Thank you for purchasing my Dizzy - Support Creator Content Script. If you have any questions that are beyond the scope of this help file, please remember to Create a ticket using my Support Site. Thank you very much!
dizzy - Support Creators Content Script is a platform where content creators, writers, designers, developers, photographers or any other branch can monetize their content by receiving subscriptions from their most loyal
followers or just anyone who likes their work. They can create free and premium posts for their subscribers.
Table of Contents
Features
Monetization
- Flexible subscription system: weekly, monthly, and yearly options
- Point-based credit system with wallet top-up and content unlocking
- Earn from posts, tips, paid messages, and live streams
- Product selling support (digital or physical)
- Paid and free live streaming features
Payment & Withdrawals
- Supports PayPal, Stripe, iyzico, BitPay, RazorPay, PayStack, CoinPayment, Authorize.Net
- Set custom payout methods (PayPal or Bank Transfer)
- Minimum payout threshold control (set by admin)
- Detailed transaction and earnings history
Real-time Interaction
- Live notifications for comments, likes, follows, purchases, and approvals
- Messaging system with text, photos, videos, stickers, GIFs, and emojis
- Send tips or paid messages directly via chat
- Option to enable/disable messaging per user
Live & Video
- Live stream with real-time chat and TikTok-style gifts
- Peer-to-peer video calling (secure)
- Free or pay-per-view live sessions
Content Creation
- Create unlimited content (free, subscriber-only, premium)
- Upload avatars, covers, photos, videos, and audio (mp3)
- Content blurring for locked or premium posts
- Apply watermark (logo or URL) to images
- Report and block content or users
- Save posts and explore other creators
User Management
- Edit profile and verify account via ID or passport
- Verified users have a visible badge
- Search for users by name or username
- Real-time point display in dropdown menu
- Track earnings from creator dashboard
Globalization & Accessibility
- Multi-language support and easy translation system
- Email verification and secure password hashing
- SMTP email support and OneSignal integration
- Light and dark mode toggle
- GDPR compliance and cookie banner
UI/UX Enhancements
- SEO-optimized pages
- Infinite scroll on profiles and chat
- Stickers, GIFs, emojis in comments and messages
- Progress bars for uploads
- Sponsored ad areas and country blocking
- Suggested users shown between posts
Gamification & Rankings
- Earn points from likes, comments, and post creation
- Admin can enable/disable point-earning actions individually
- Top 5 creators leaderboard (weekly)
- Fake user generator (for demo/testing)
Social Integration
- Social login via Google and Twitter
- Browser push notifications via OneSignal
Admin Features
- Settings
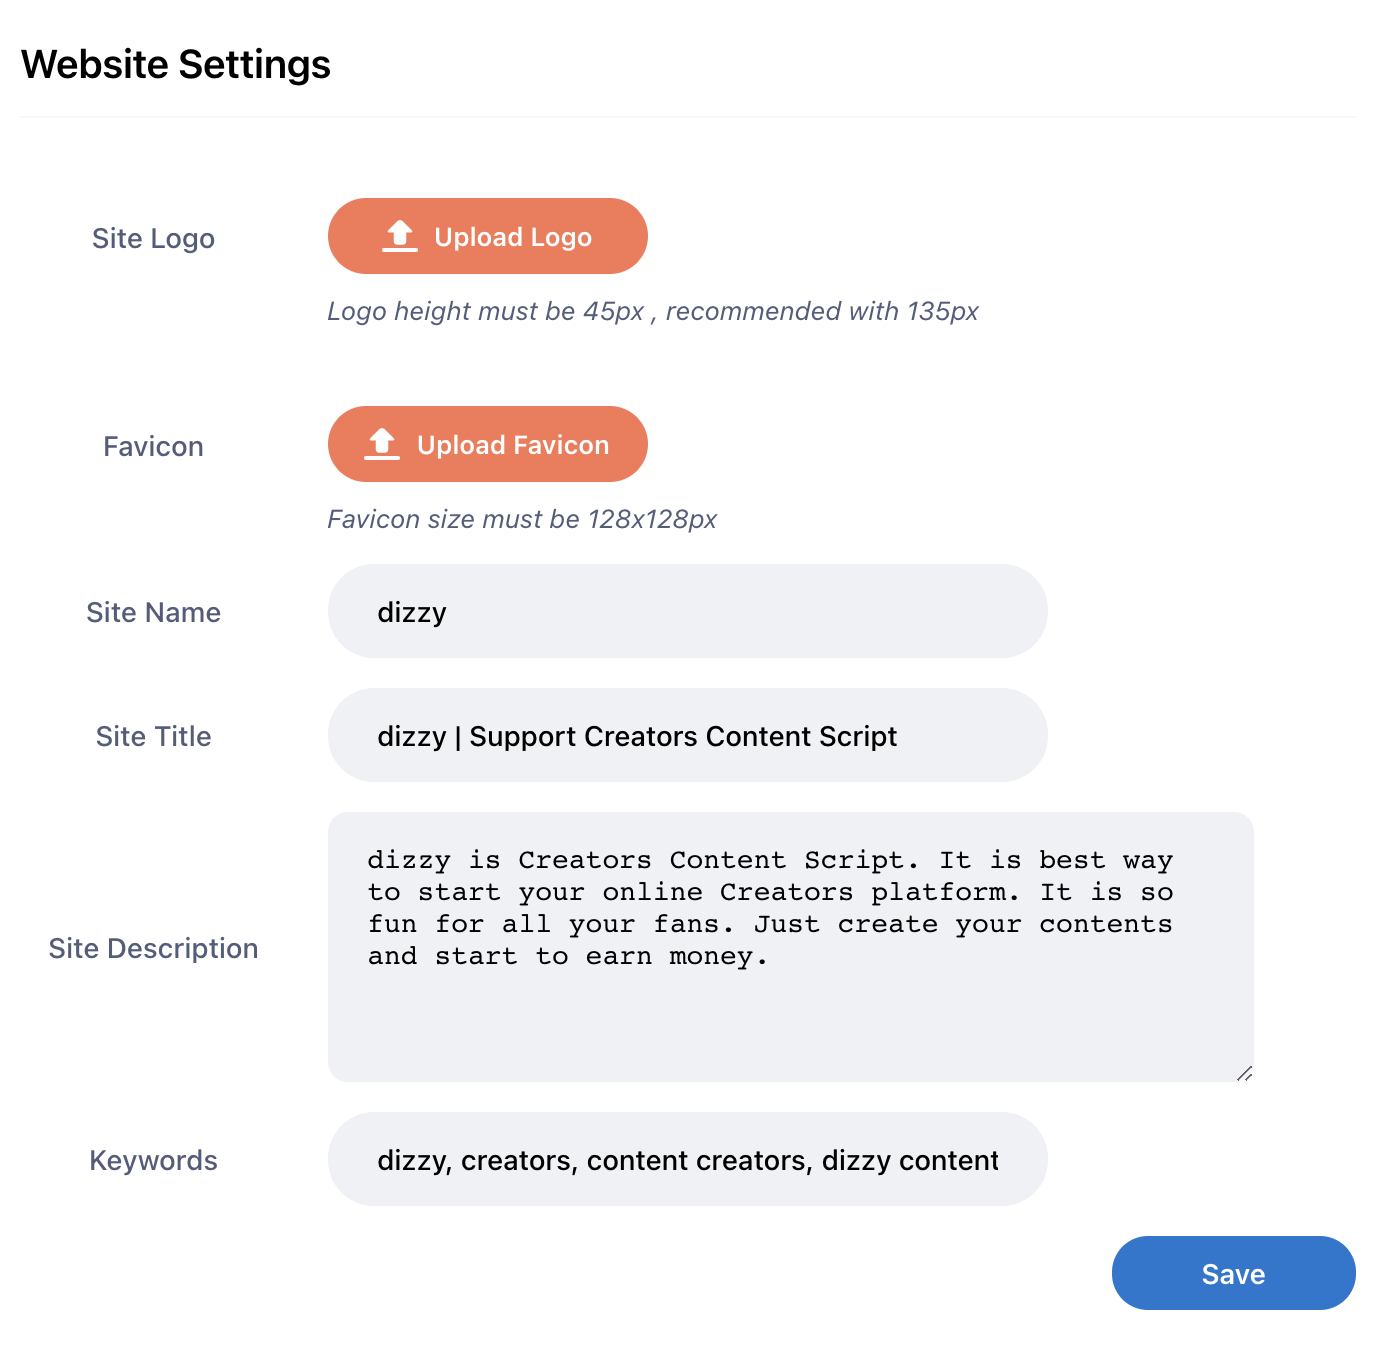
- Website Settings
- Site Logo
- Favicon
- Site Name
- Site Title
- Site Description
- Keywords
- General
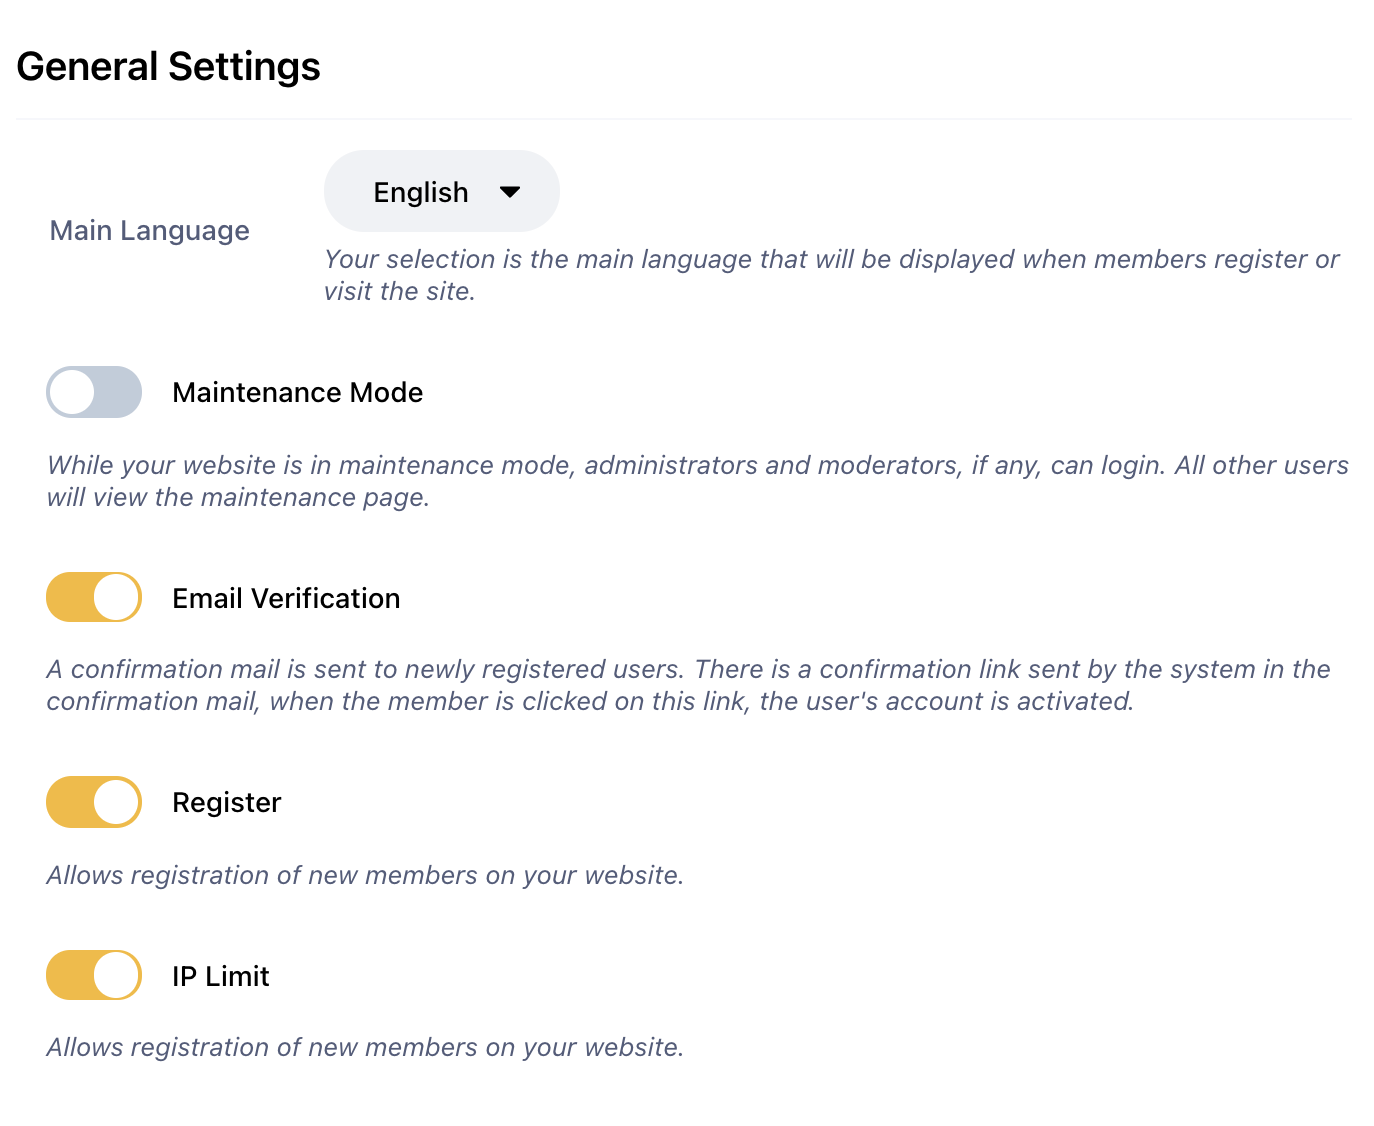
- Main Language(Choose Language)
- Maintenance Mode(Enable/Disable)
- Email verification(Enable/Disable)
- Register (Enable/Disable)
- IP Limit(One ip can register 2 times if enabled)
- Limits
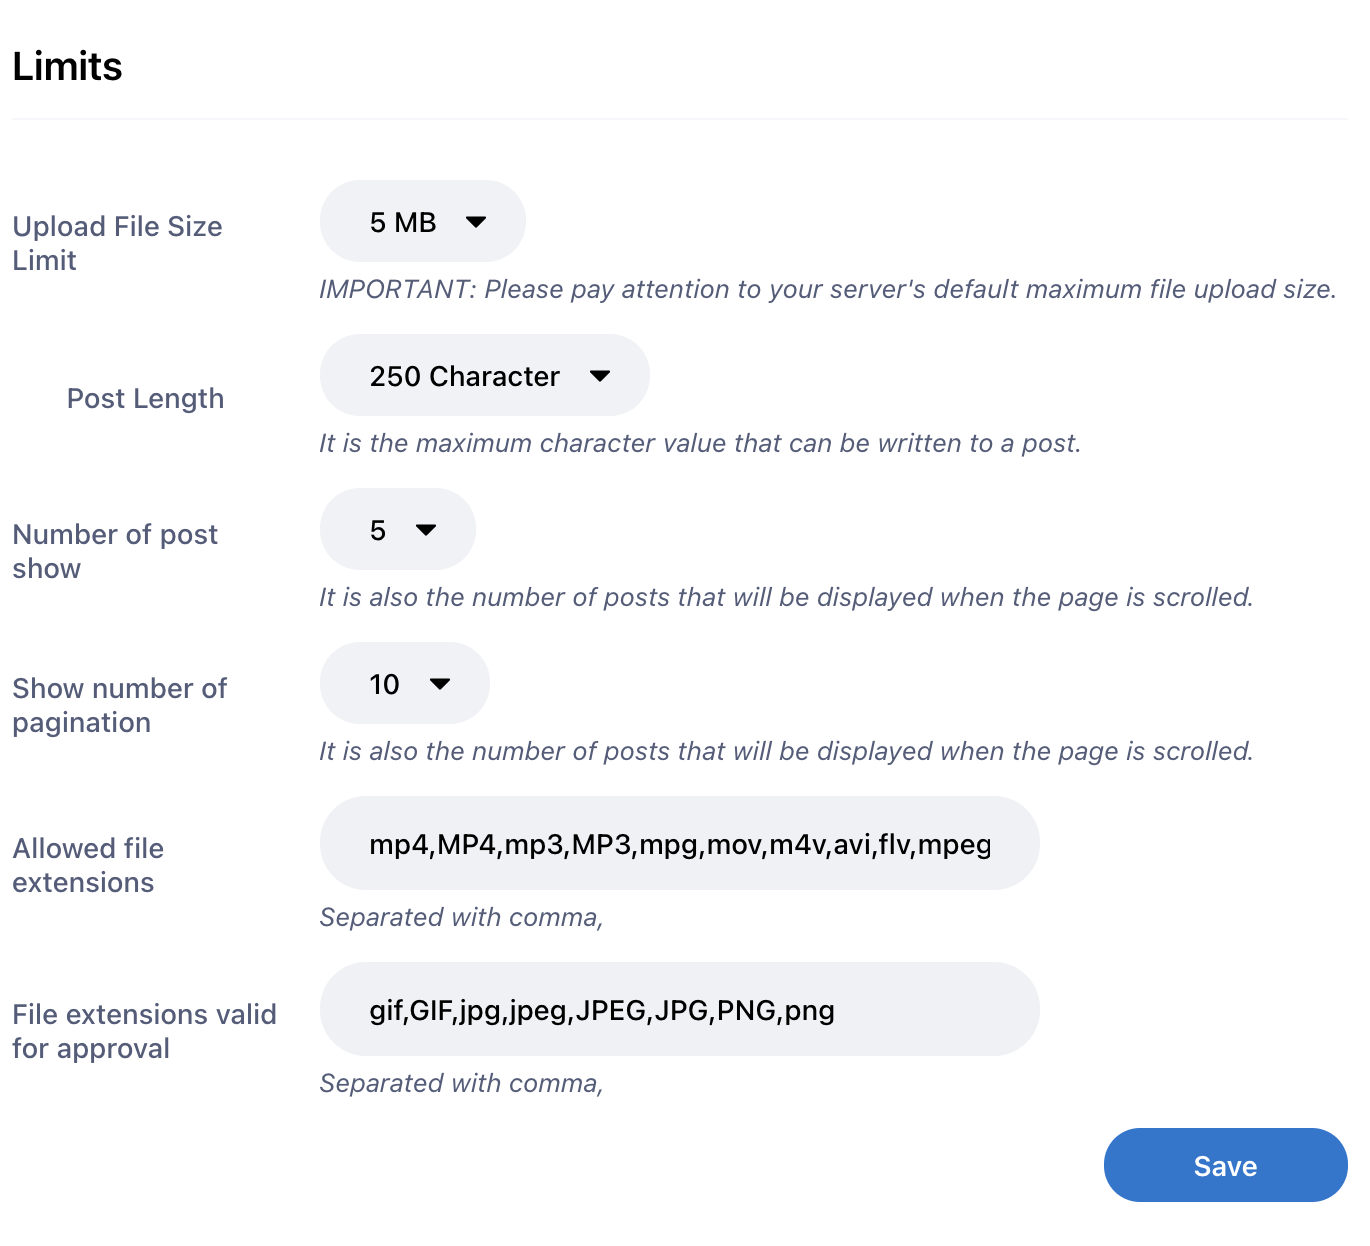
- Upload File Size limit
- Post Length
- Number of post show
- Show number of pagination
- Allowed file extensions(mp4,MP4,mp3,MP3,mpg,mov,m4v,avi,flv,mpeg,MPEG,webm,mkv,MKV,gif,GIF,jpg,jpeg,JPEG,JPG,PNG,png)
- File extensions valid for approval(gif,GIF,jpg,jpeg,JPEG,JPG,PNG,png)
- Billing Informations
- Email Settings
- Live Streaming Settings
- Storage
- S3 Storage Settings (Amazon)
- DigitalOcean Storage Settings
- Questions from Users (from contact page)
- Manage Posts
- Awaiting approval(Admin should approve Premium posts)
- Posts
- Premium Posts
- Subscribe Possts
- Reports
- Reported Posts
- Reported Comments
- Design
- Custom CSS/JS
- Manage SVG Icons
- Manage Landing Page
- Landing Page Question & Answer
- Manage Point Feature
- Point Packages Settings
- Live Streaming Gift Coin Settings
- Manage Languages
- Users
- Manage Users
- Creator Verification Requests
- Pages (Create/Edit/Delete) pages
- Stickers (Create/Edit/Delete) stickers
- Giphy API Settings
- Payment Methods
- Payment Settings
- PayPal
- Bitpay
- Stripe
- Authorize.Net
- IyziCo
- RazorPay
- PayStack
- CoinPayment
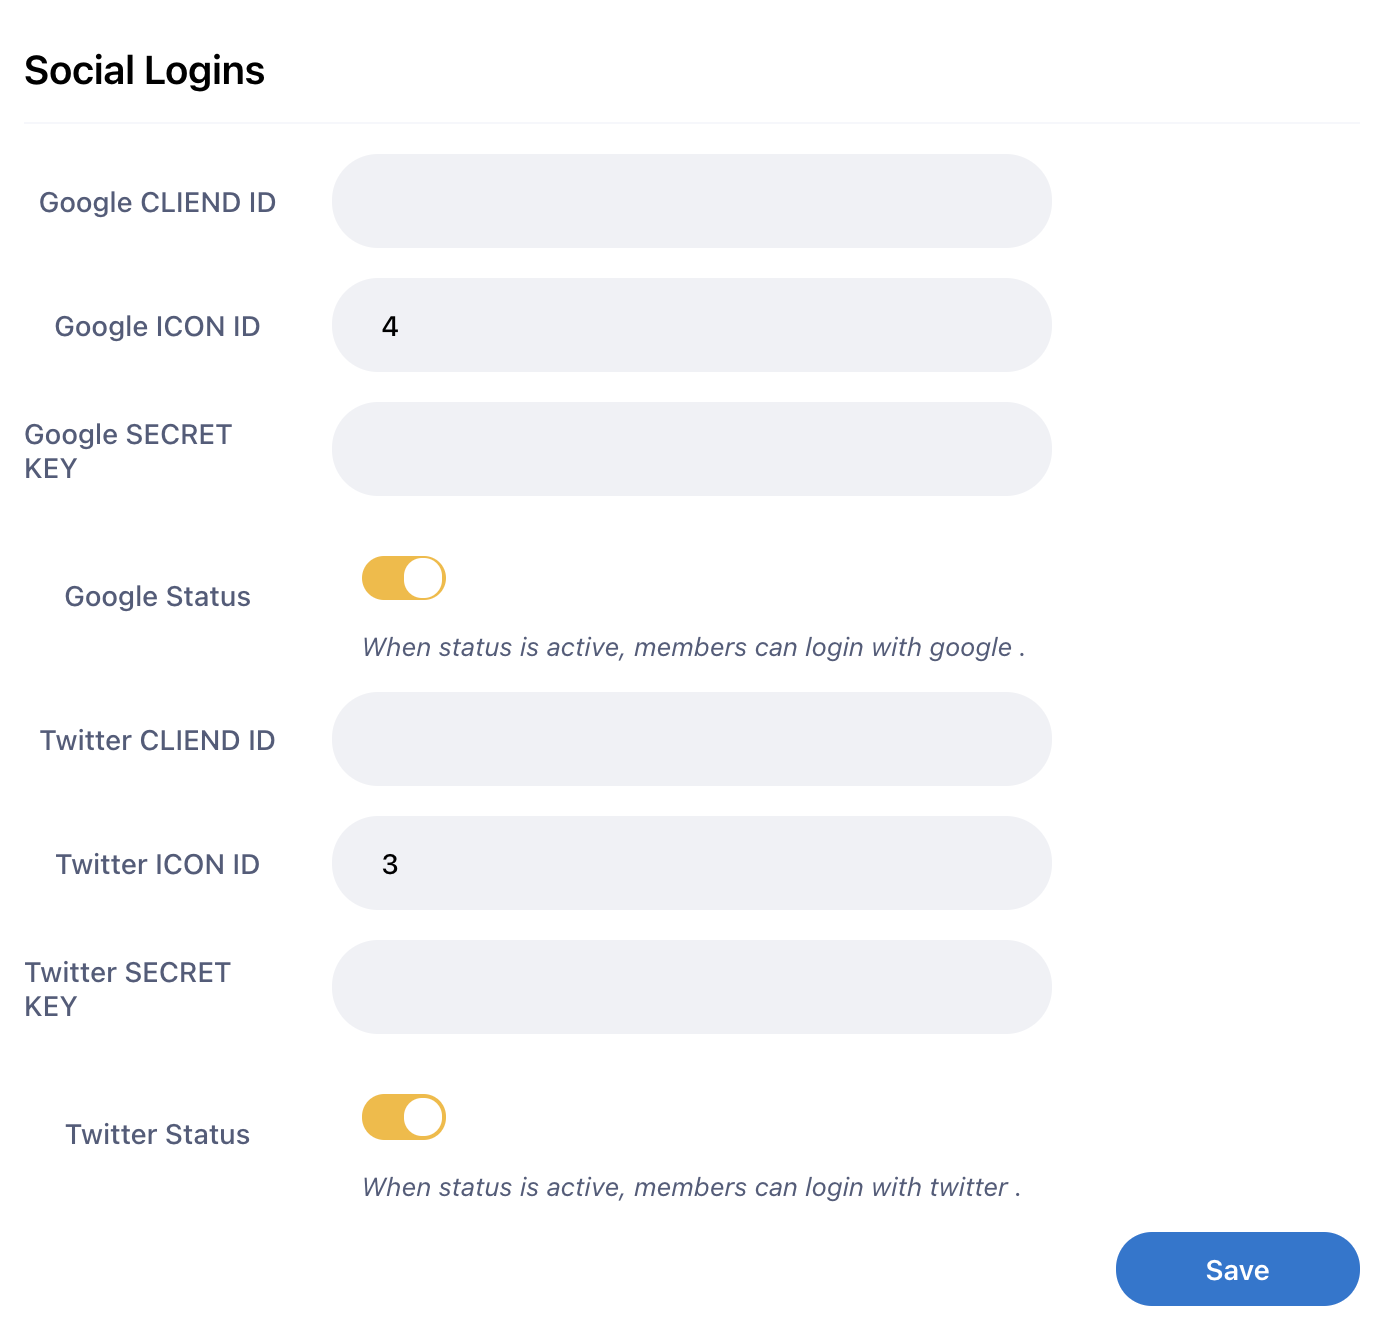
- Social Logins (Edit Twitter and Google Login)
- Manage Payments
- Manage Withdrawals
- Manage Subscription Payment
- Advertisement
- Create a Advertisement
- Manage Advertisements
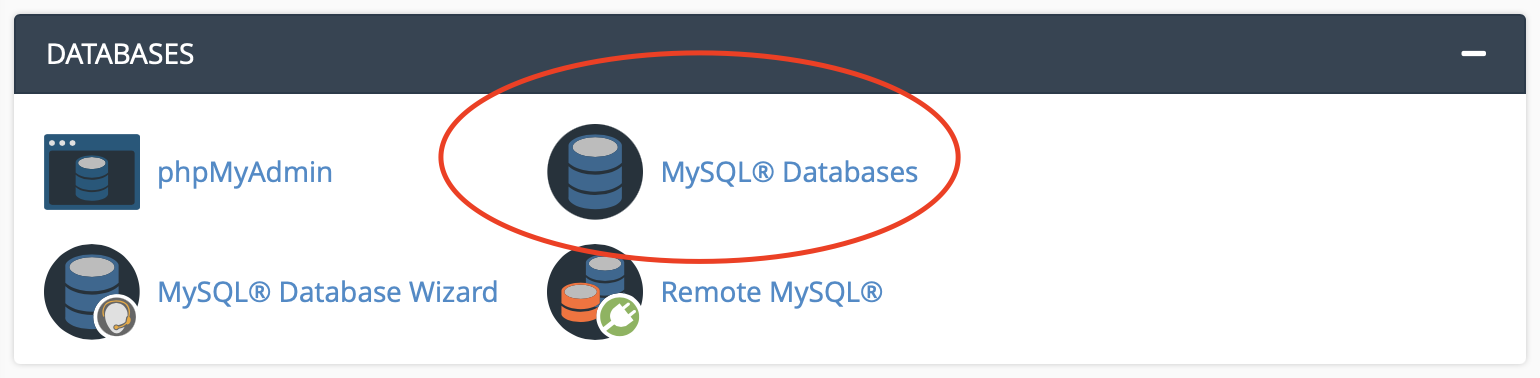
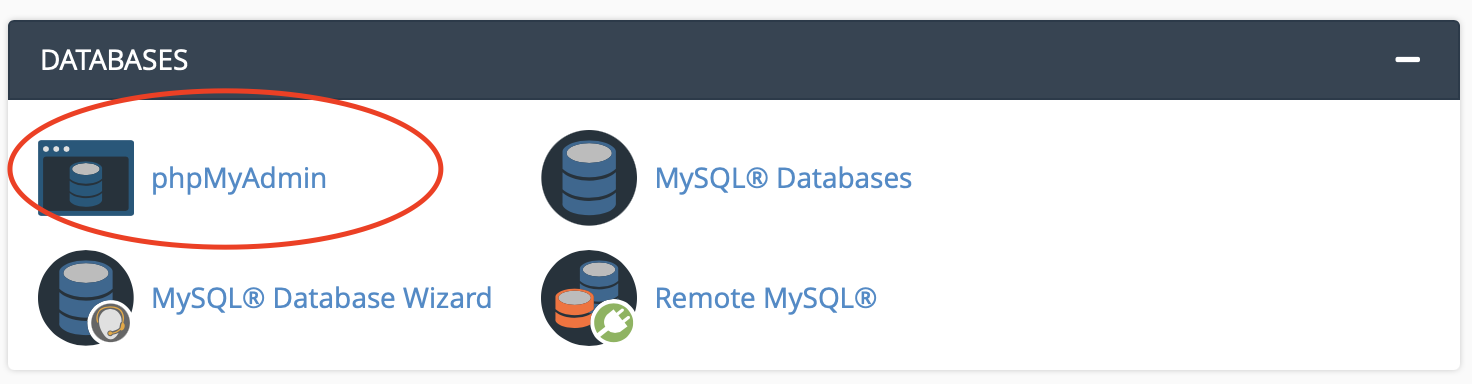
1-) Create a database
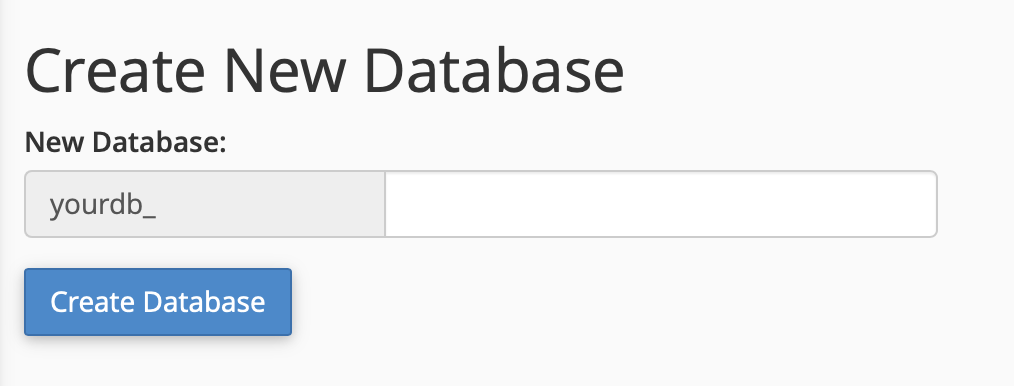
2-)New Database
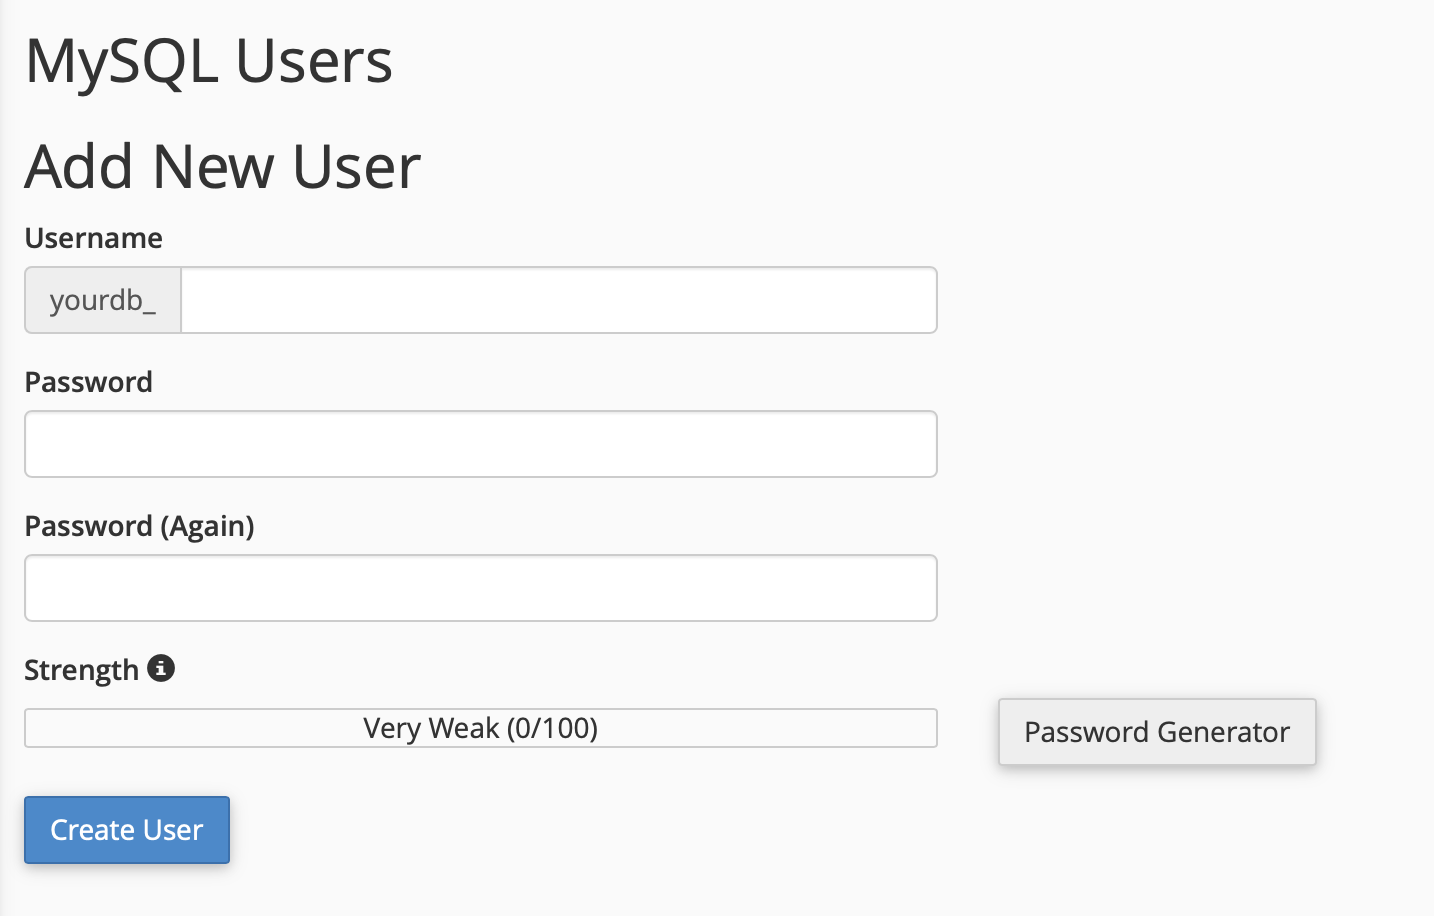
3-)New Database User
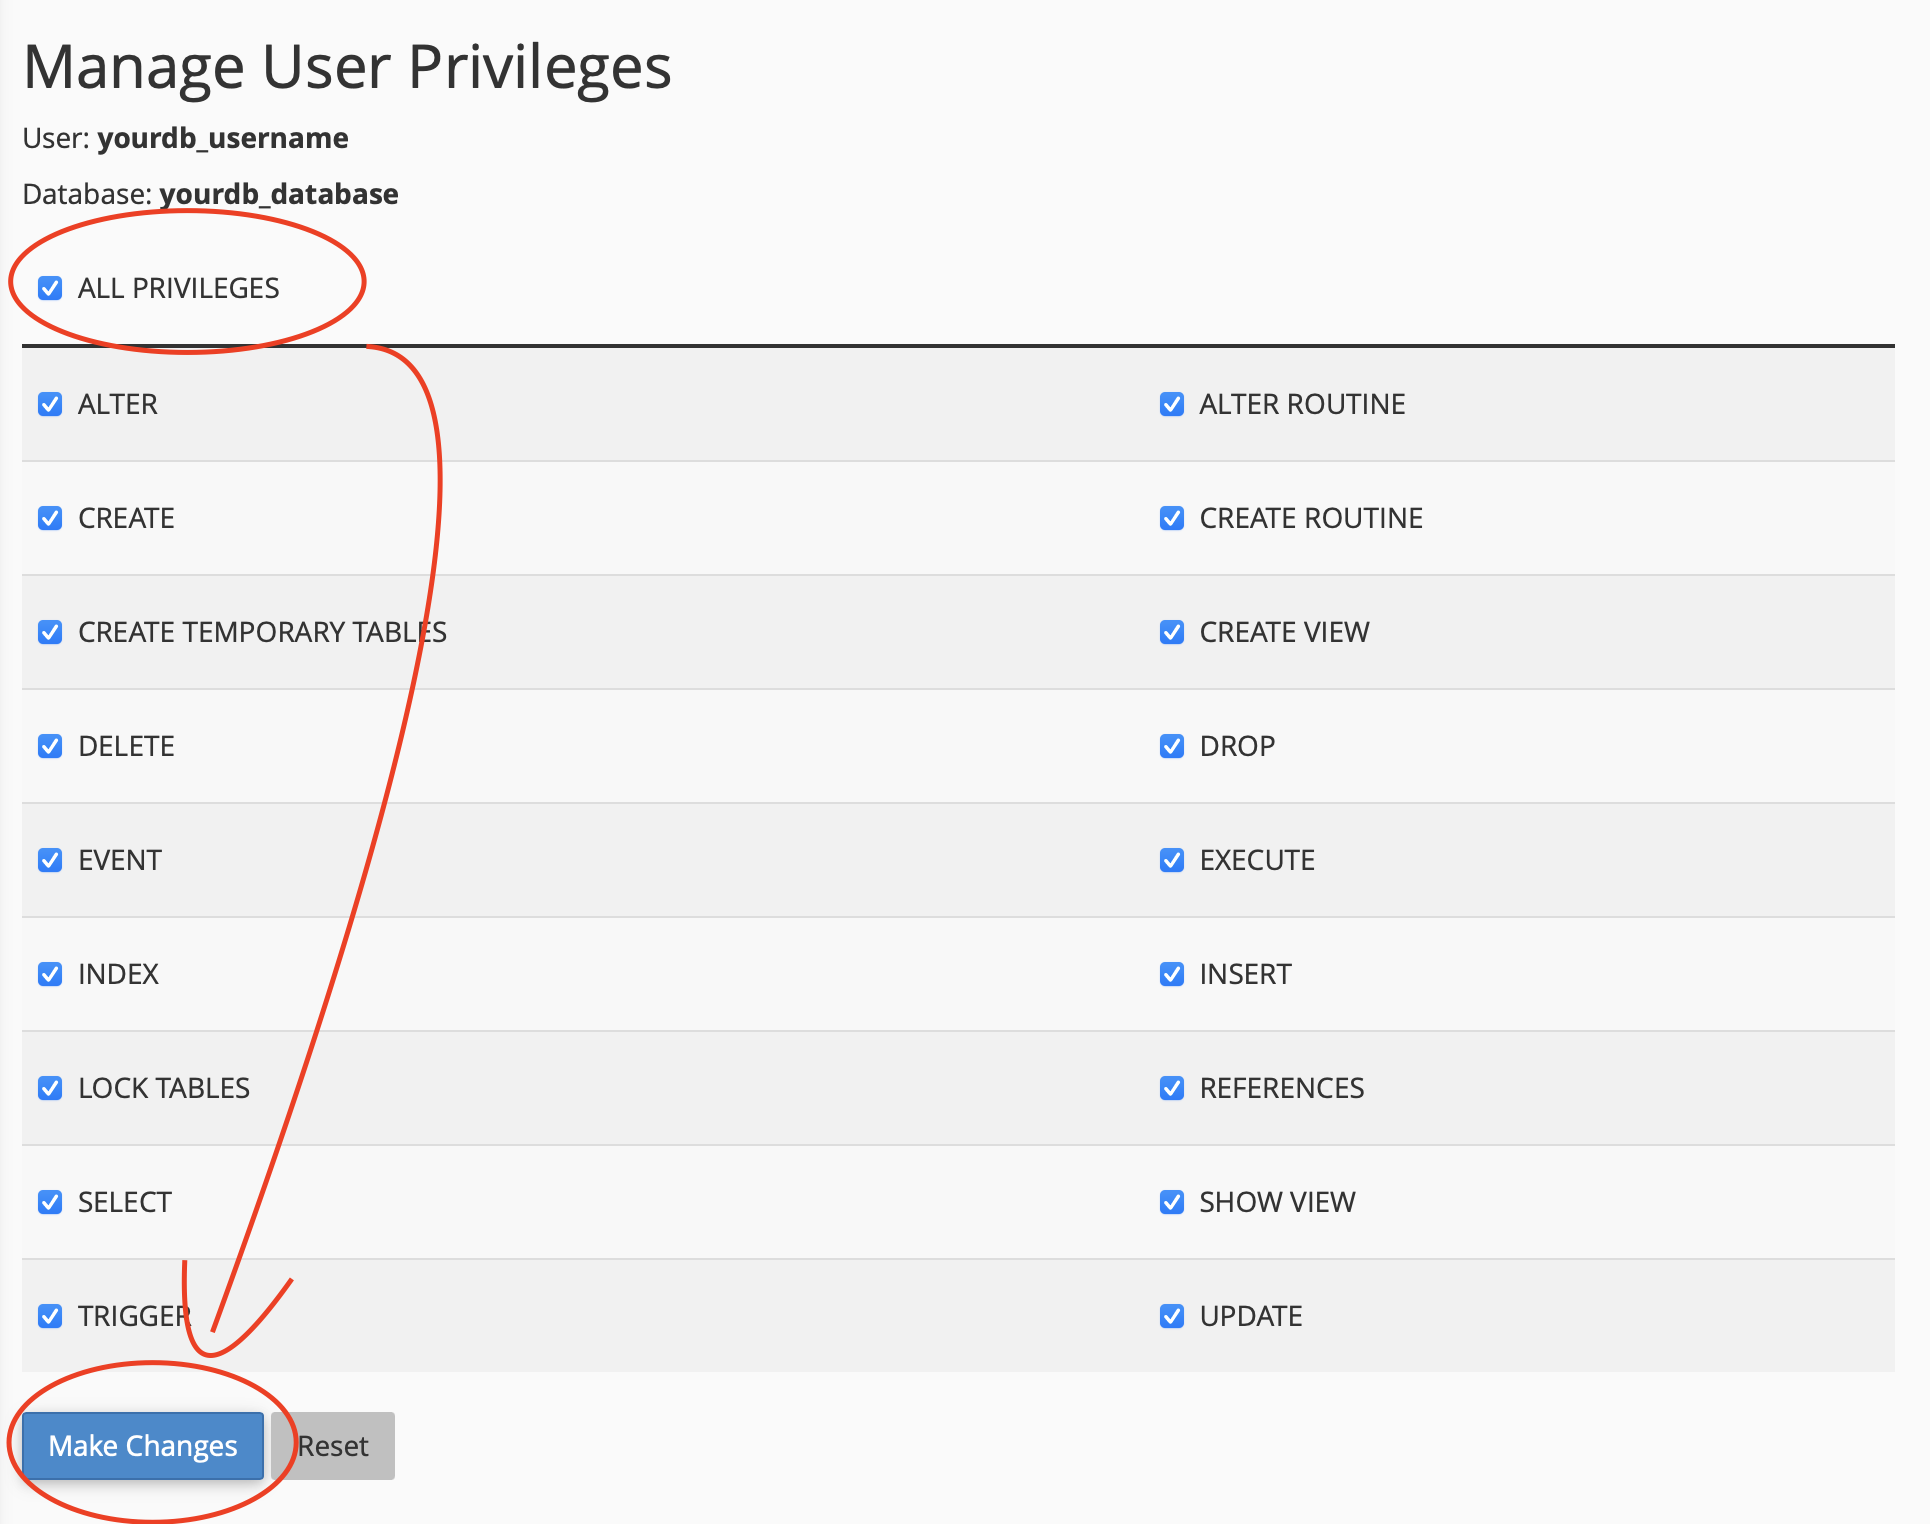
3-)Manage User Priviliges
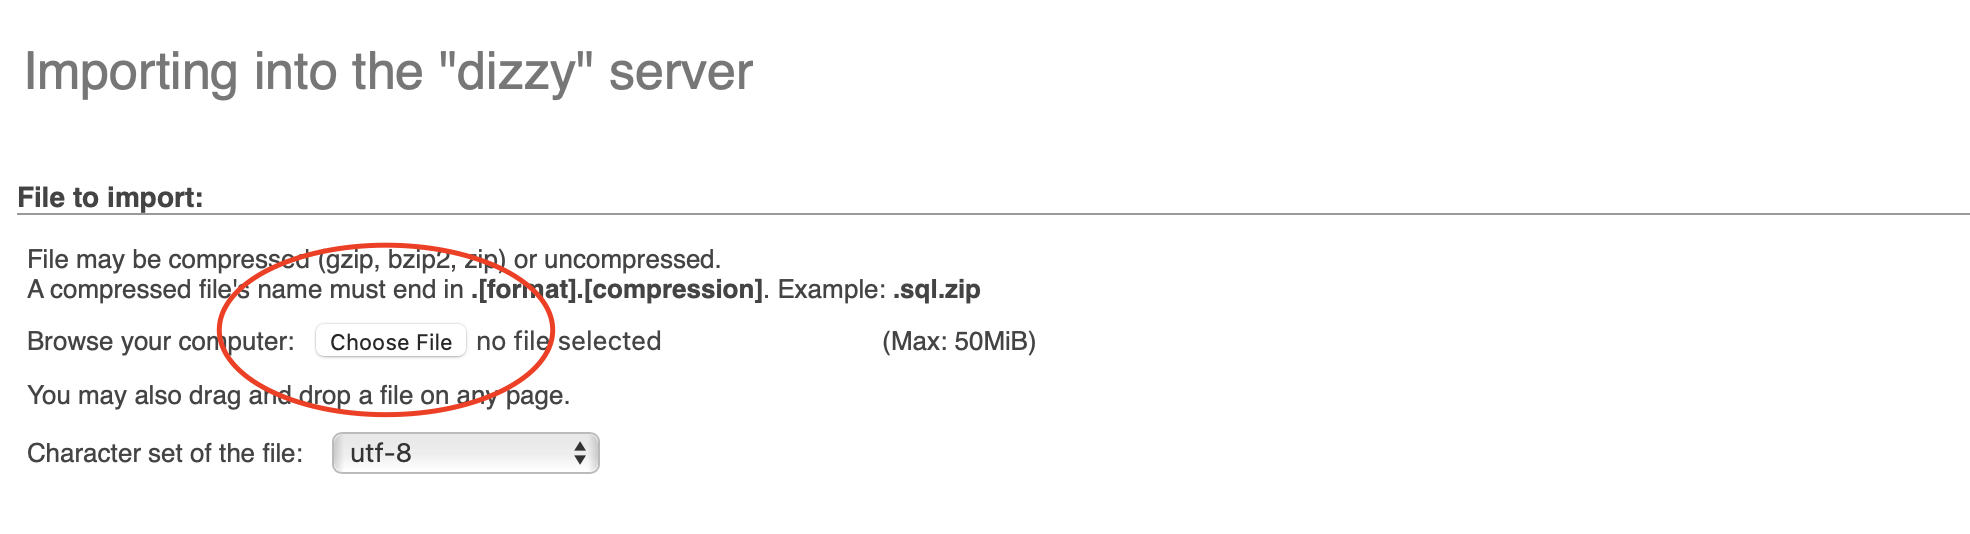
4-)Import Database
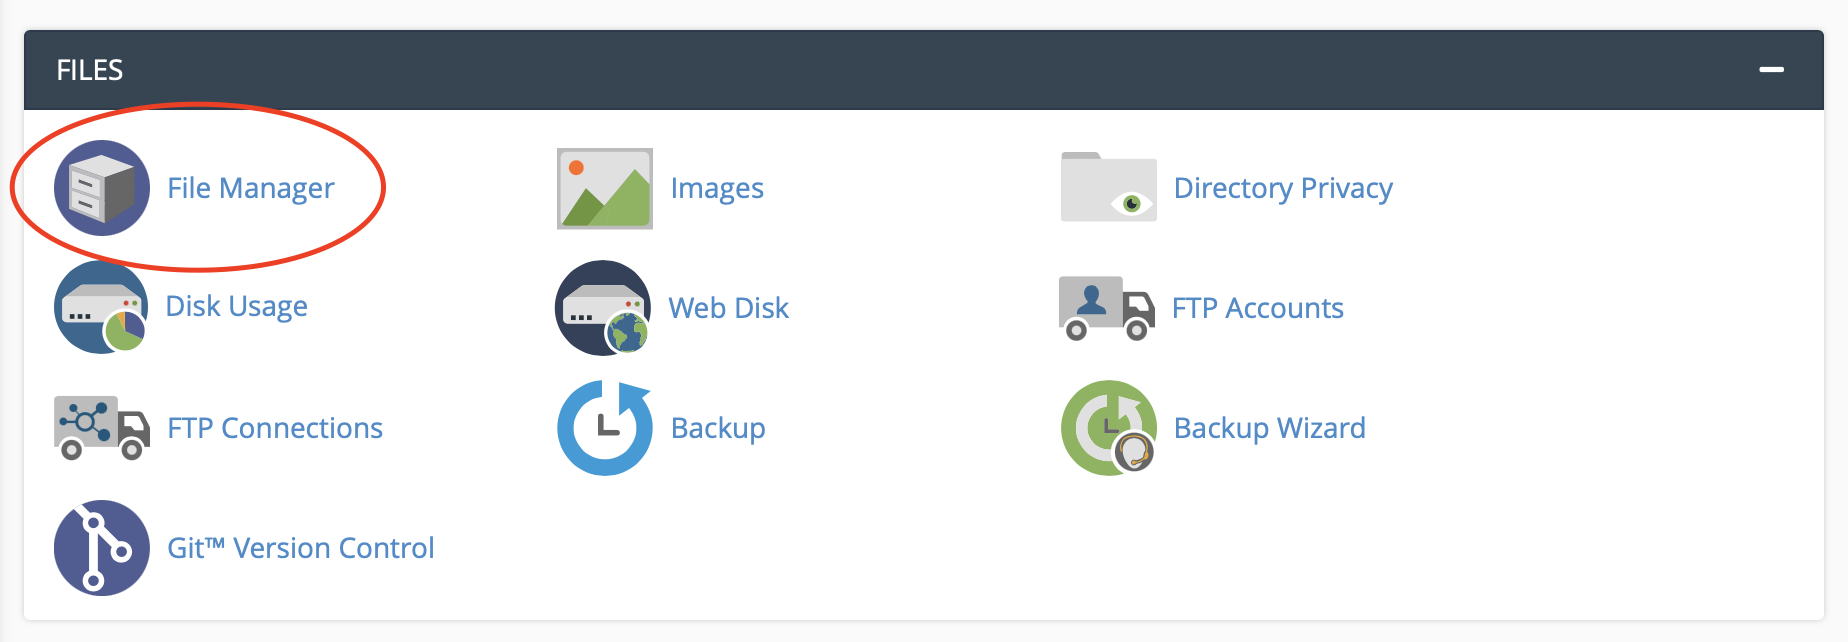
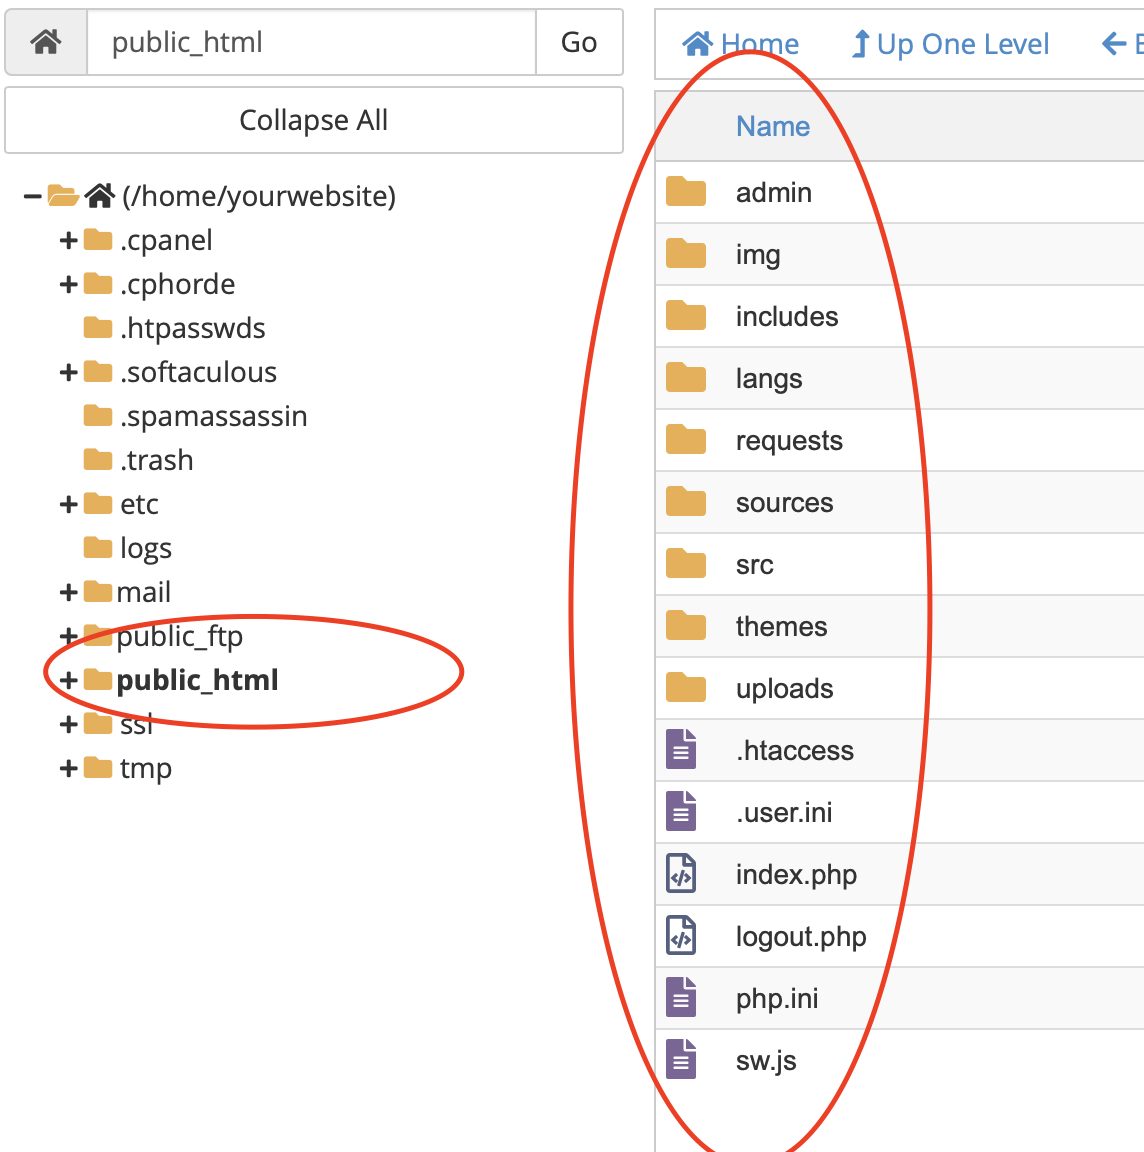
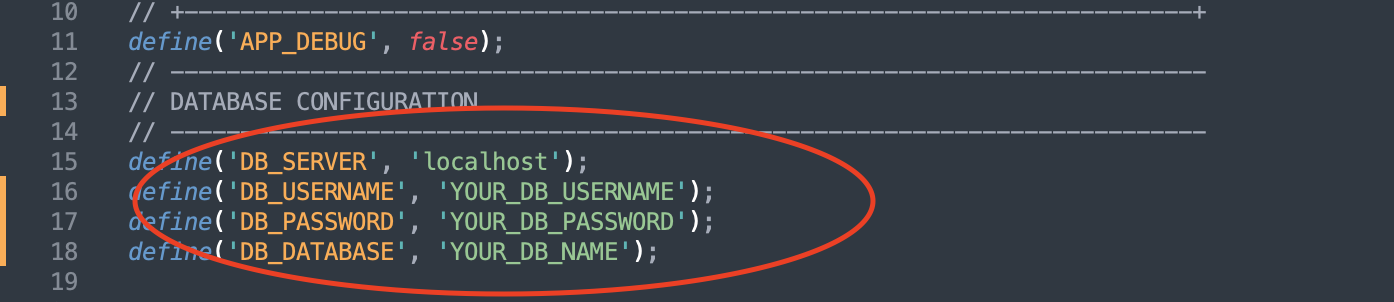
- DB_SERVER – usually
localhost - DB_USERNAME – your database username
- DB_PASSWORD – your database password
- DB_DATABASE – your database name
true. It is recommended to set it back to false after installation.
http://localhost:8888 with your actual domain name:
- Change this:
ErrorDocument 404 http://localhost:8888/404 - To this:
ErrorDocument 404 https://www.yourwebsite.com/404 - And also:
RewriteCond %{HTTP_REFERER} !^http://localhost:8888/ [NC]
should become:RewriteCond %{HTTP_REFERER} !^https://www.yourwebsite.com/ [NC]
- Username: adminstaff
- Password: 123456

Dashboard Settings Website Settings
Dashboard Settings General
Dashboard Settings Limits
Email Settings
Storage Settings (s3)
{
    "Version": "2012-10-17",
    "Statement": [
        {
            "Sid": "PublicRead",
            "Effect": "Allow",
            "Principal": "*",
            "Action": [
                "s3:GetObject"
            ],
            "Resource": [
                "arn:aws:s3:::YourBucketNameHere/*"
            ]
        }
    ]
}
Click Save.
Storage Settings (DigitalOcean)
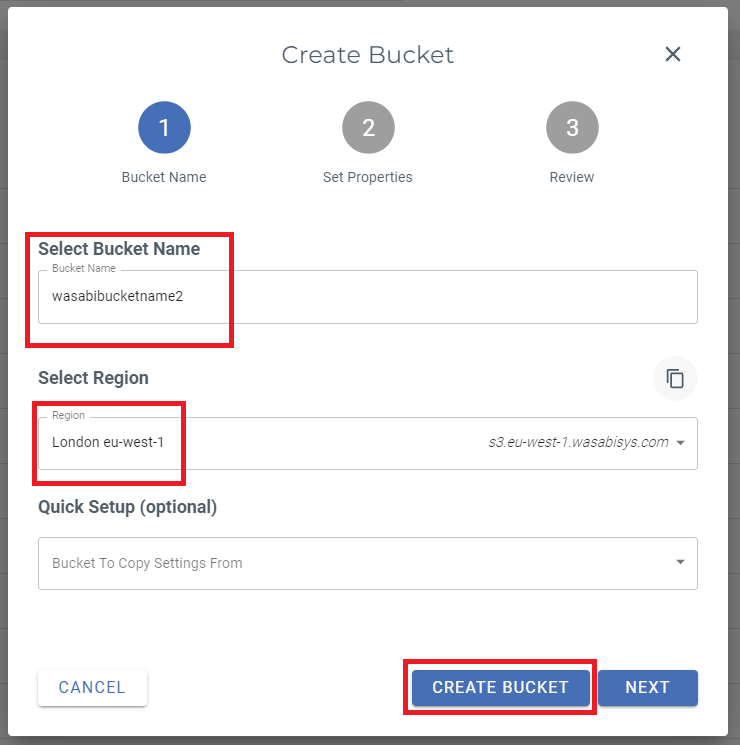
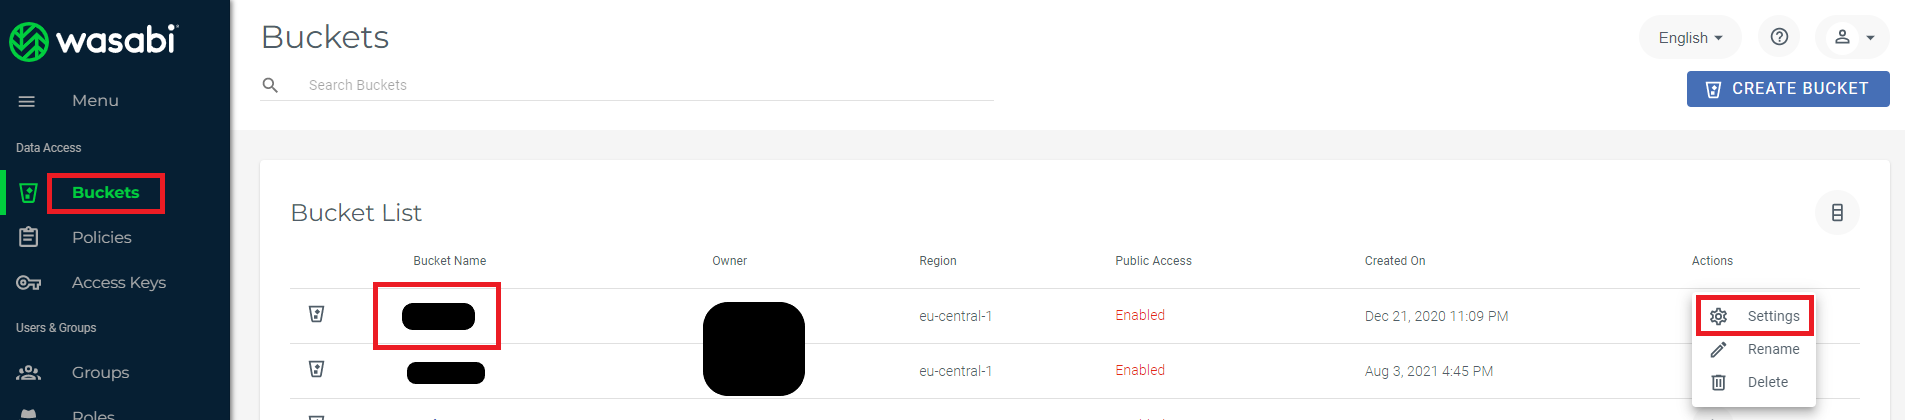
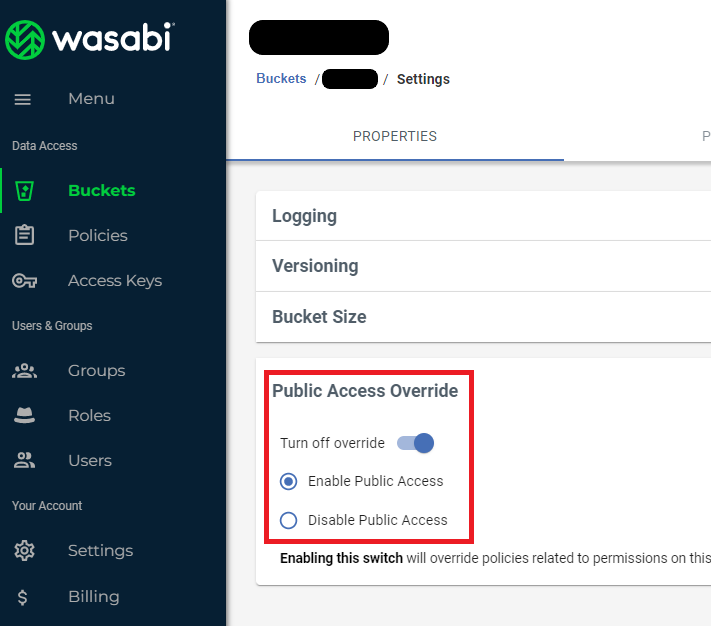
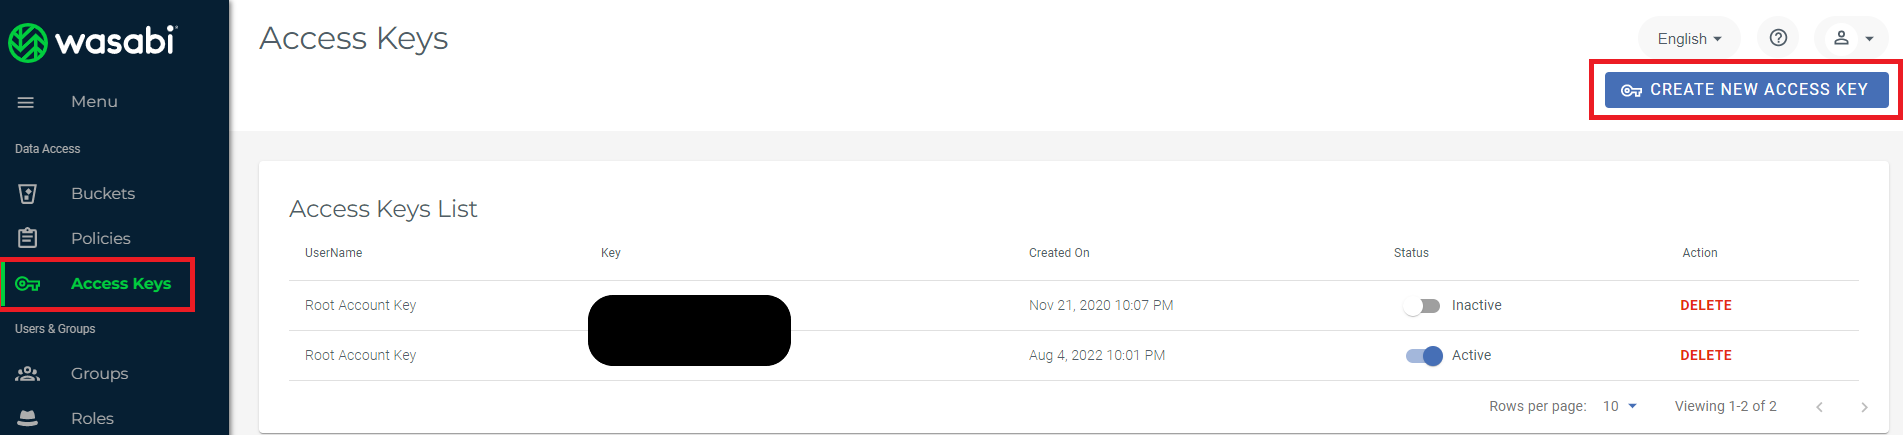
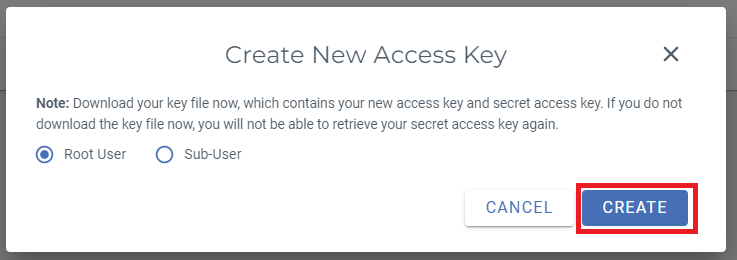
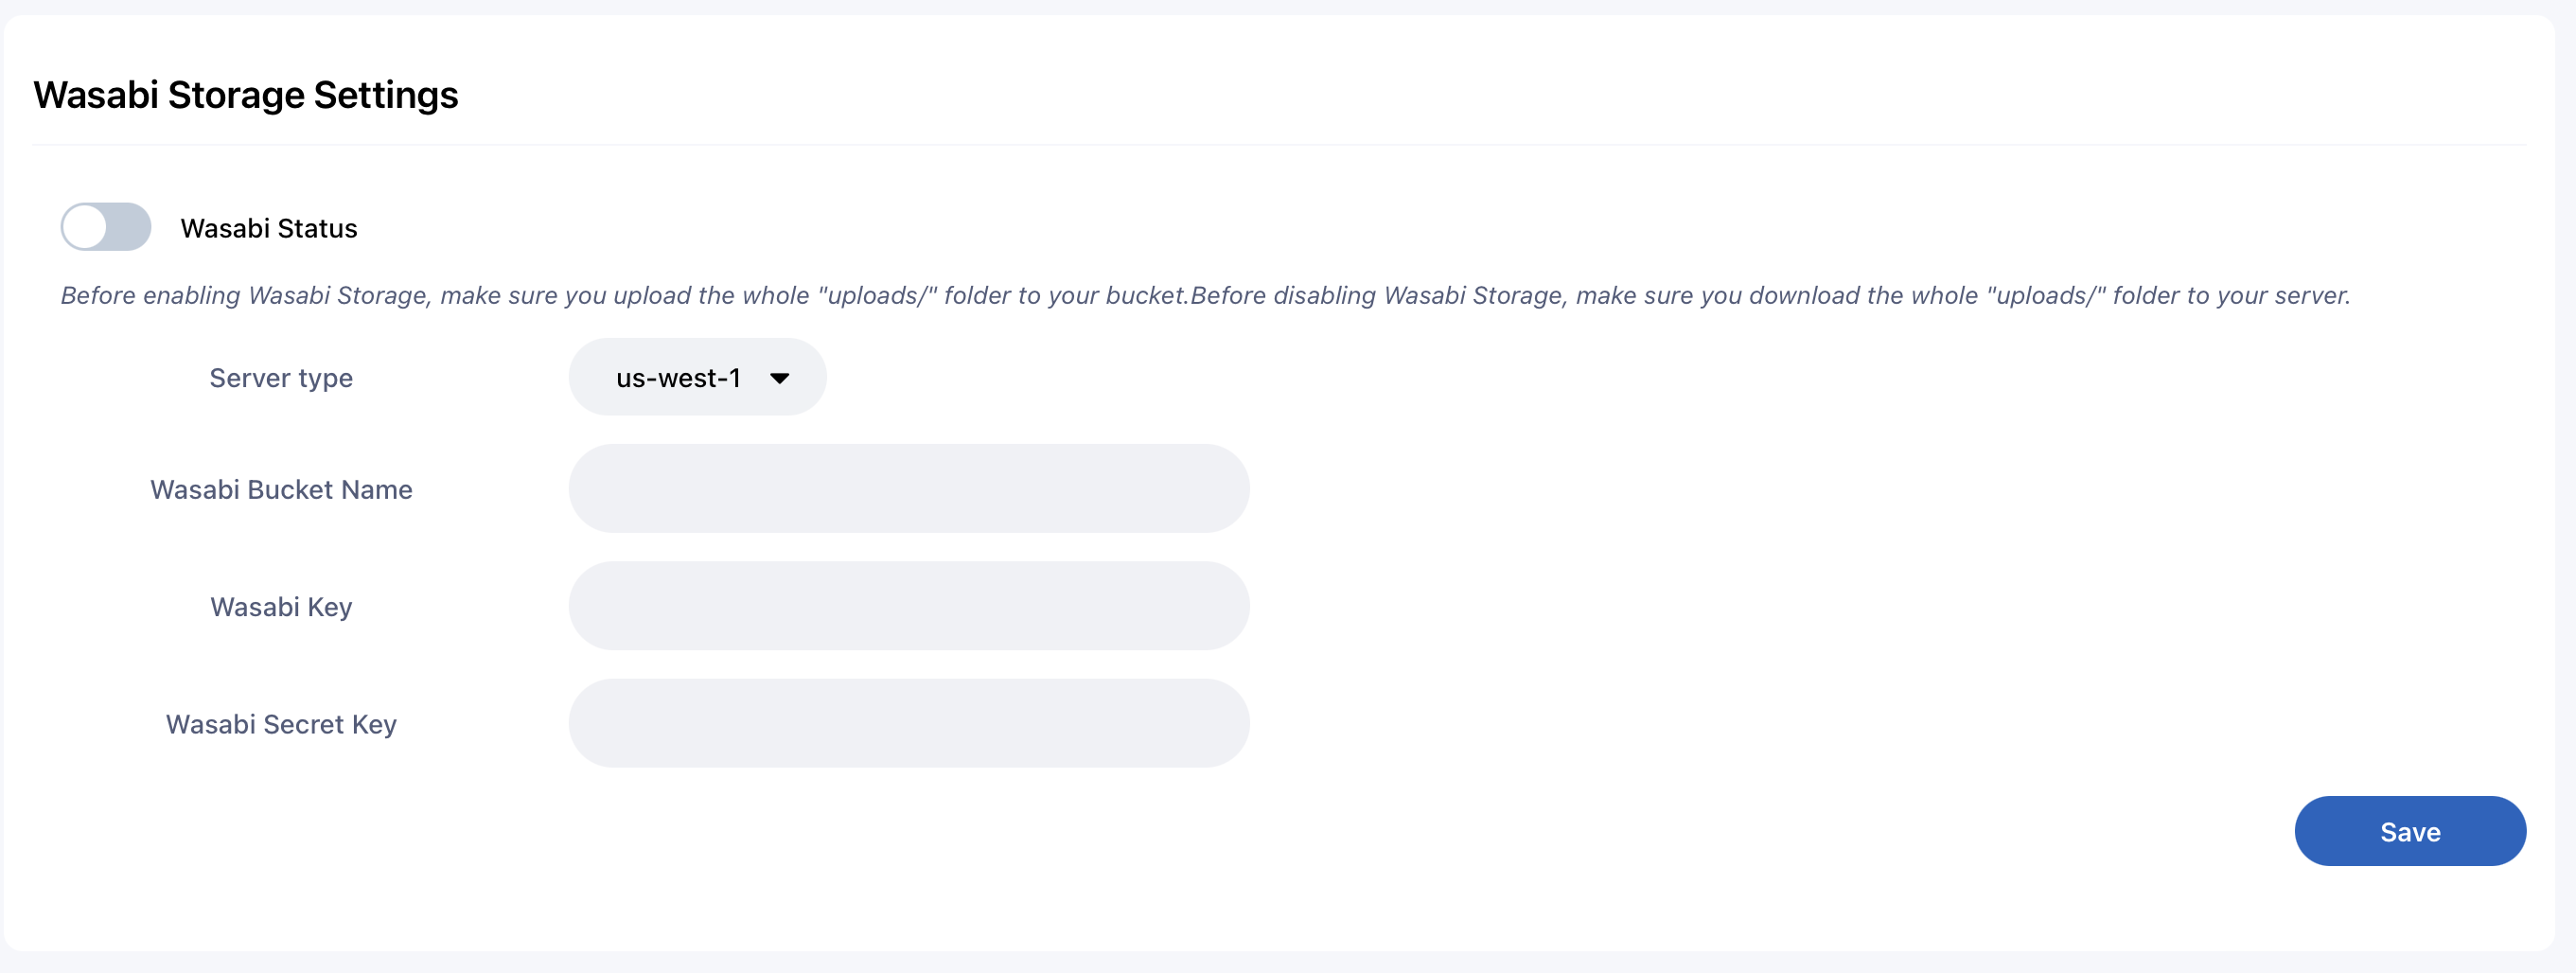
Storage Settings (Wasabi)

Login With Google Installation
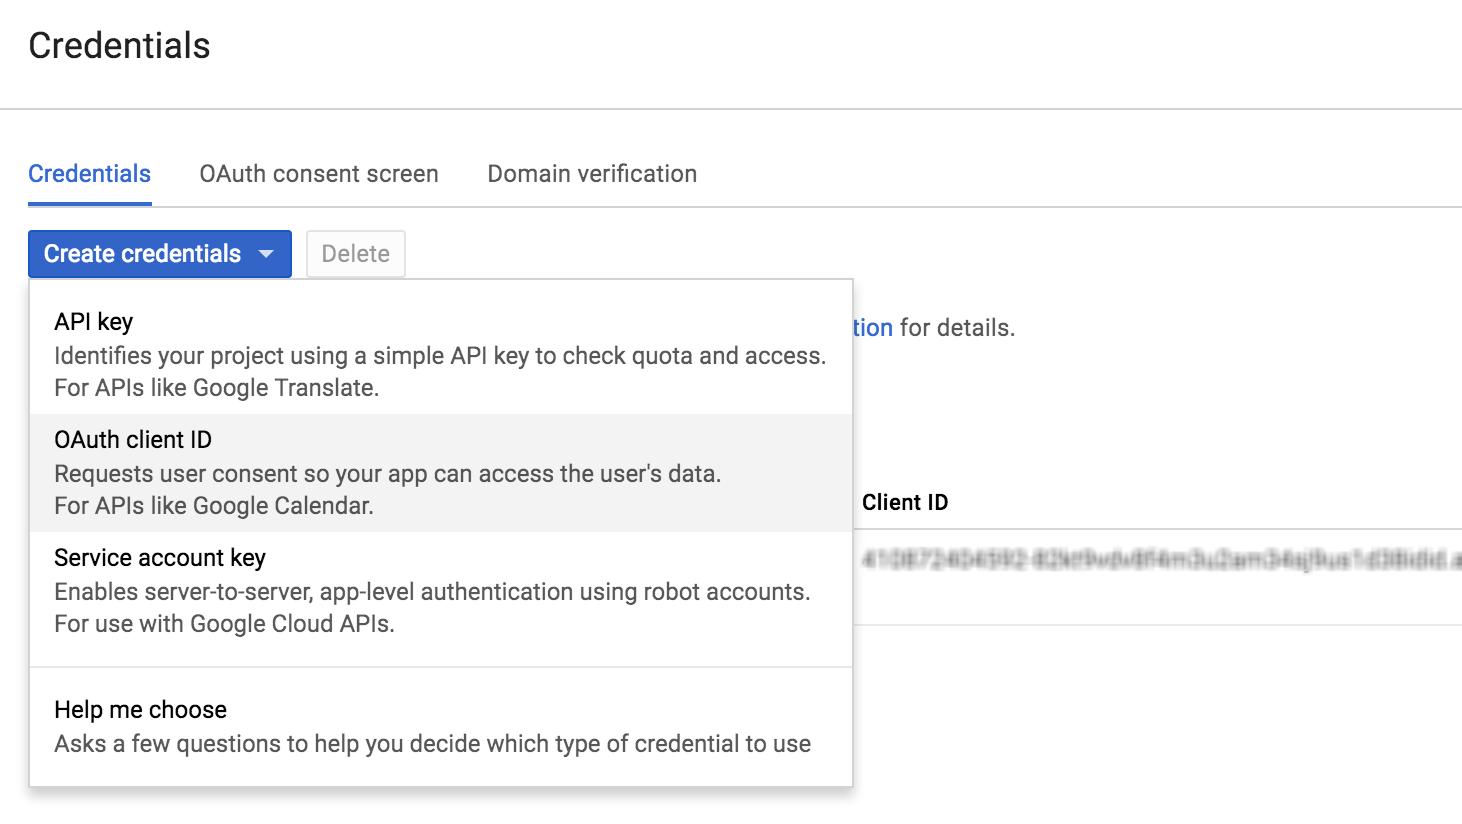
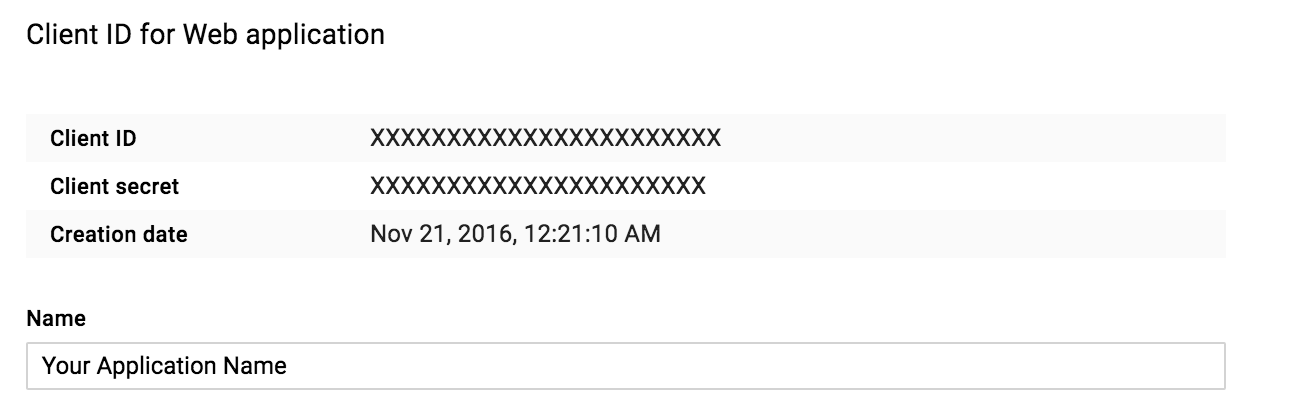
- Go to Google API Console create OAuth client ID
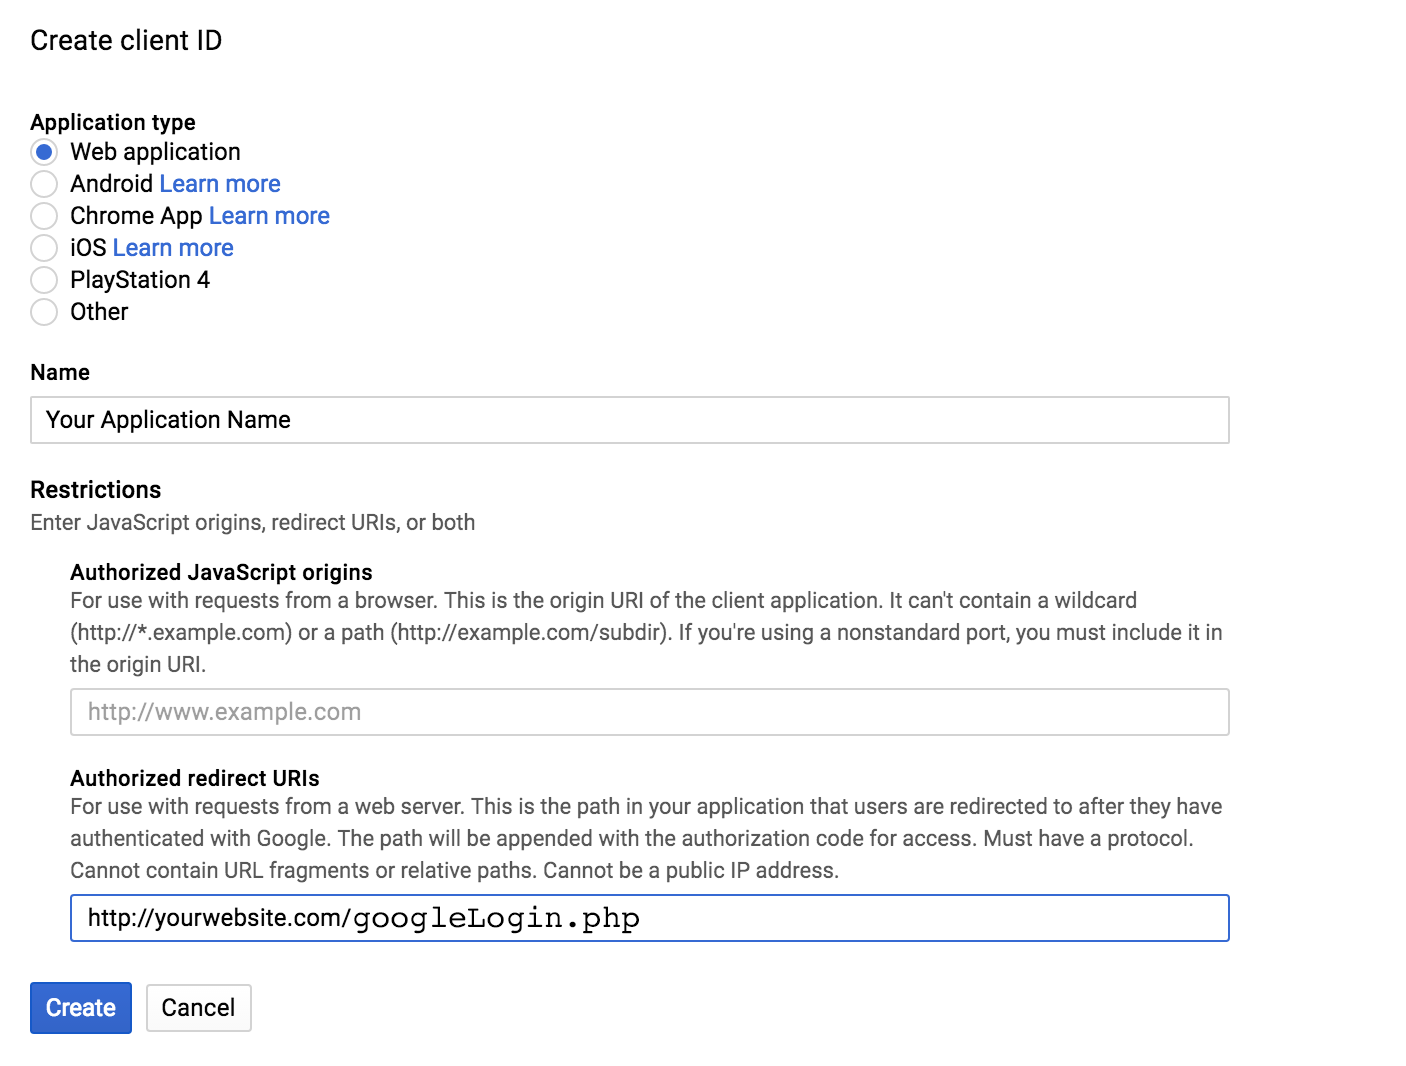
- Step 2: Google APIConsole create client ID OAuth Console here.
- Step 3: Google APIConsole create client ID OAuth Console here.
Create Twitter App
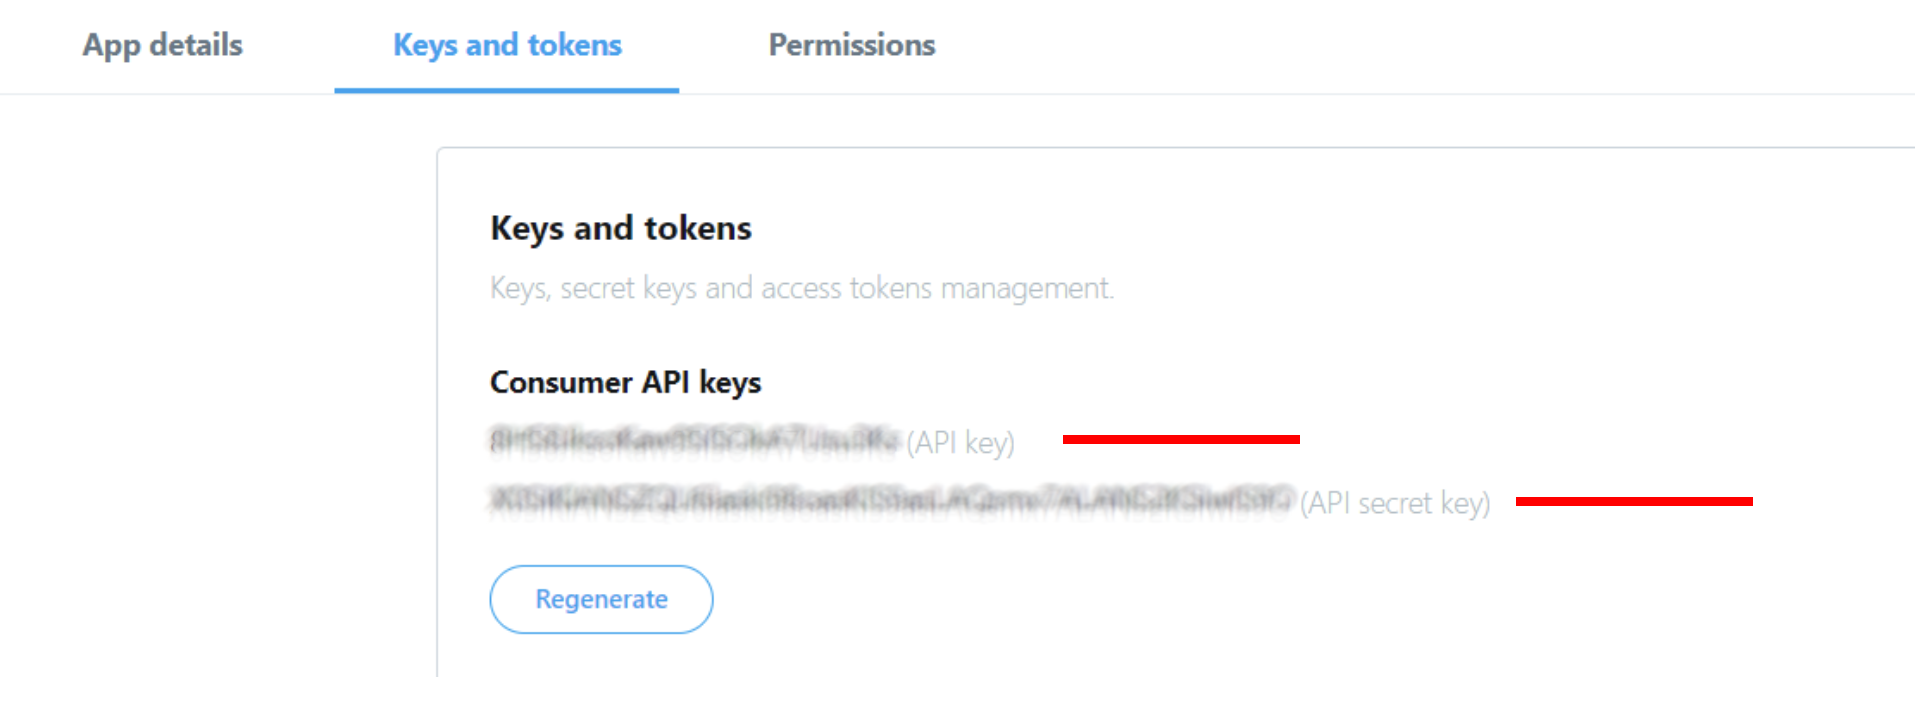
To access Twitter API you need to create a Twitter App and specify the Consumer key & Consumer secret at the time of calling the Twitter API. If you haven’t already created a Twitter App, follow the below steps to create and configure a Twitter App from the Application Management page.
- Go to the Twitter Developer account and log in with your Twitter account.
- Click the Create an app button. Before creating a Twitter App you need to Apply for a Developer account. If you don’t have already a Twitter Developer account, provide the required details to apply. Once your developer account is approved by Twitter, create a New App.
- Name: Your application Name. This is shown to the user in Twitter OAuth dialog.
- Description: Your application Description. This is shown to the user while authorizing.
- Website URL: Your web application URL.
- Callback URL(*): After authorization, this URL is loaded with oauth_token.
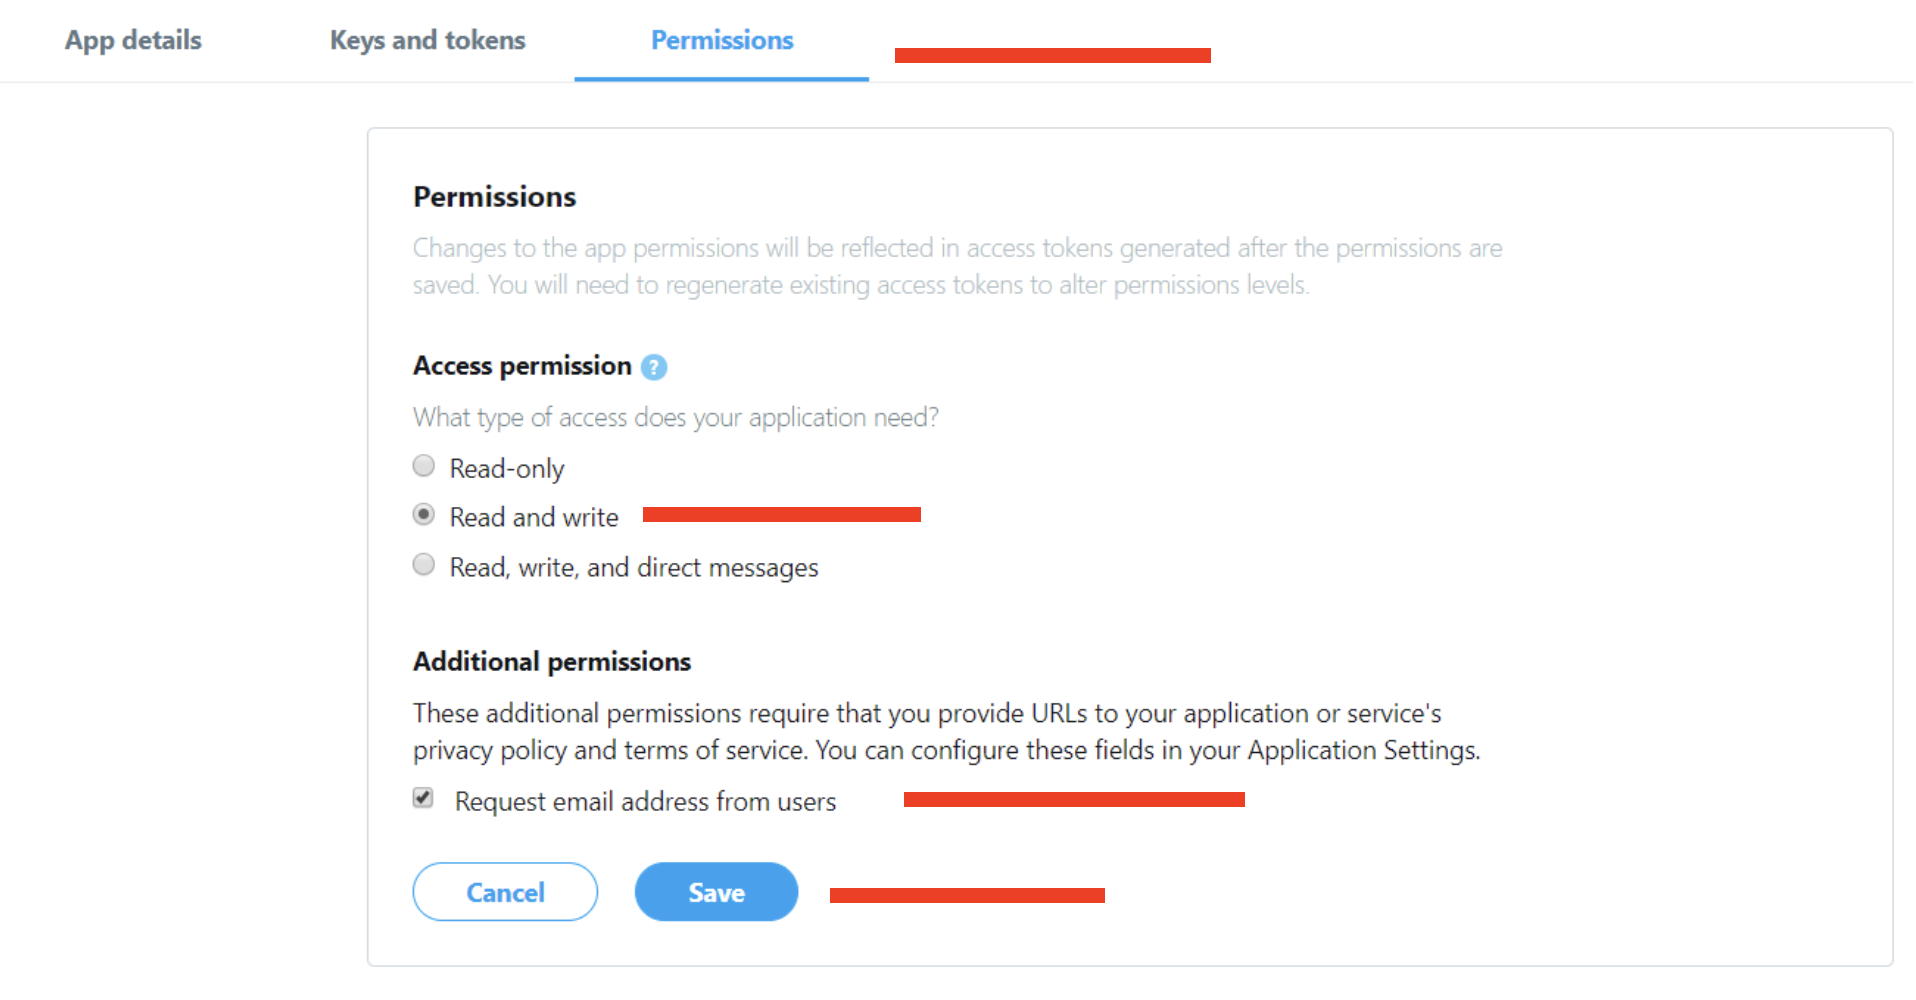
- Change the apps permission to Read and Write or Read, Write and Access direct messages. For changing the apps permission, you need to add a mobile number to your twitter account.
PayPal
- https://www.paypal.com (for production)
- https://developer.paypal.com/developer (for sandbox)
BitPay
- https://test.bitpay.com/signup/ (for test mode)
- https://bitpay.com/signup/ (for product mode)
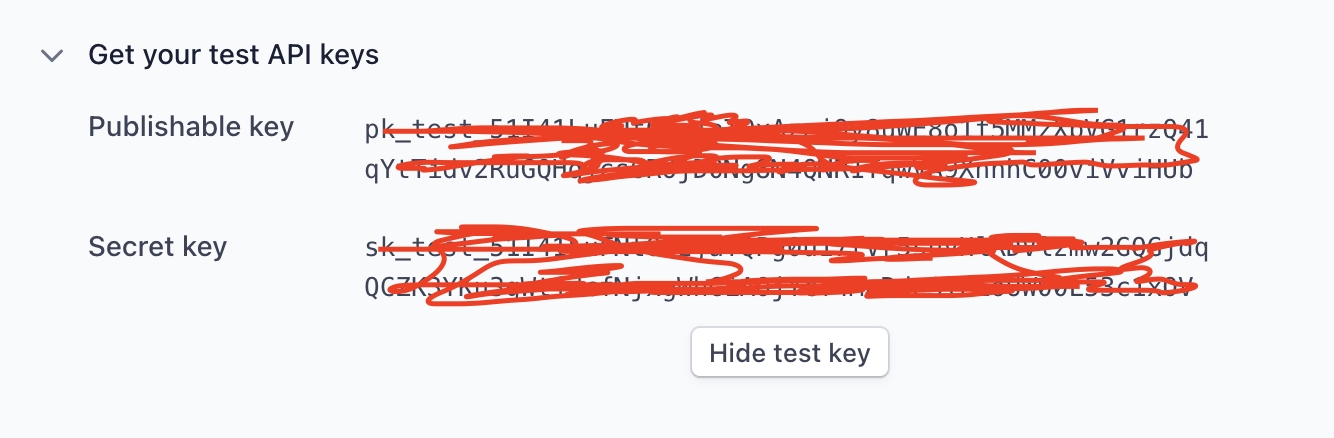
Stripe
Authorize.Net
- https://developer.authorize.net/hello_world/sandbox/ (for sendbox mode)
- https://www.authorize.net/sign-up/ (for product mode)
IyziCo
RazorPay
PayStack
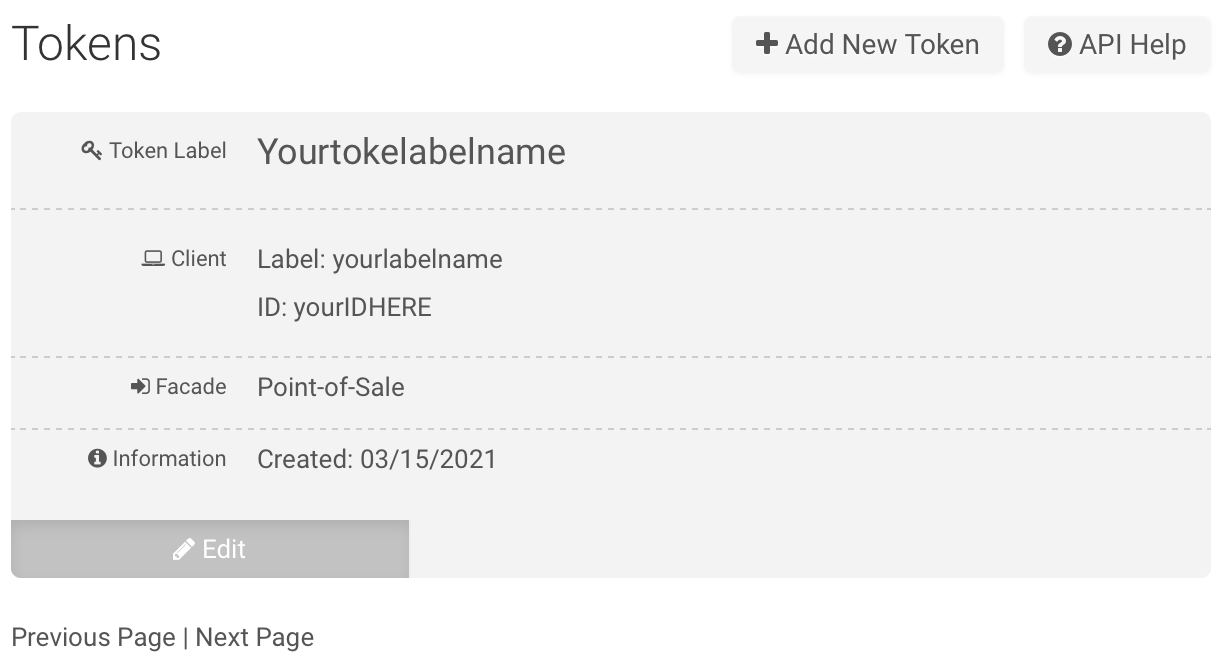
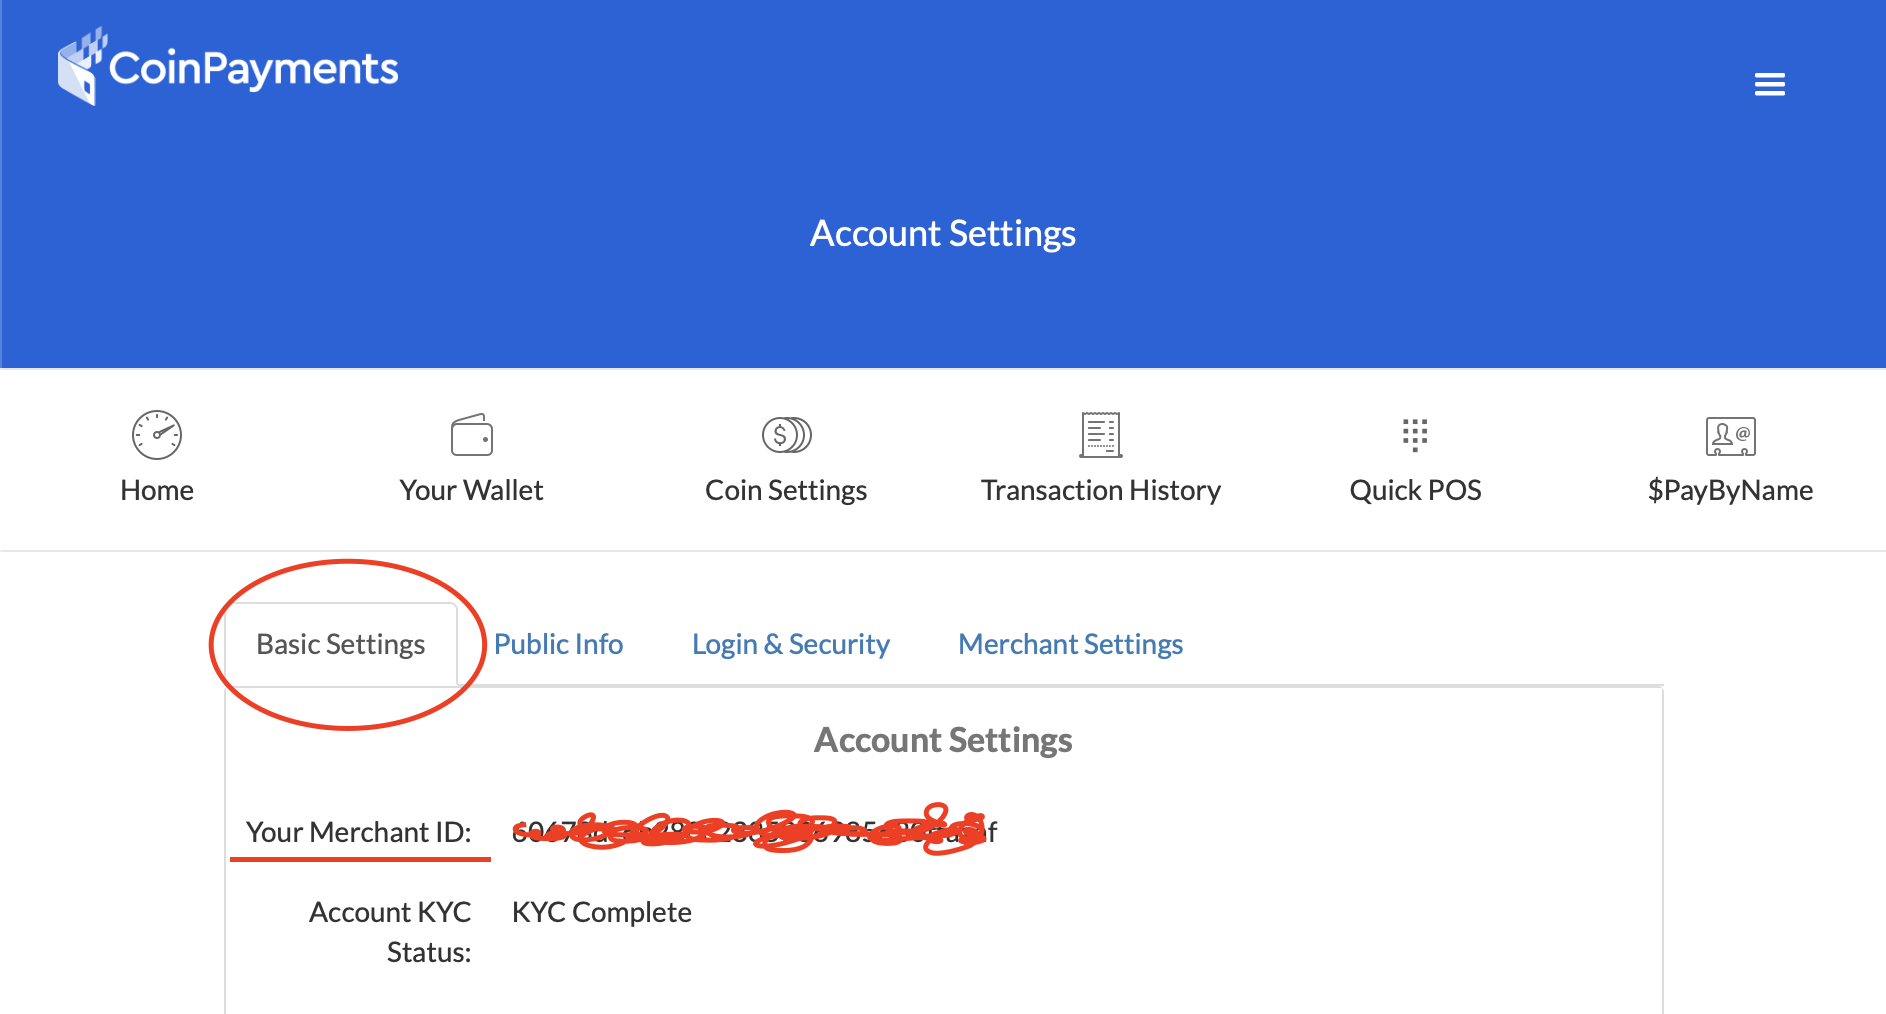
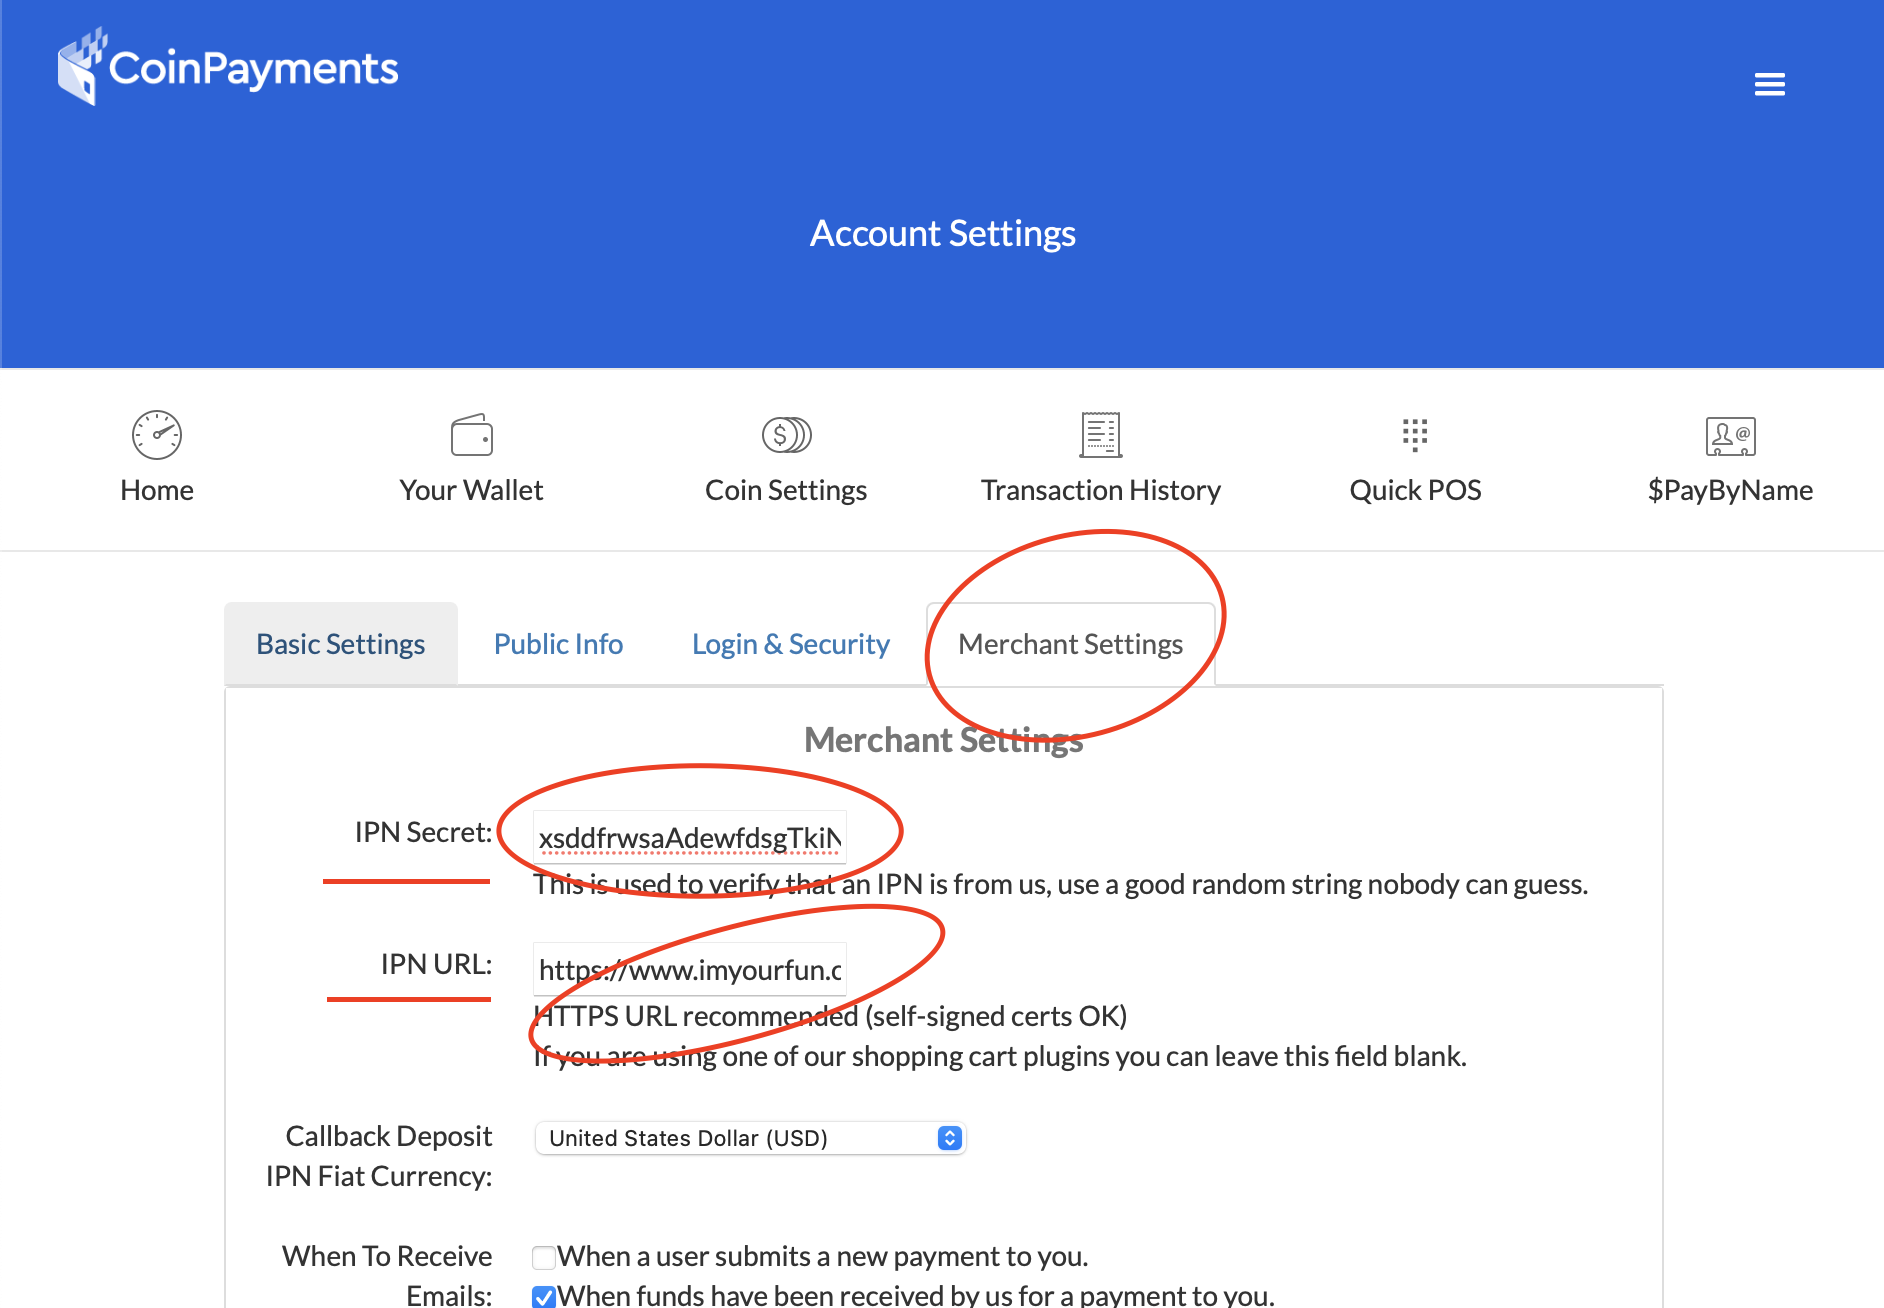
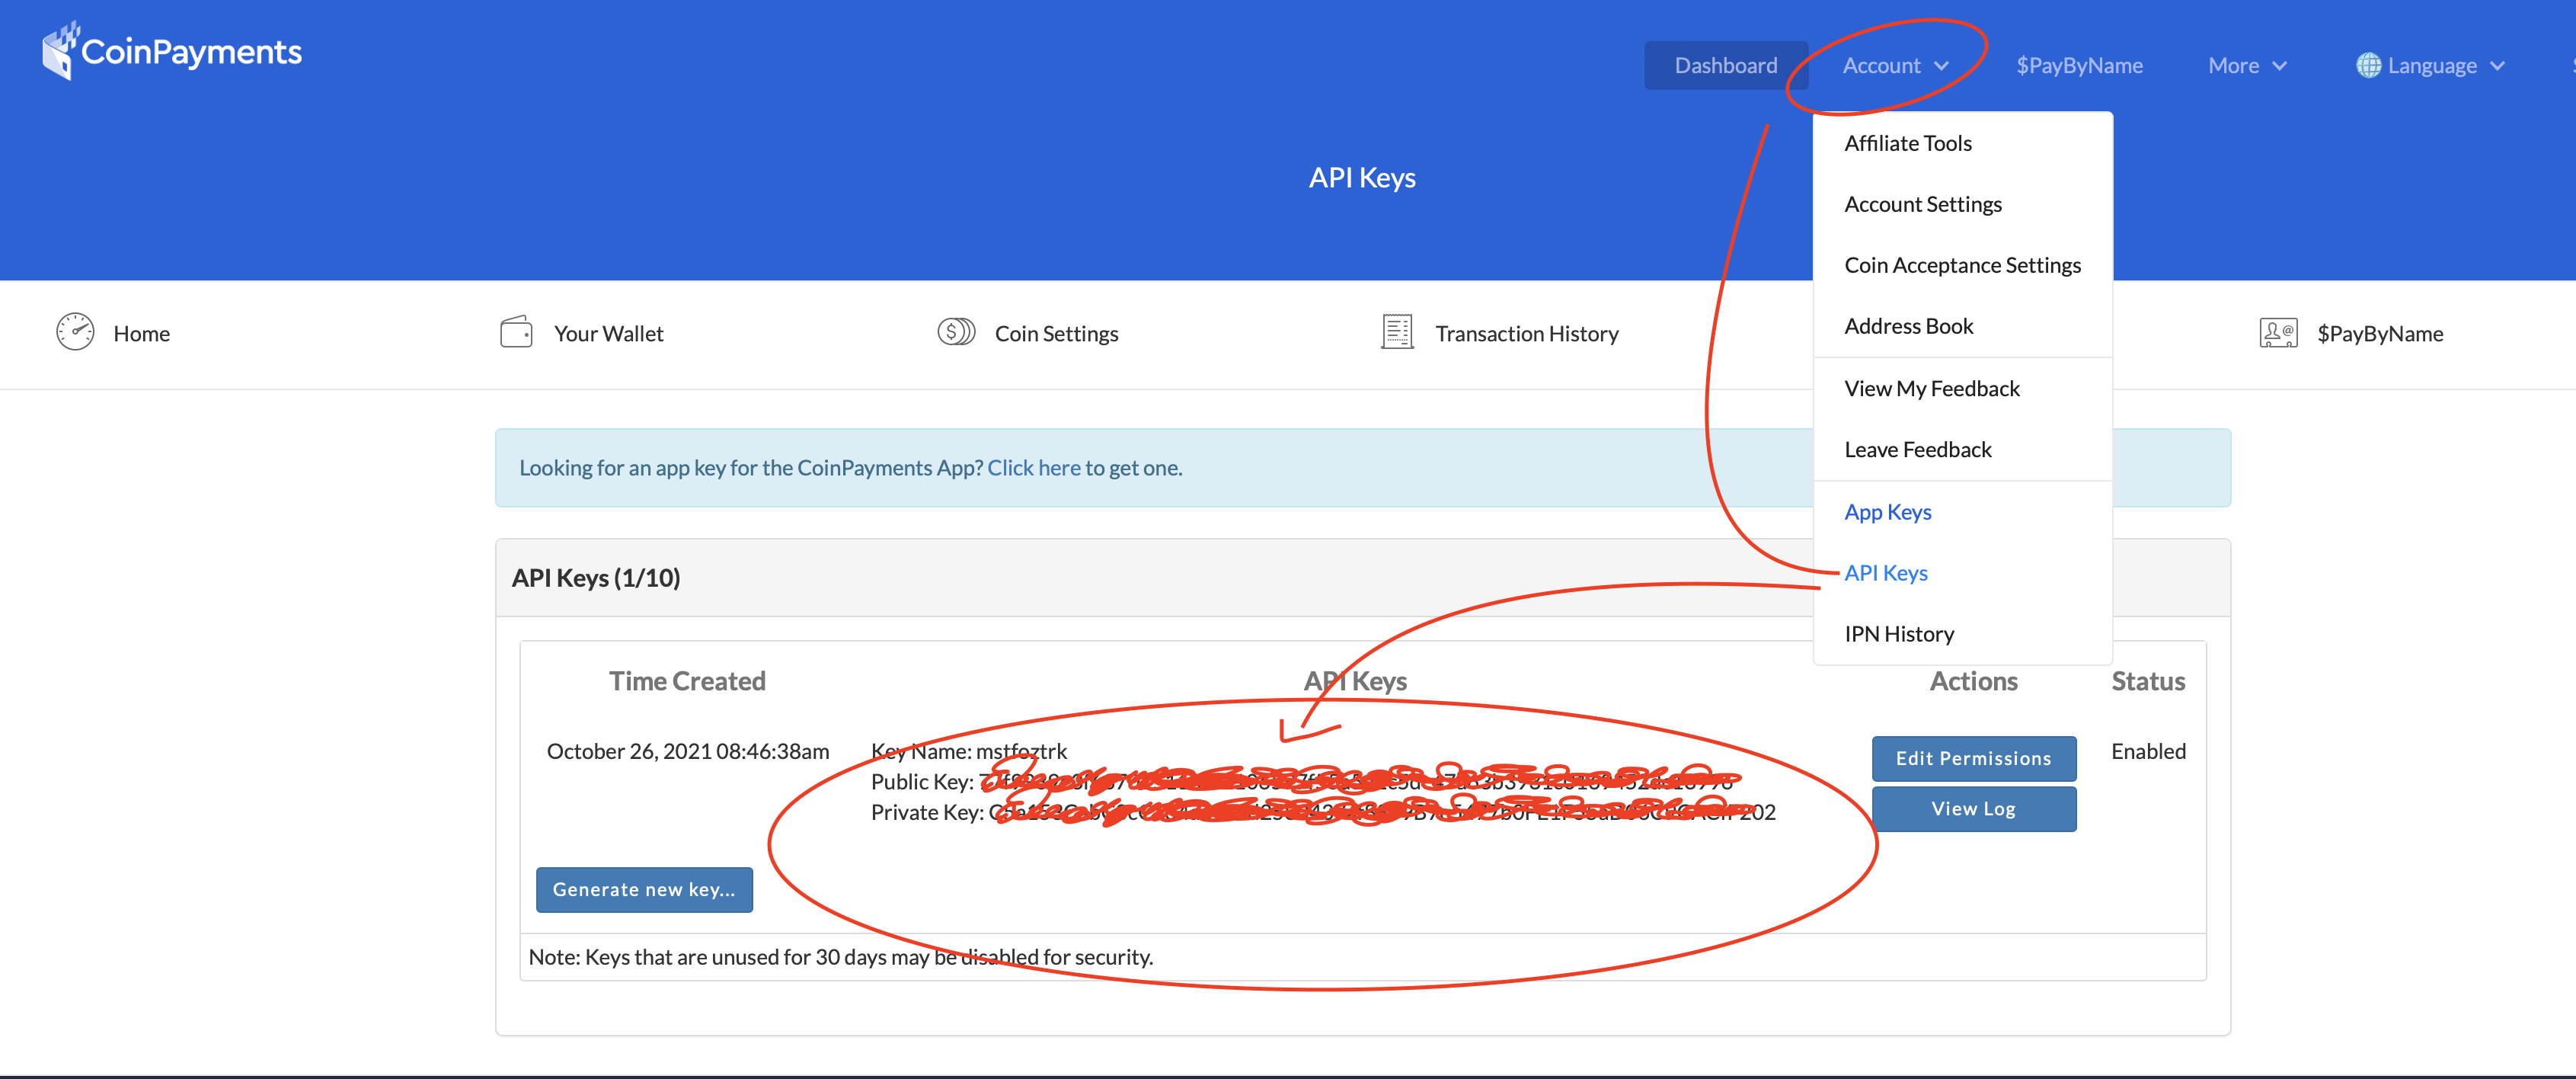
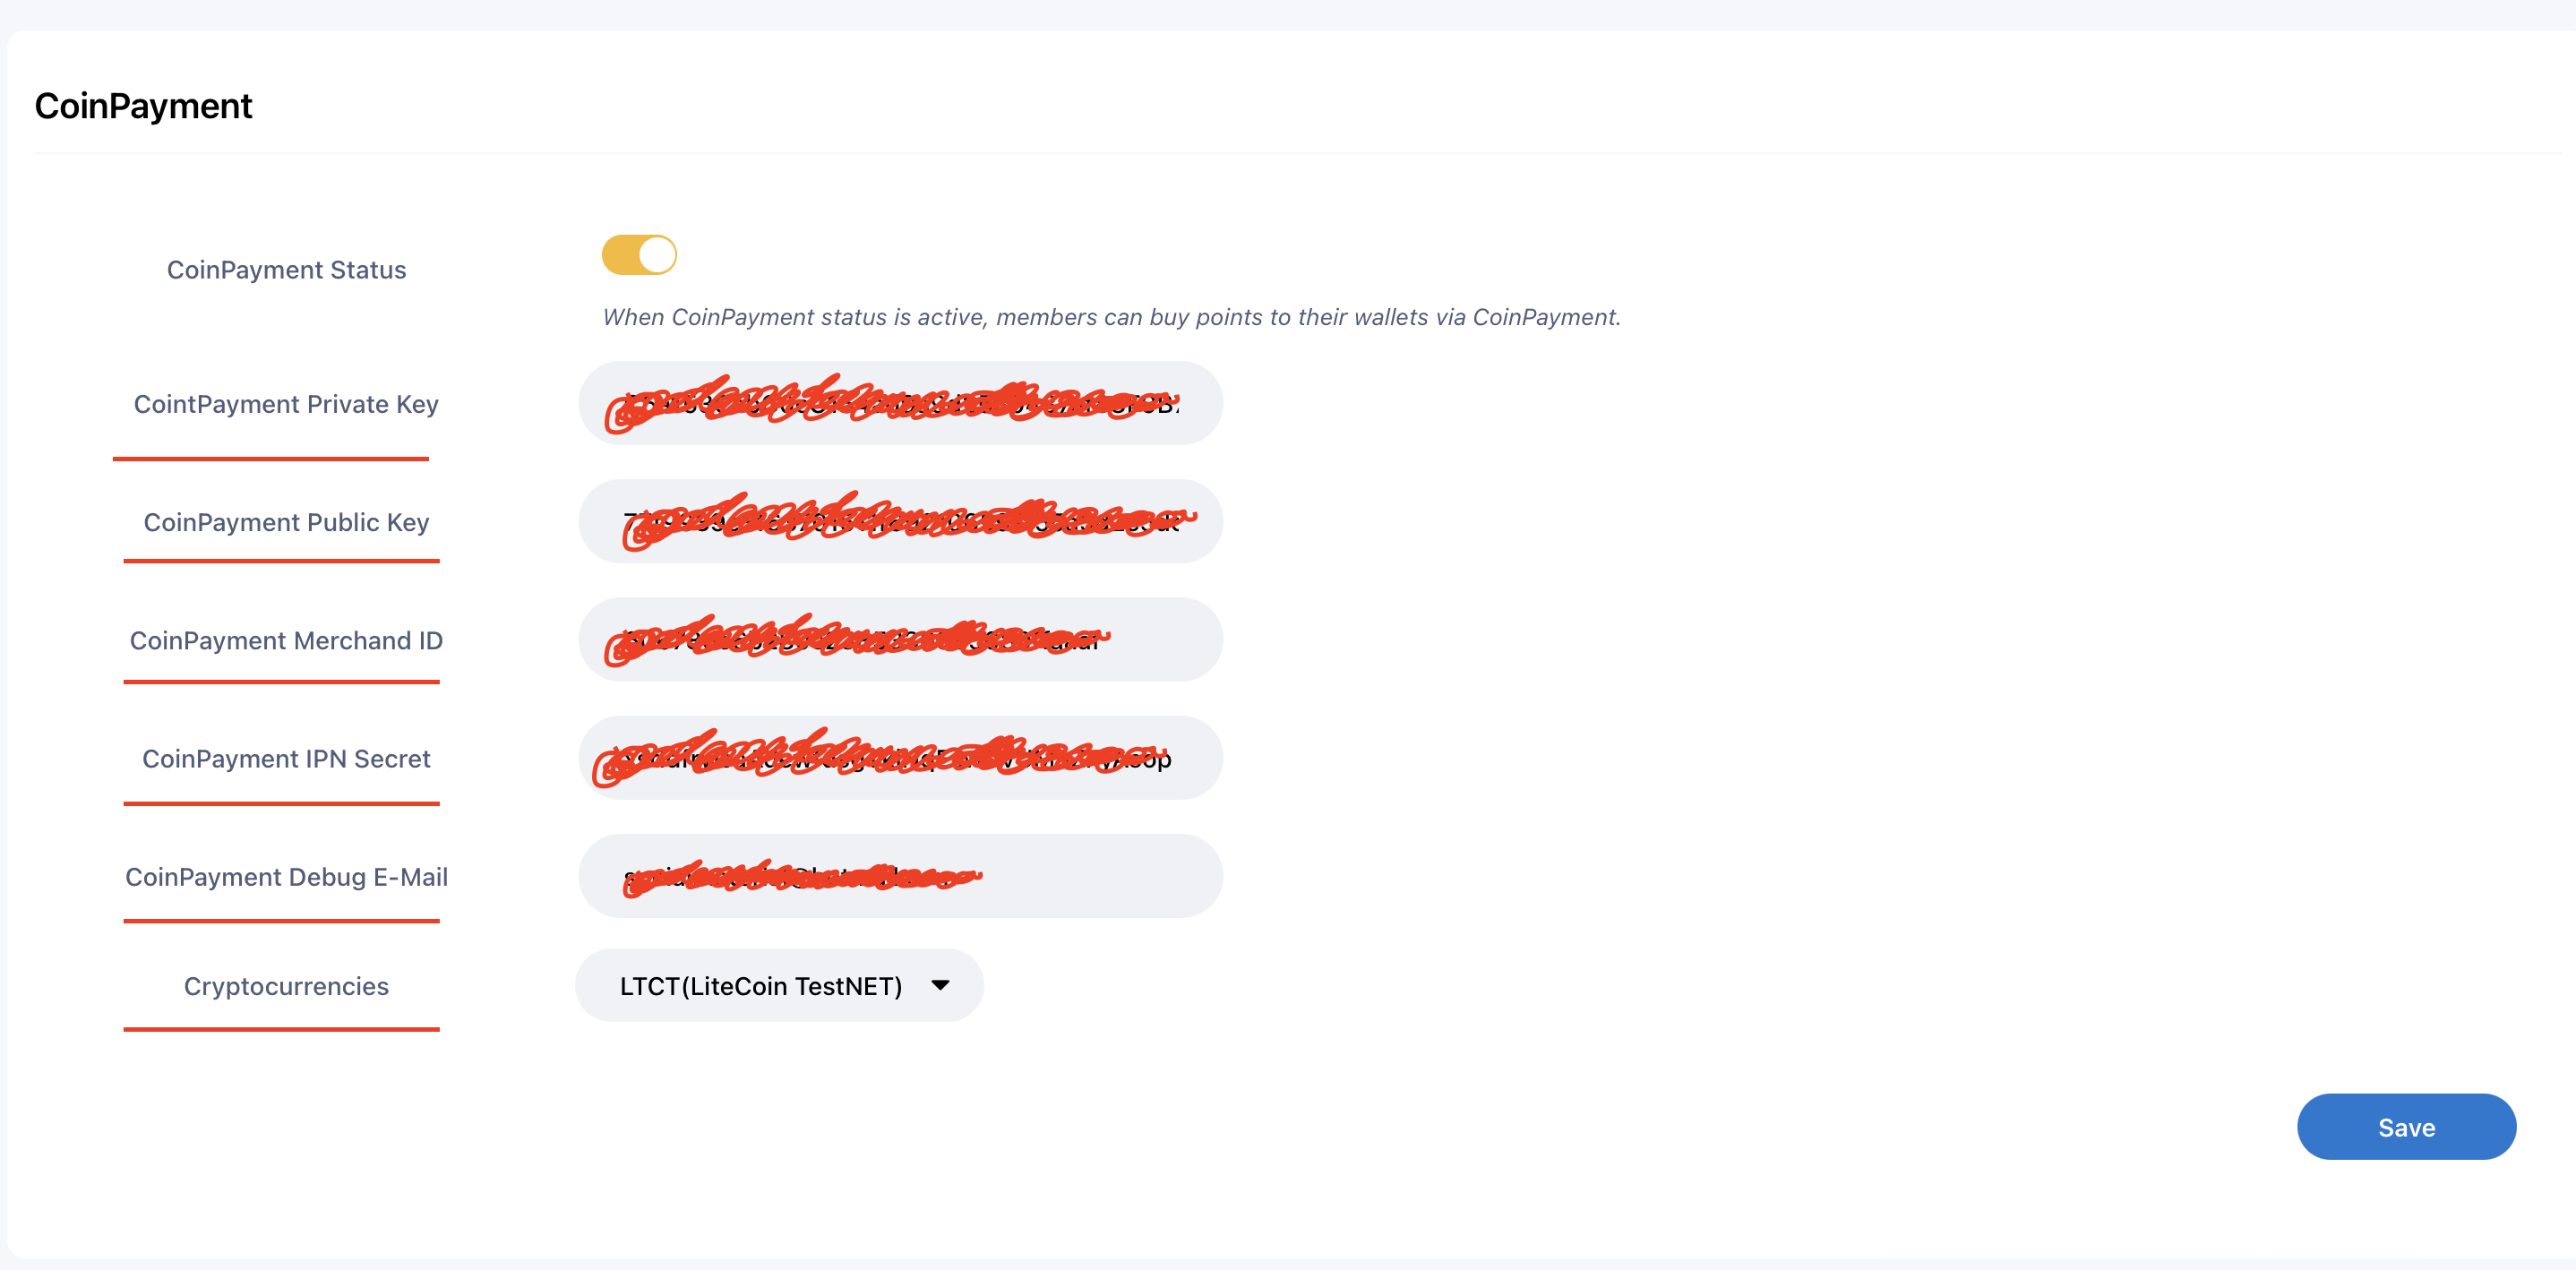
CoinPayment
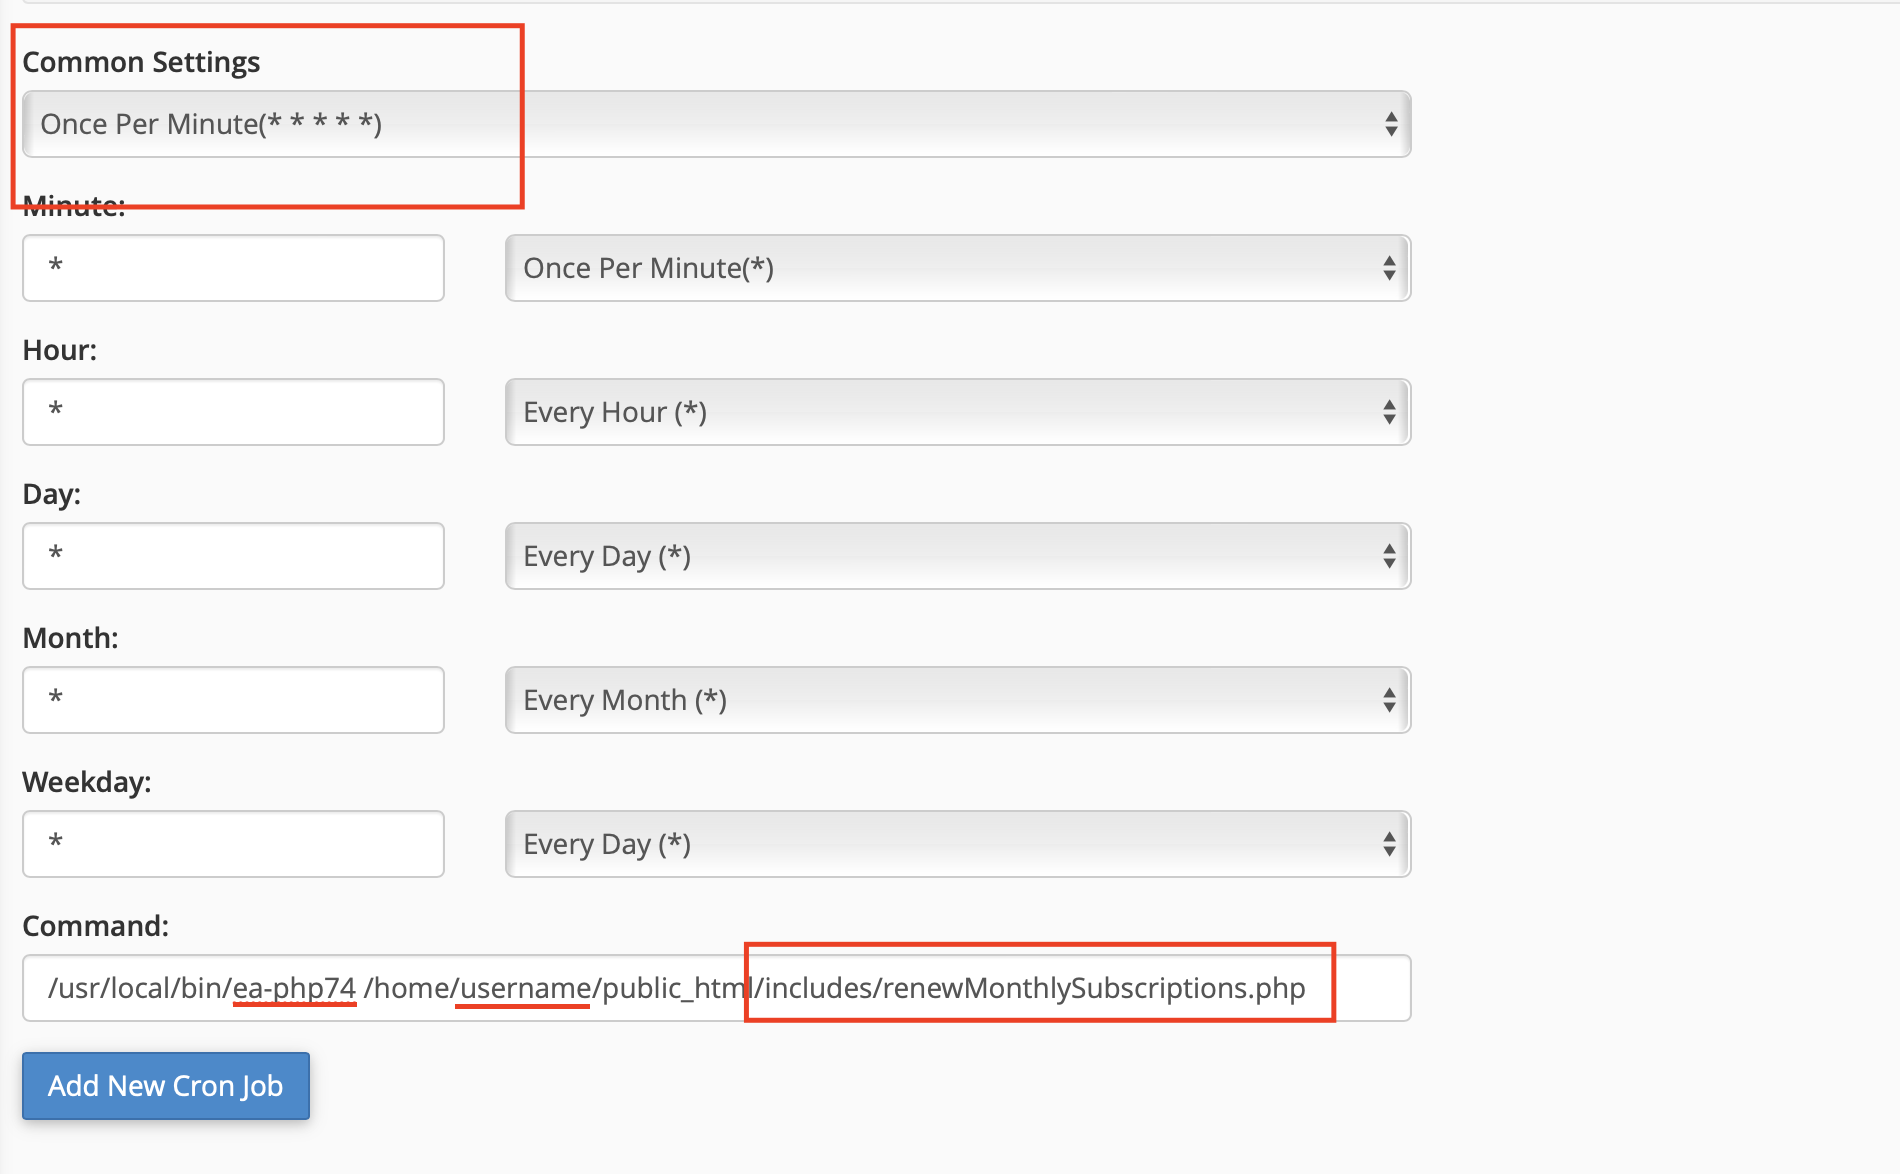
Create Cron Job

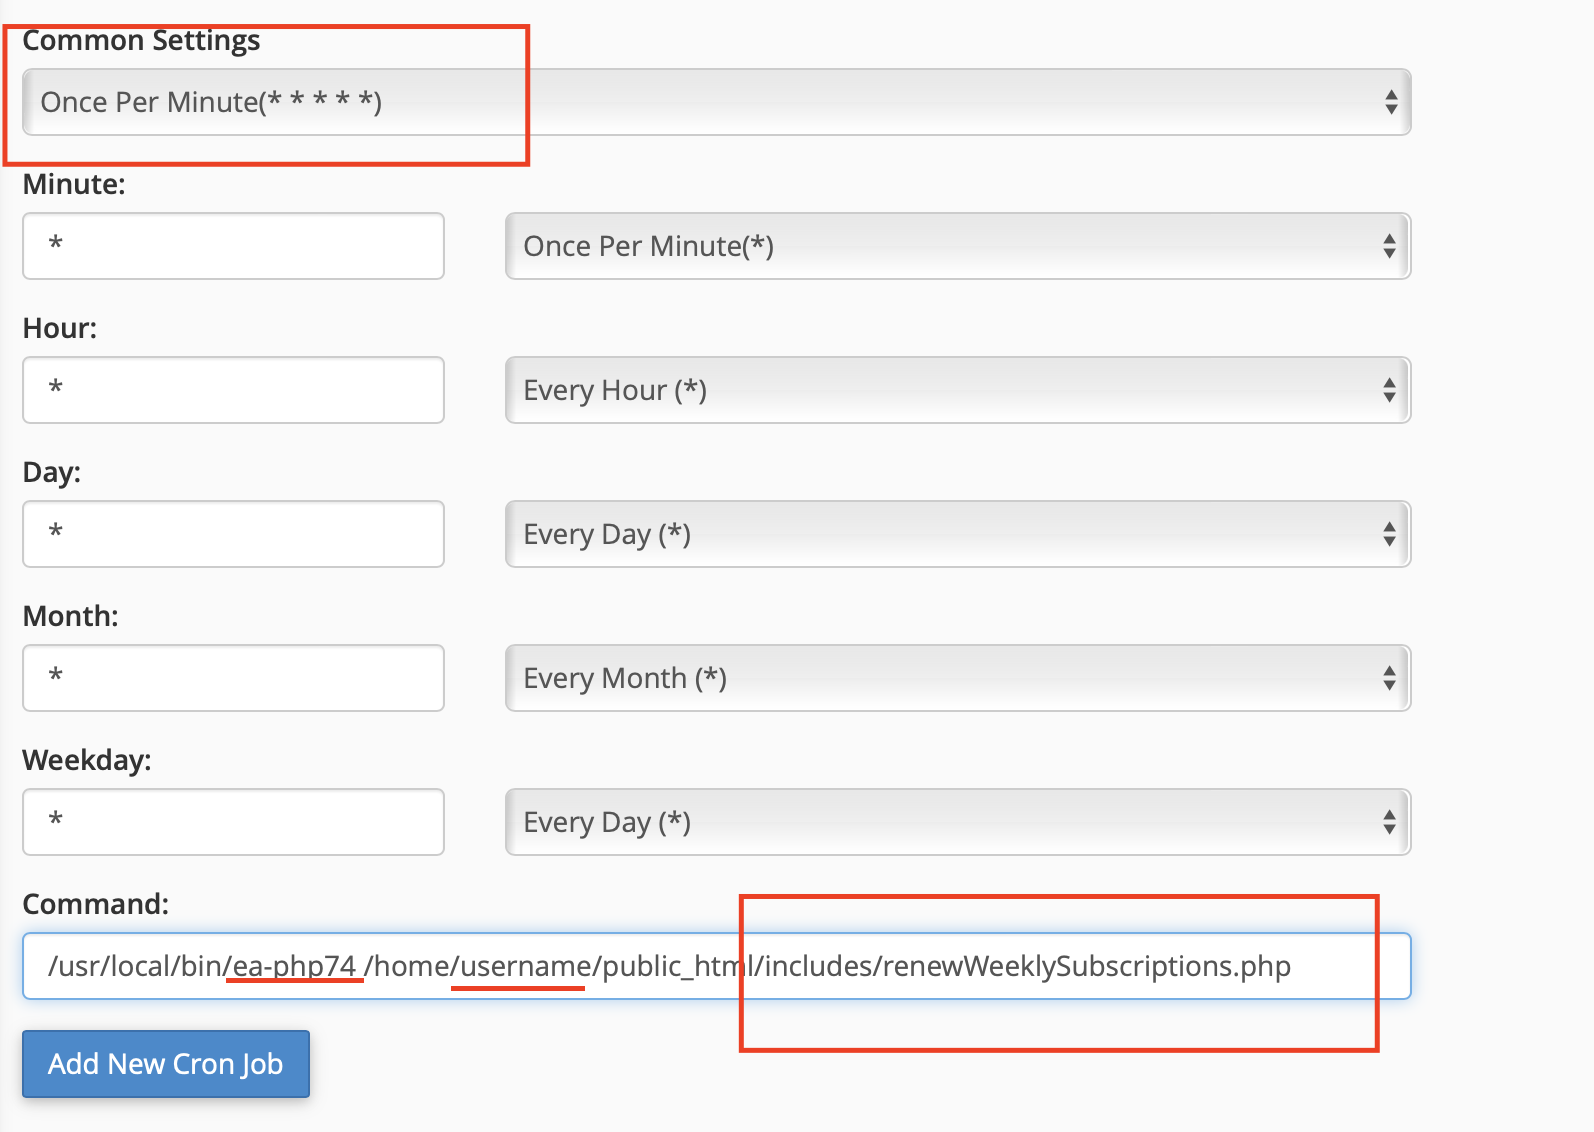
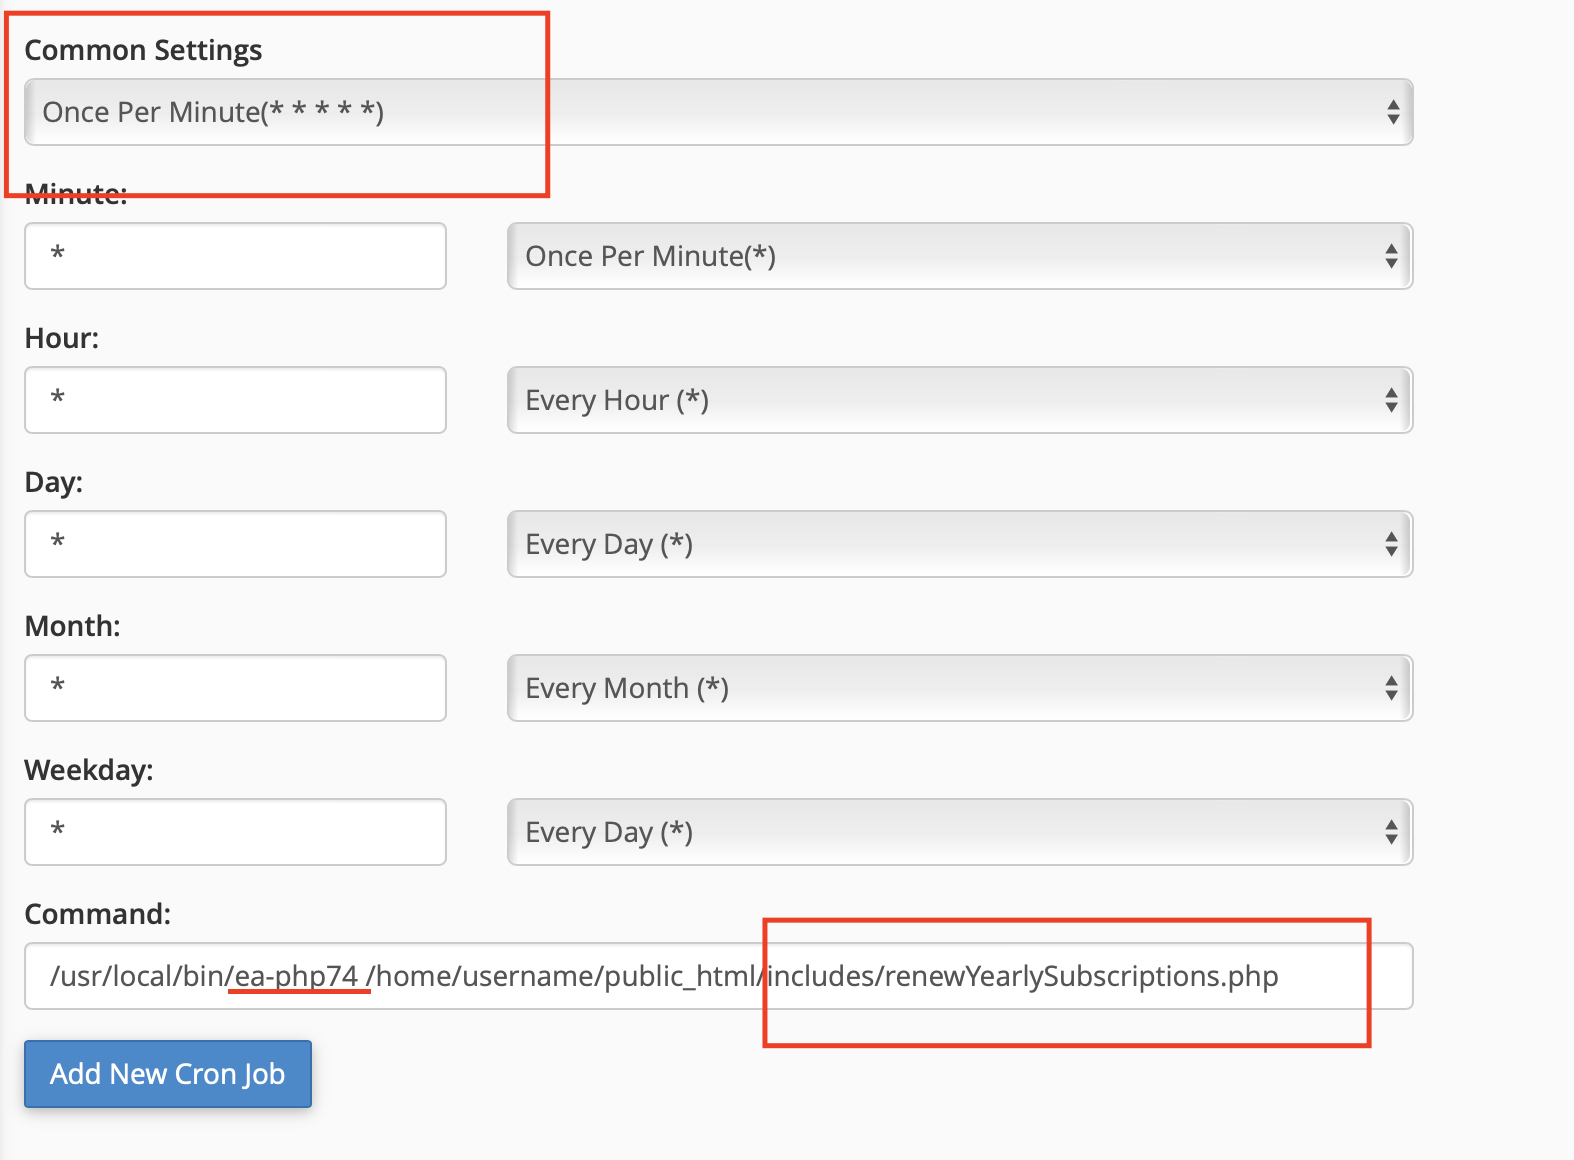
/usr/local/bin/ea-php74 /home/username/public_html/includes/renewWeeklySubscriptions.php
/usr/local/bin/ea-php74 /home/username/public_html/includes/renewMonthlySubscriptions.php
/usr/local/bin/ea-php74 /home/username/public_html/includes/renewYearlySubscriptions.php
/usr/local/bin/ea-php74 /home/username/public_html/includes/calculateSubscriptionEarnings.php
- In the image above change ea-php74 for your PHP version, username for yours, and put the path where your project is located, in my case it is in public_html.
- Click on Add New Cron Job and you're done!
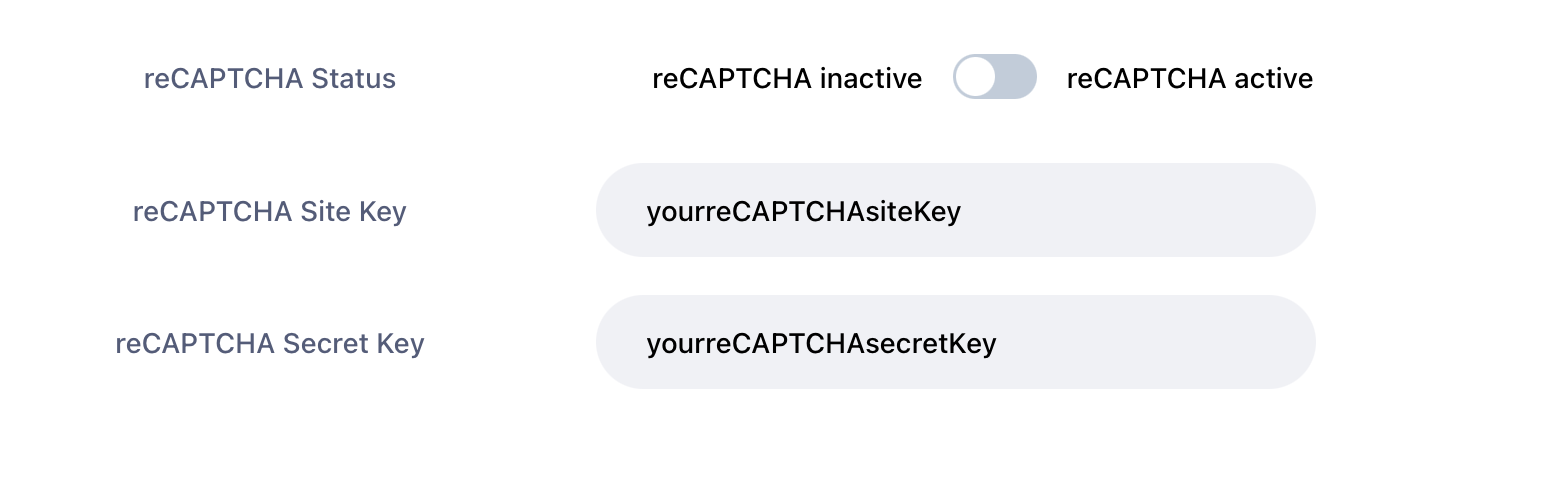
reCaptcha
- Open https://www.YOURWEBSITE.com/admin/limits
- Get your API keys here Create a reCAPTCHA
Please follow the following steps then make sure you clear cache before testing.
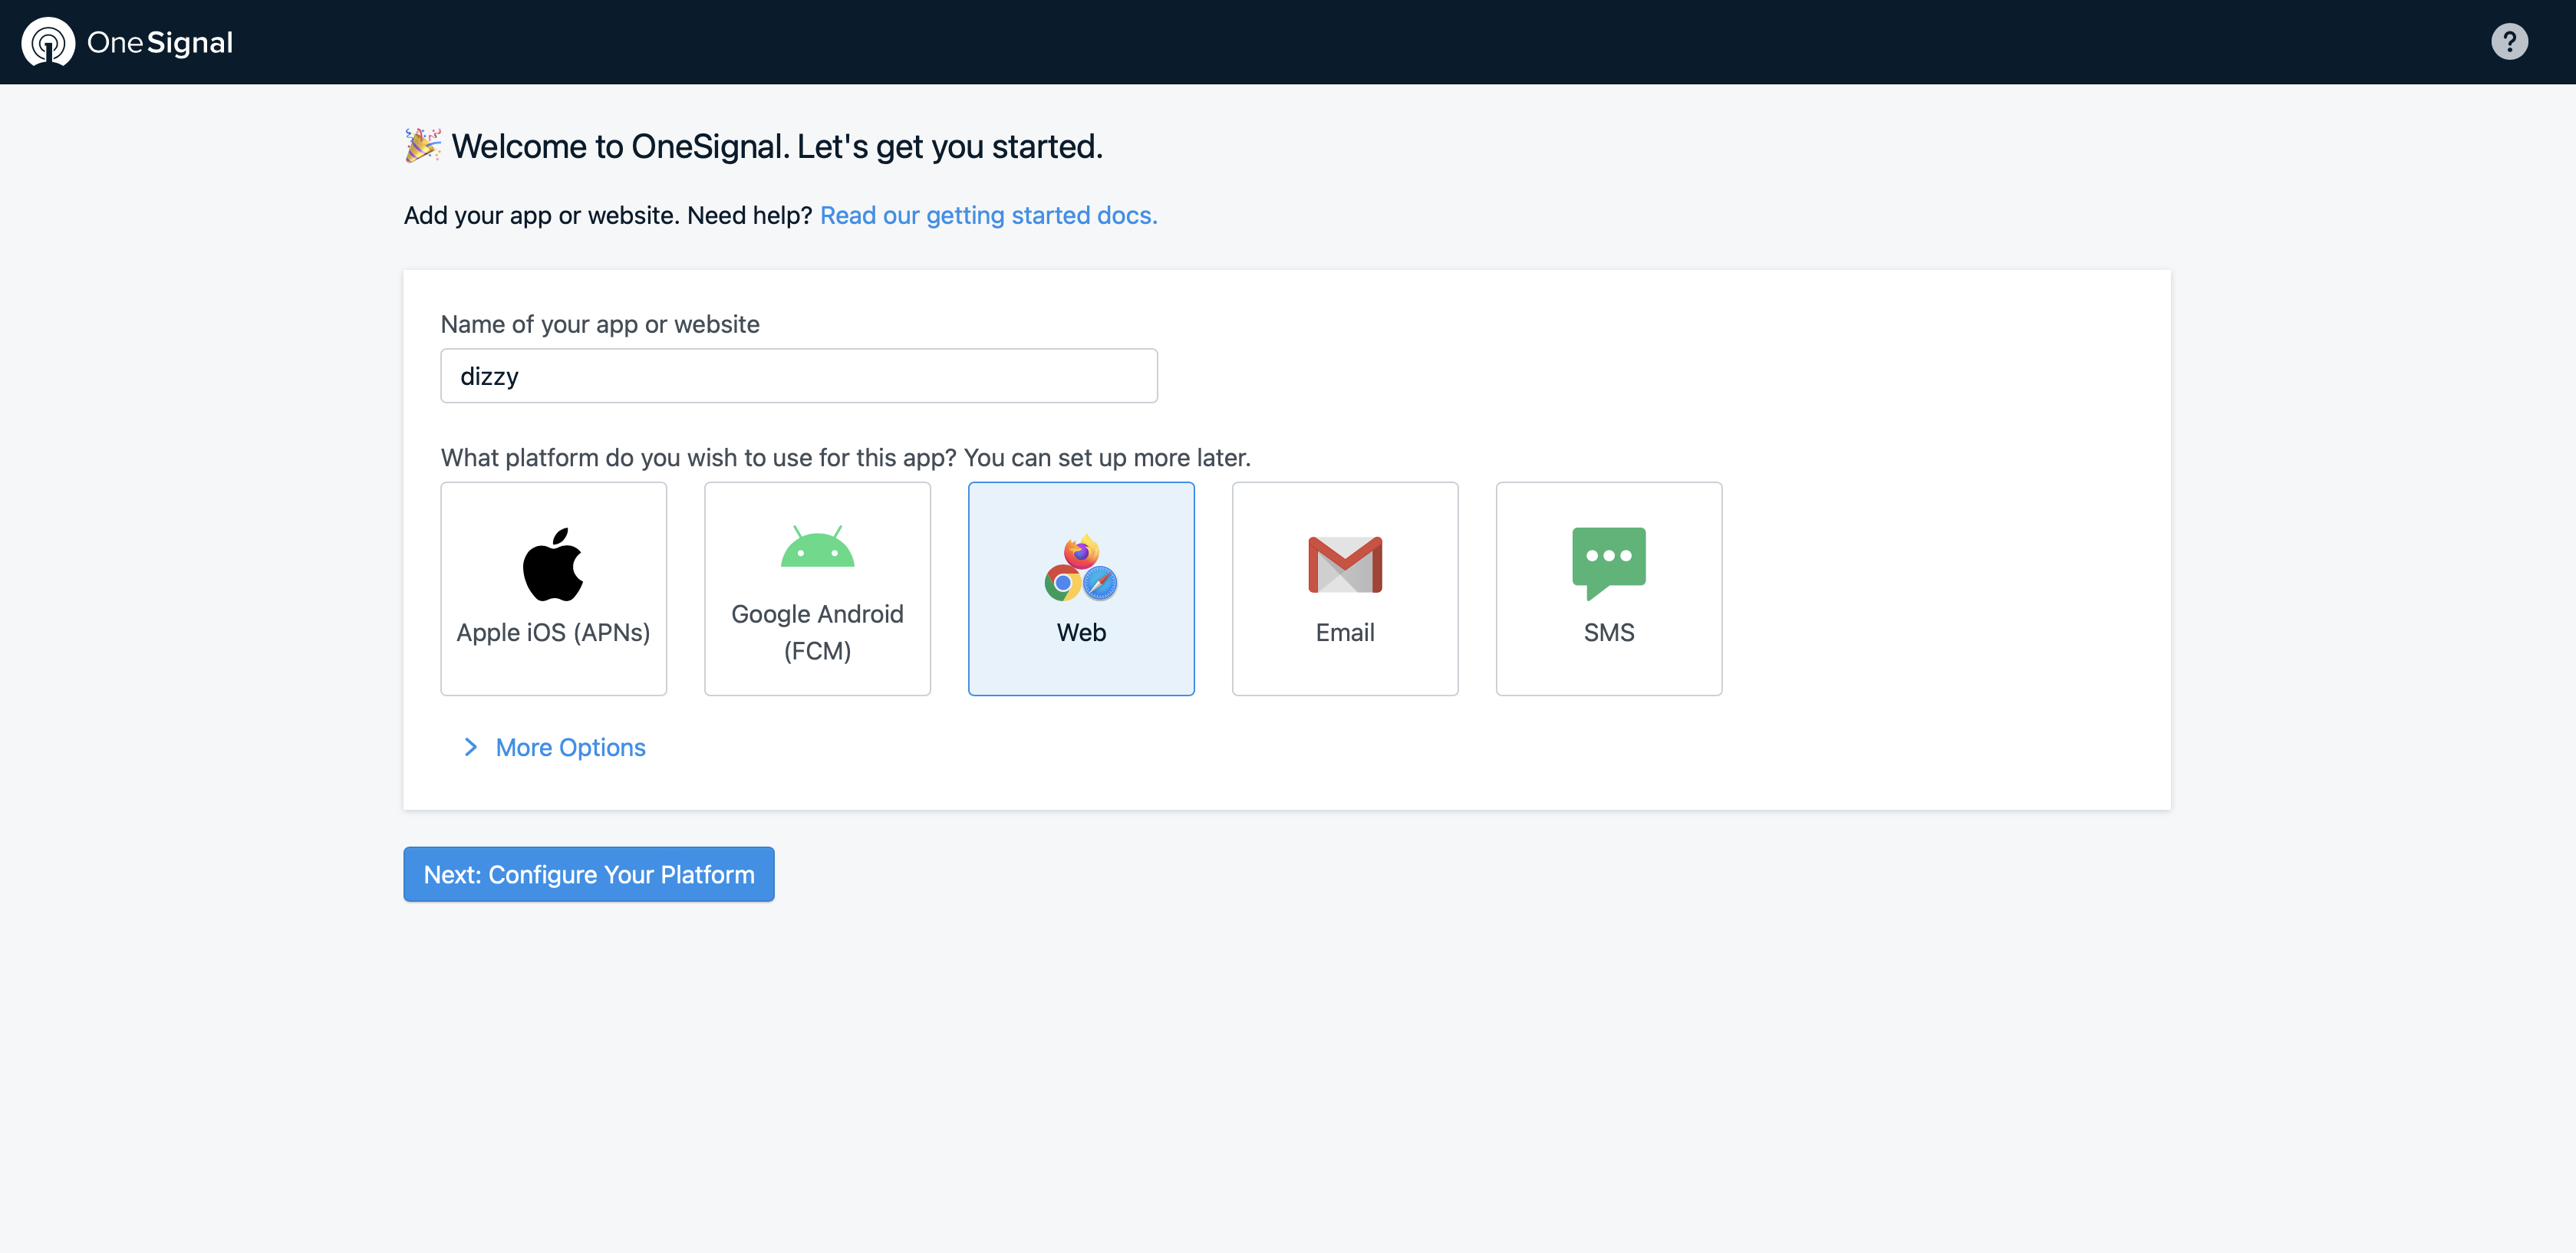
- Register or Login OneSignal https://onesignal.com
-
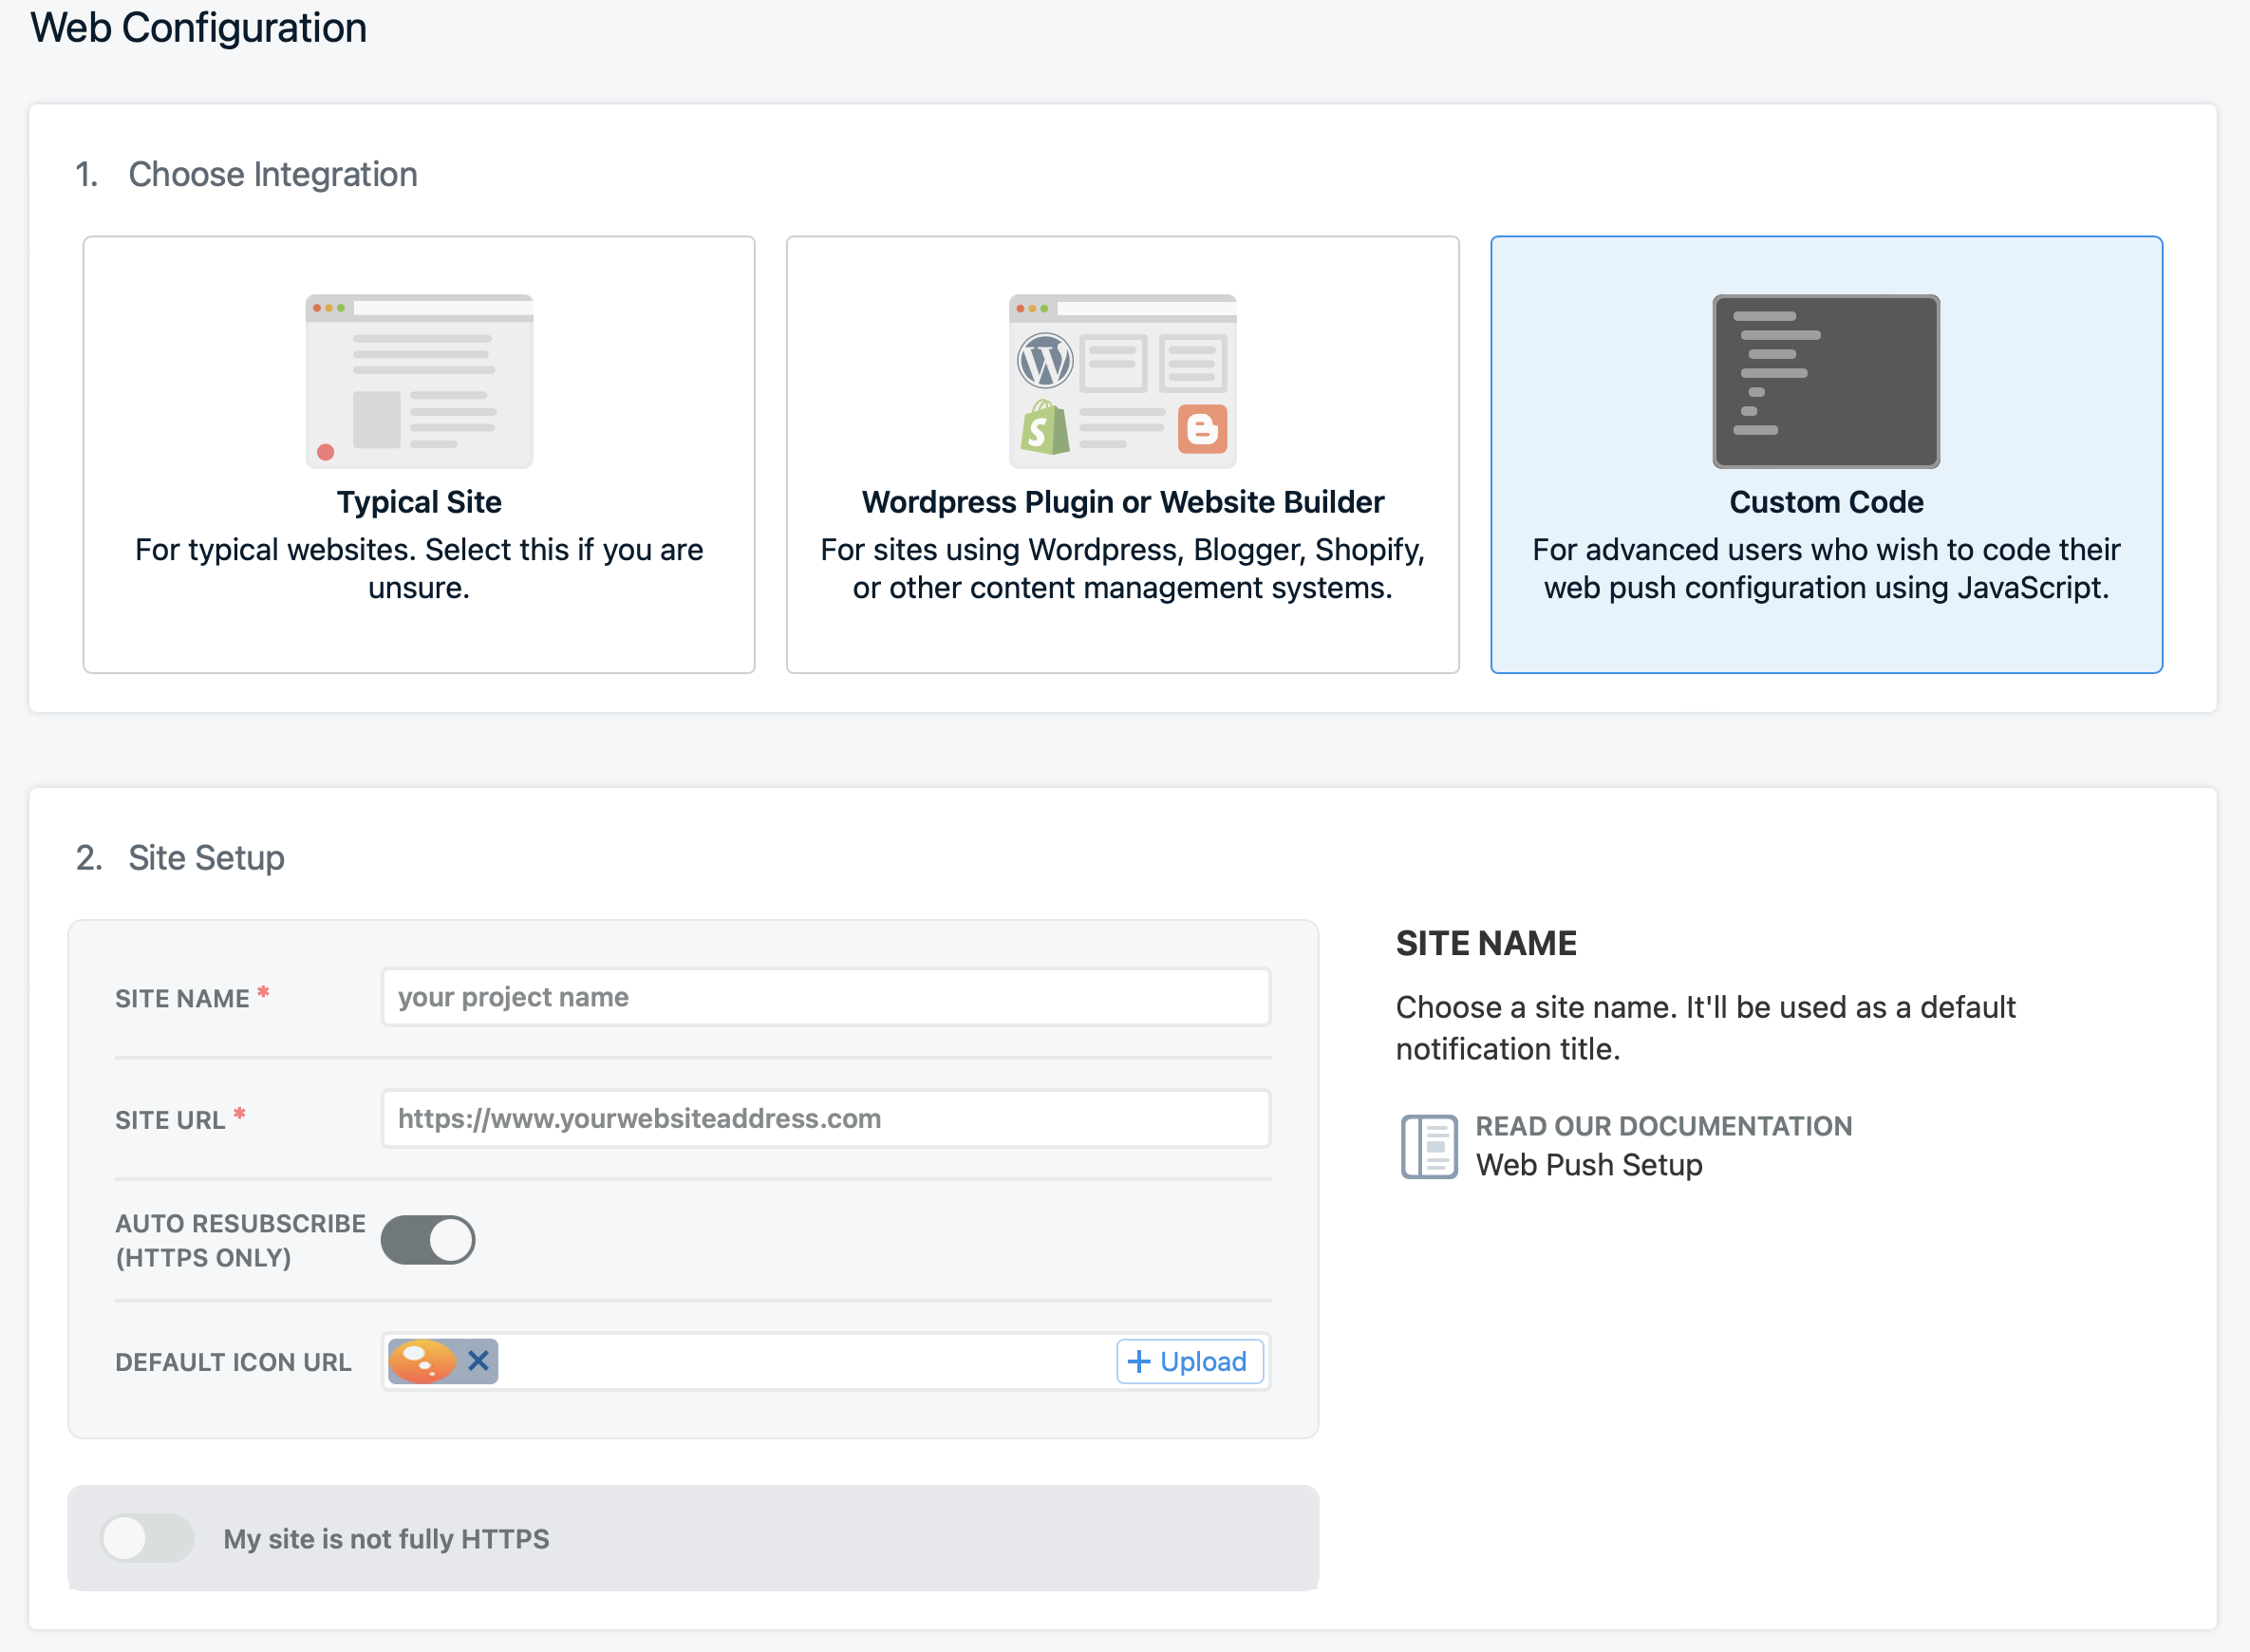
Setup your web configuration
- Choose Integration
- Site Setup
- Click Save
-
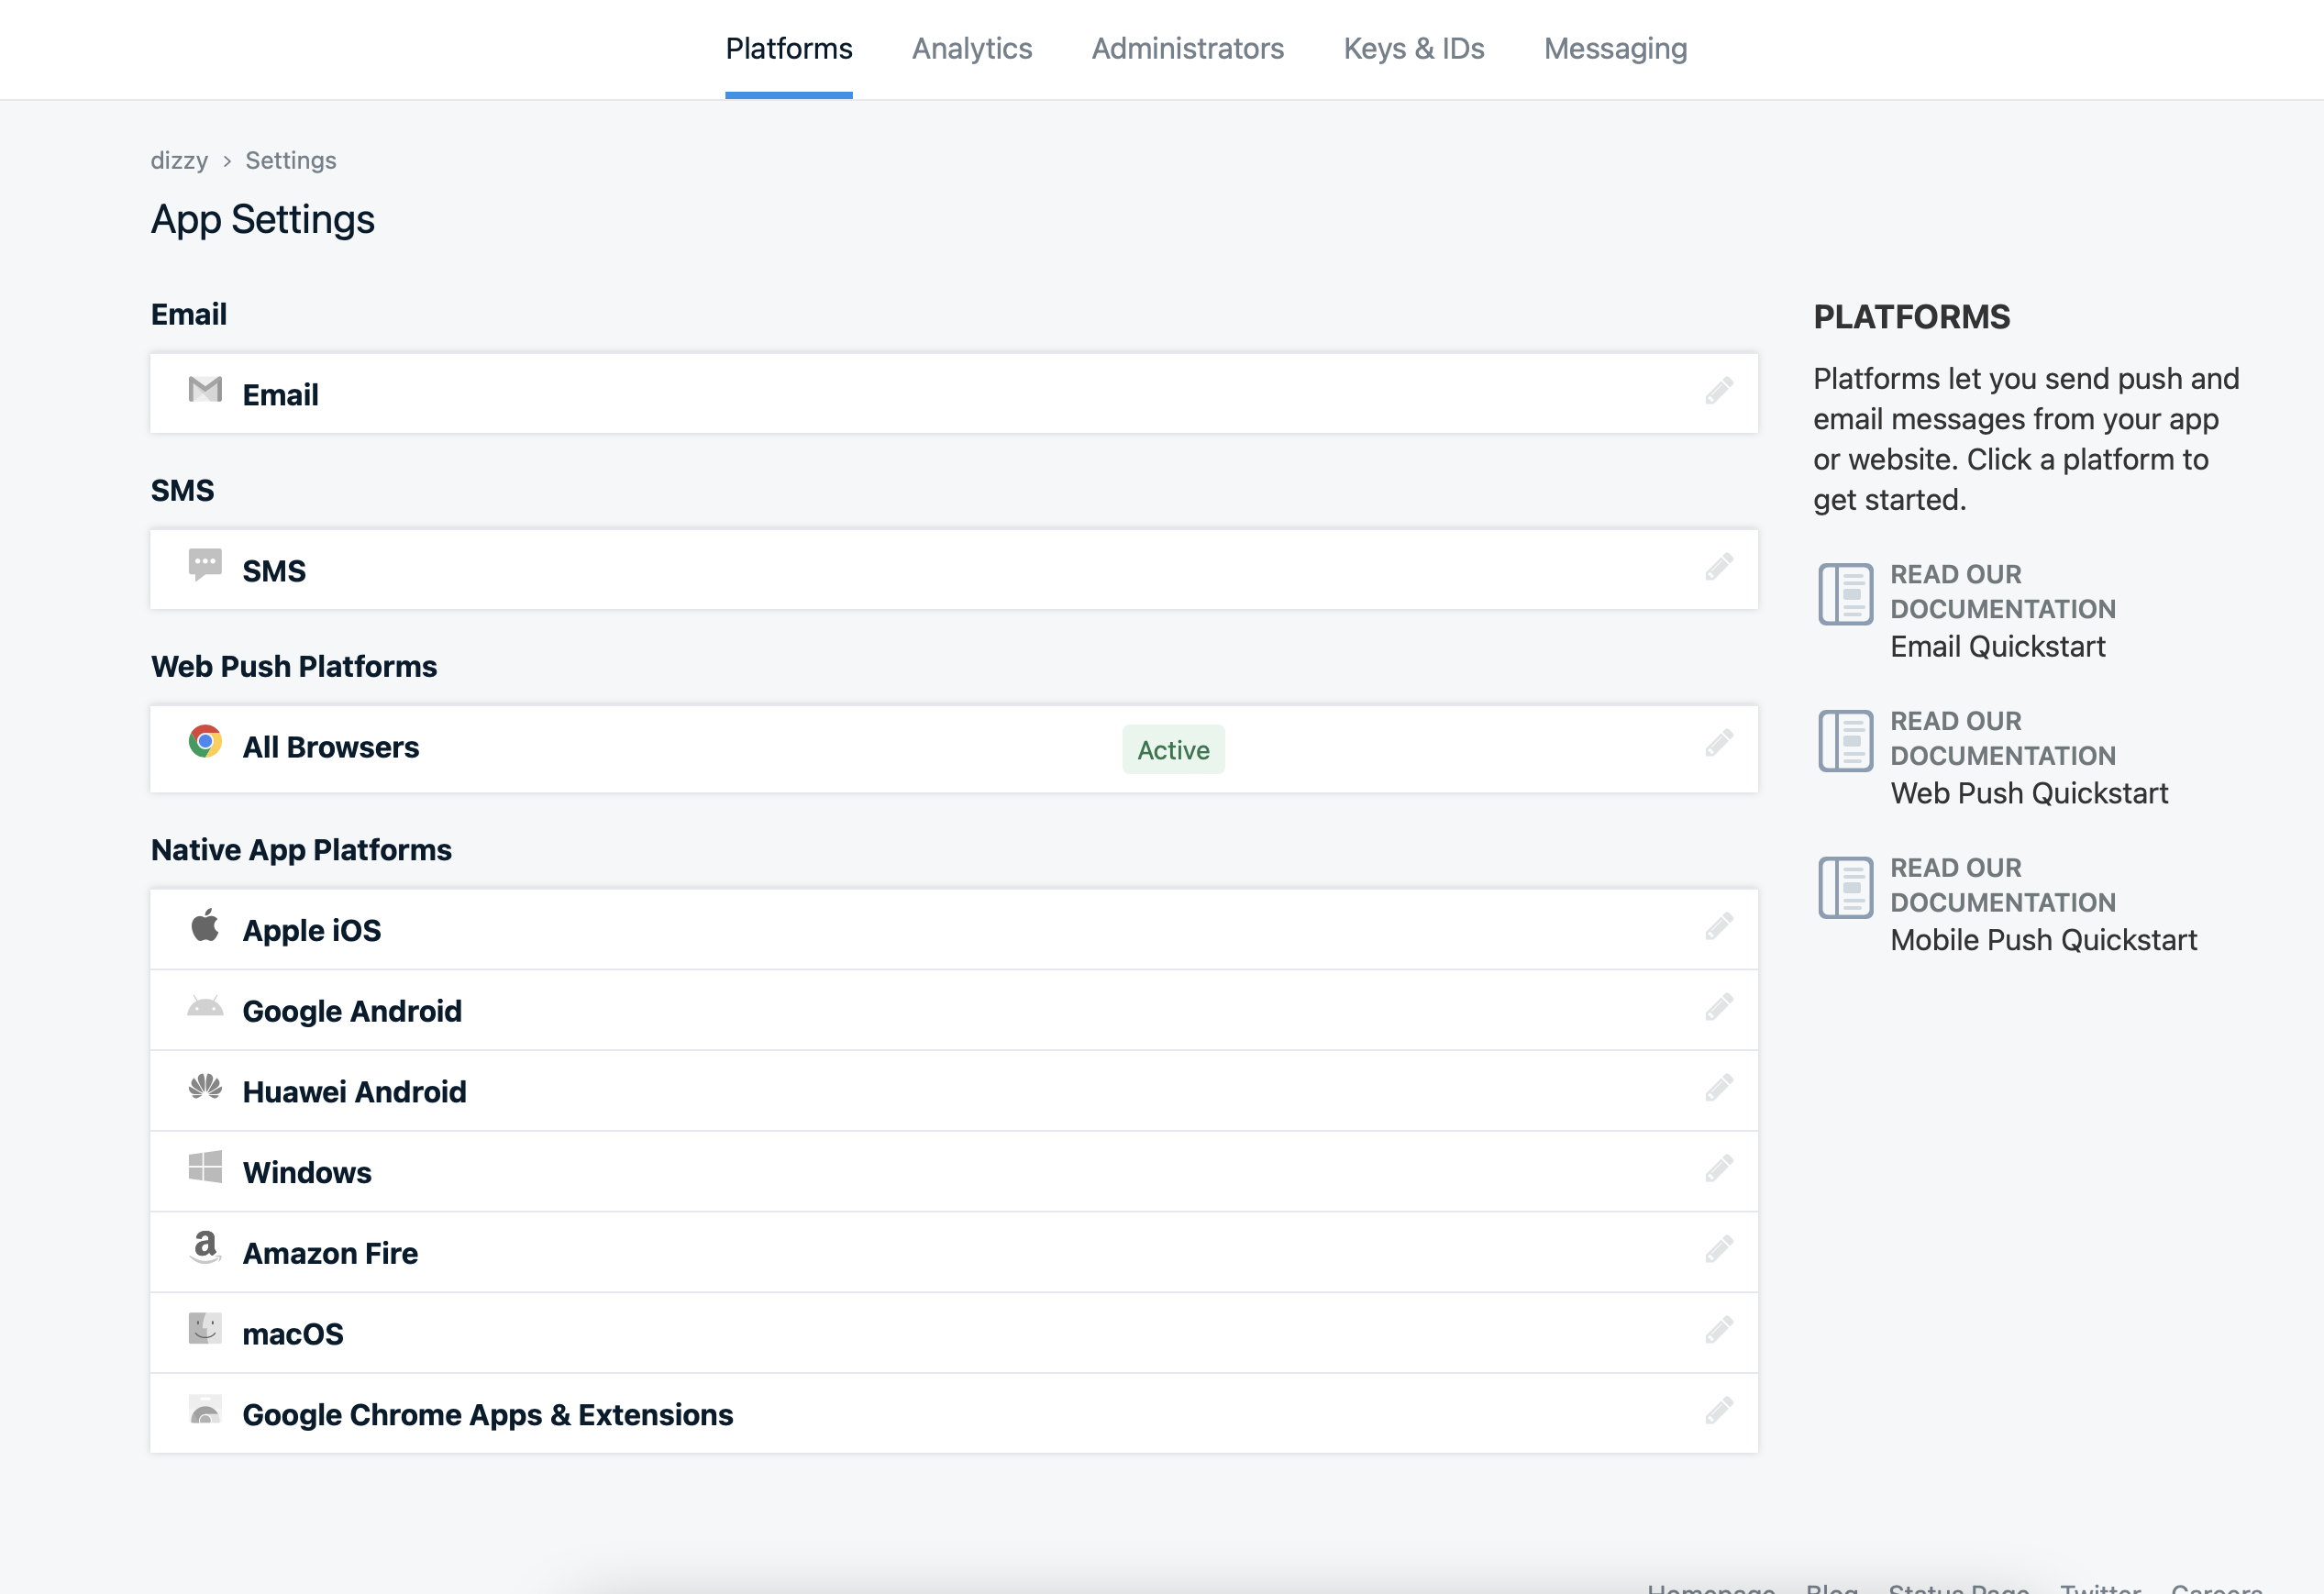
Click Settings
- After then click Web Push Platforms like as follows
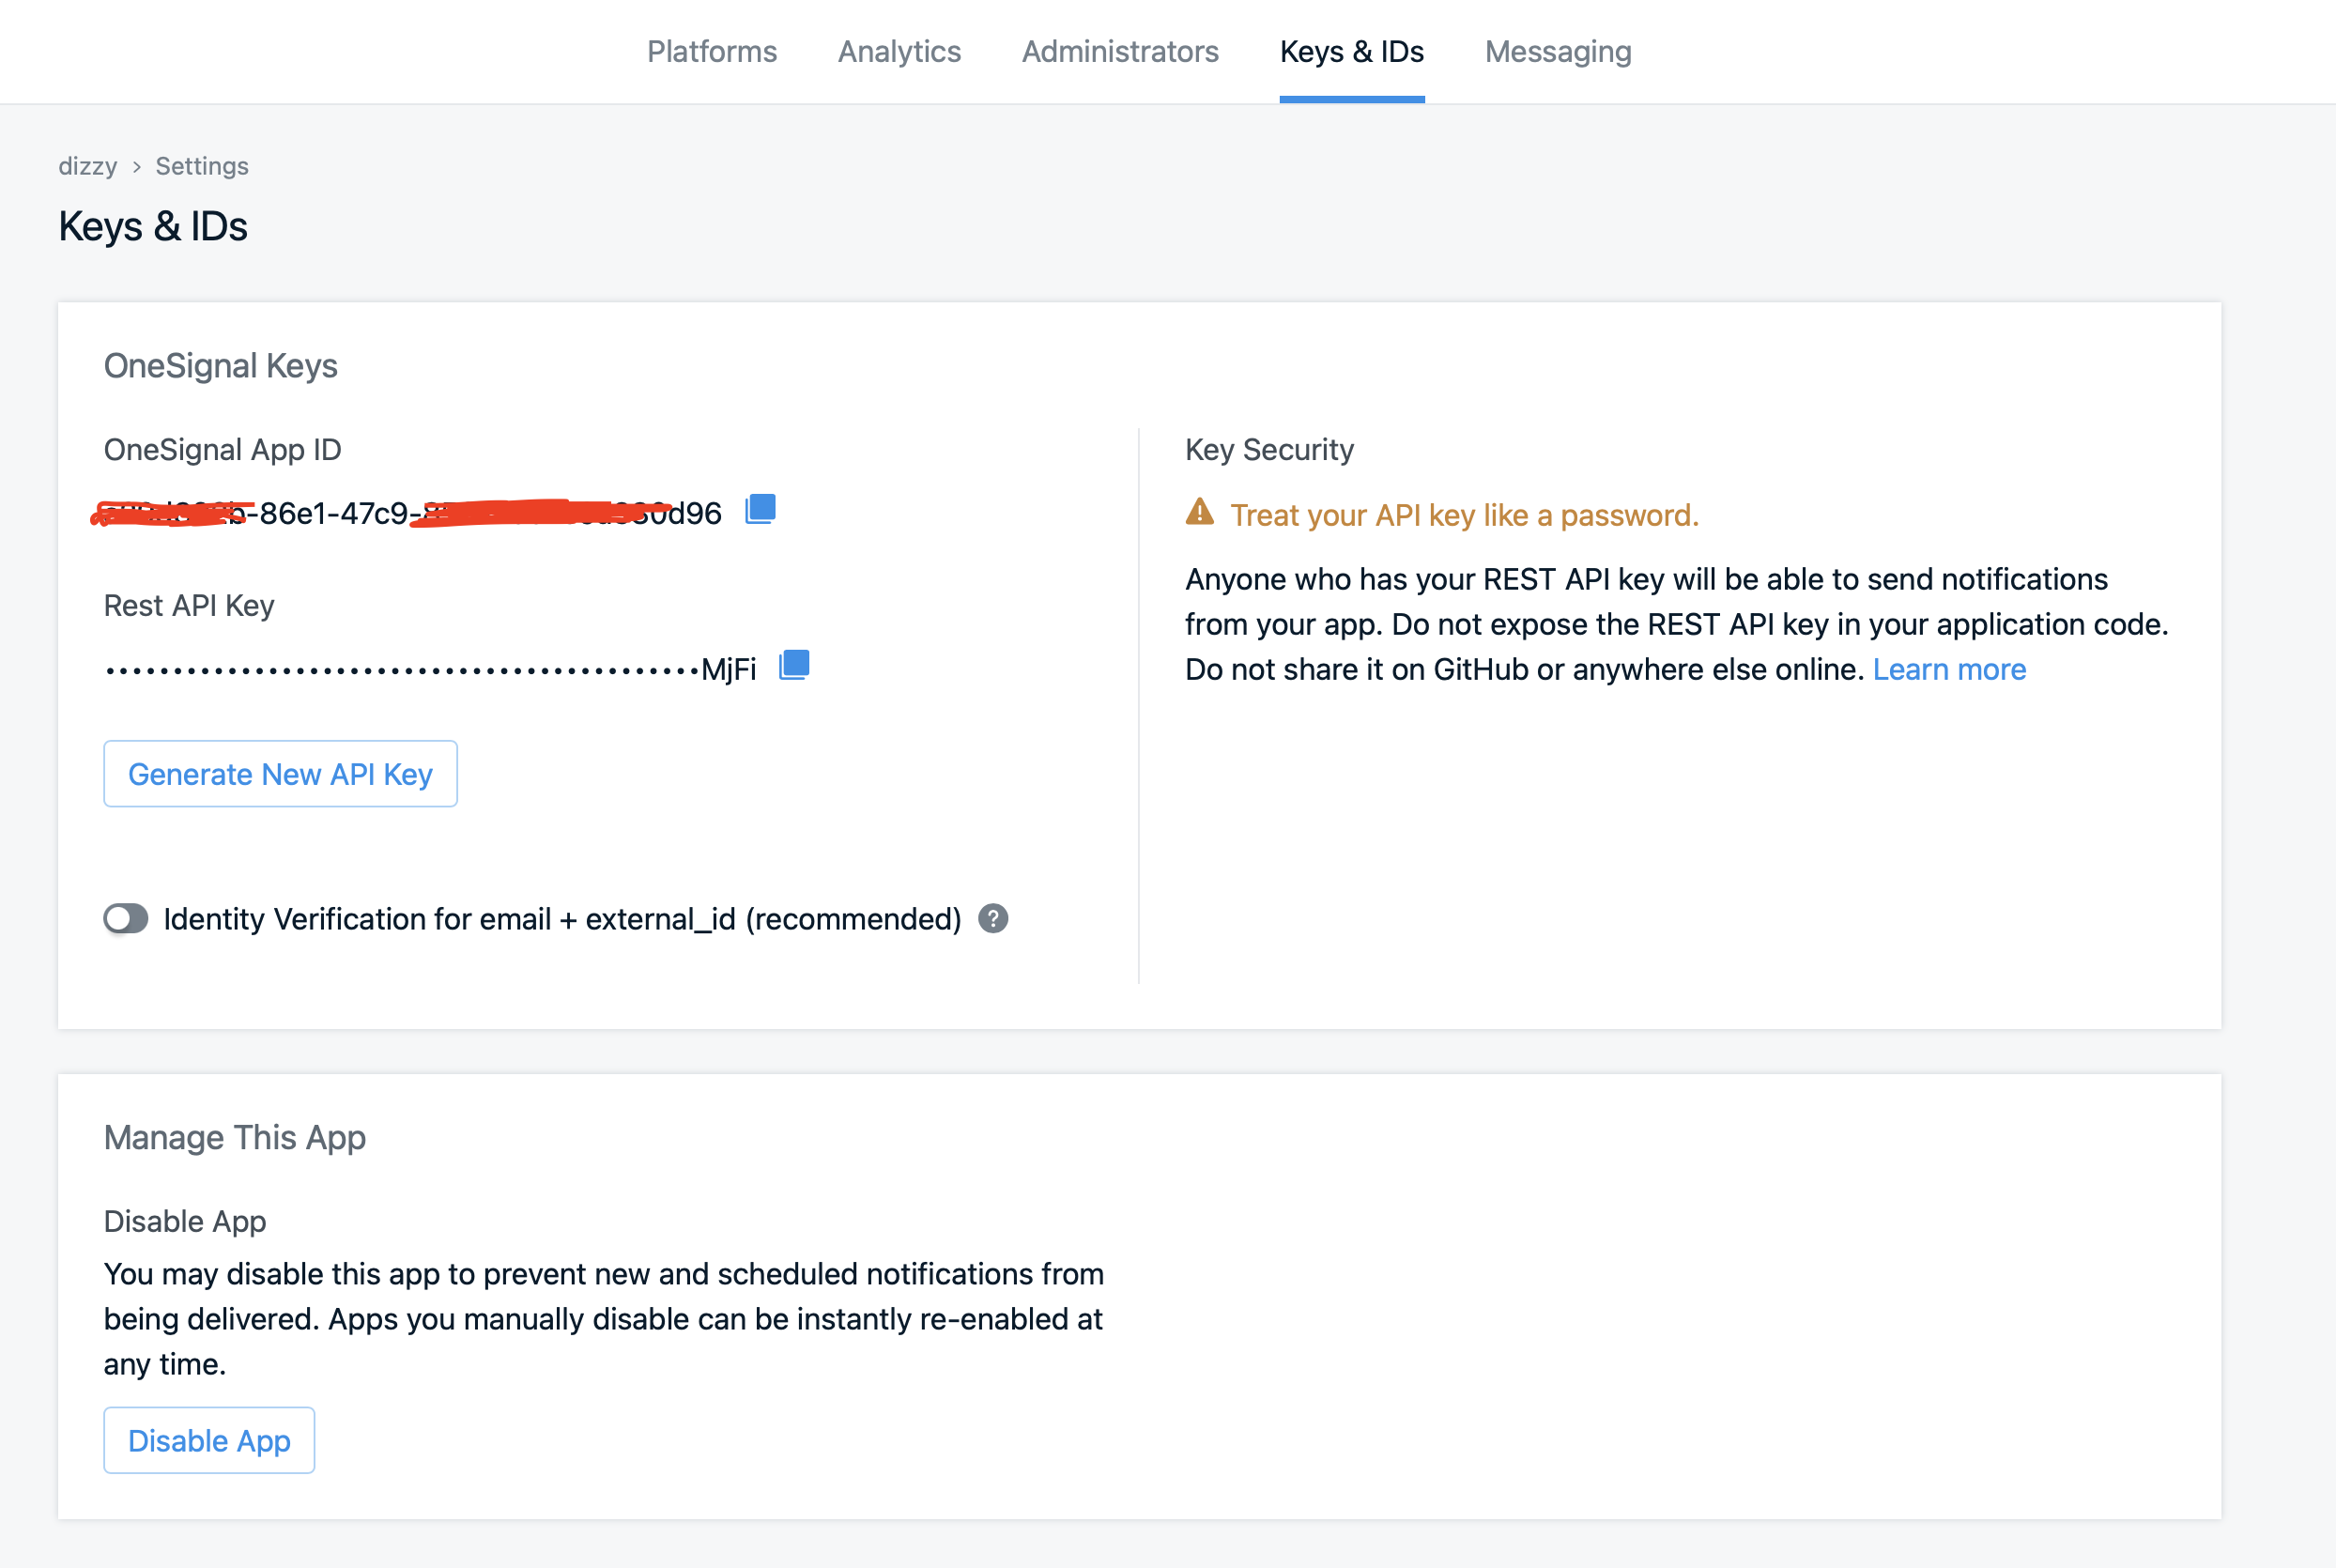
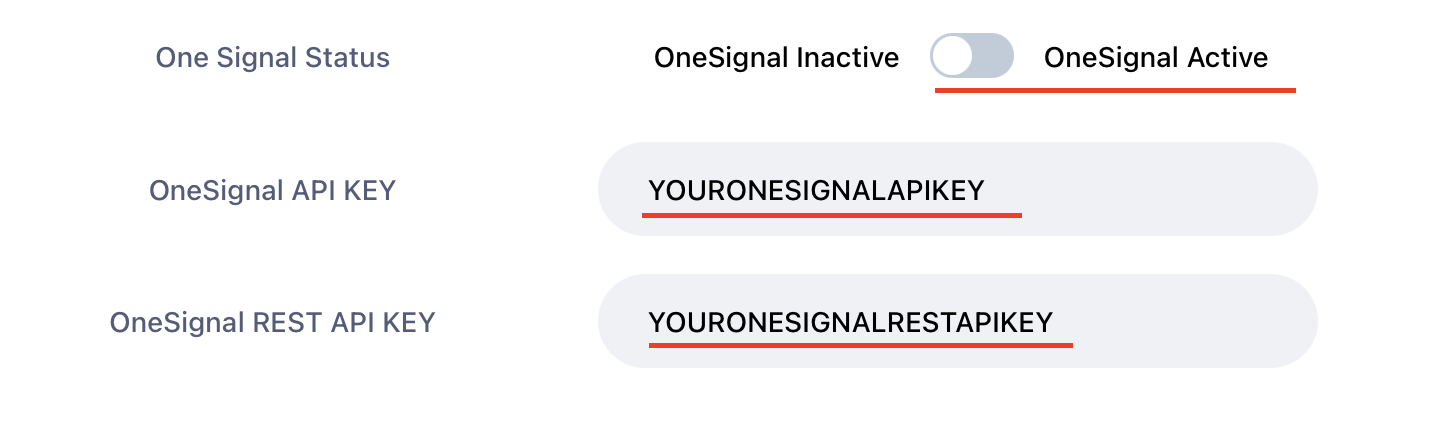
- After clicking the Web Push Platforms you can see your Keys Just copy and paste your own keys in admin panel
- https://www.YOURWEBSITEL.com/admin/limits
Please follow the steps below carefully. Clear your cache before testing.
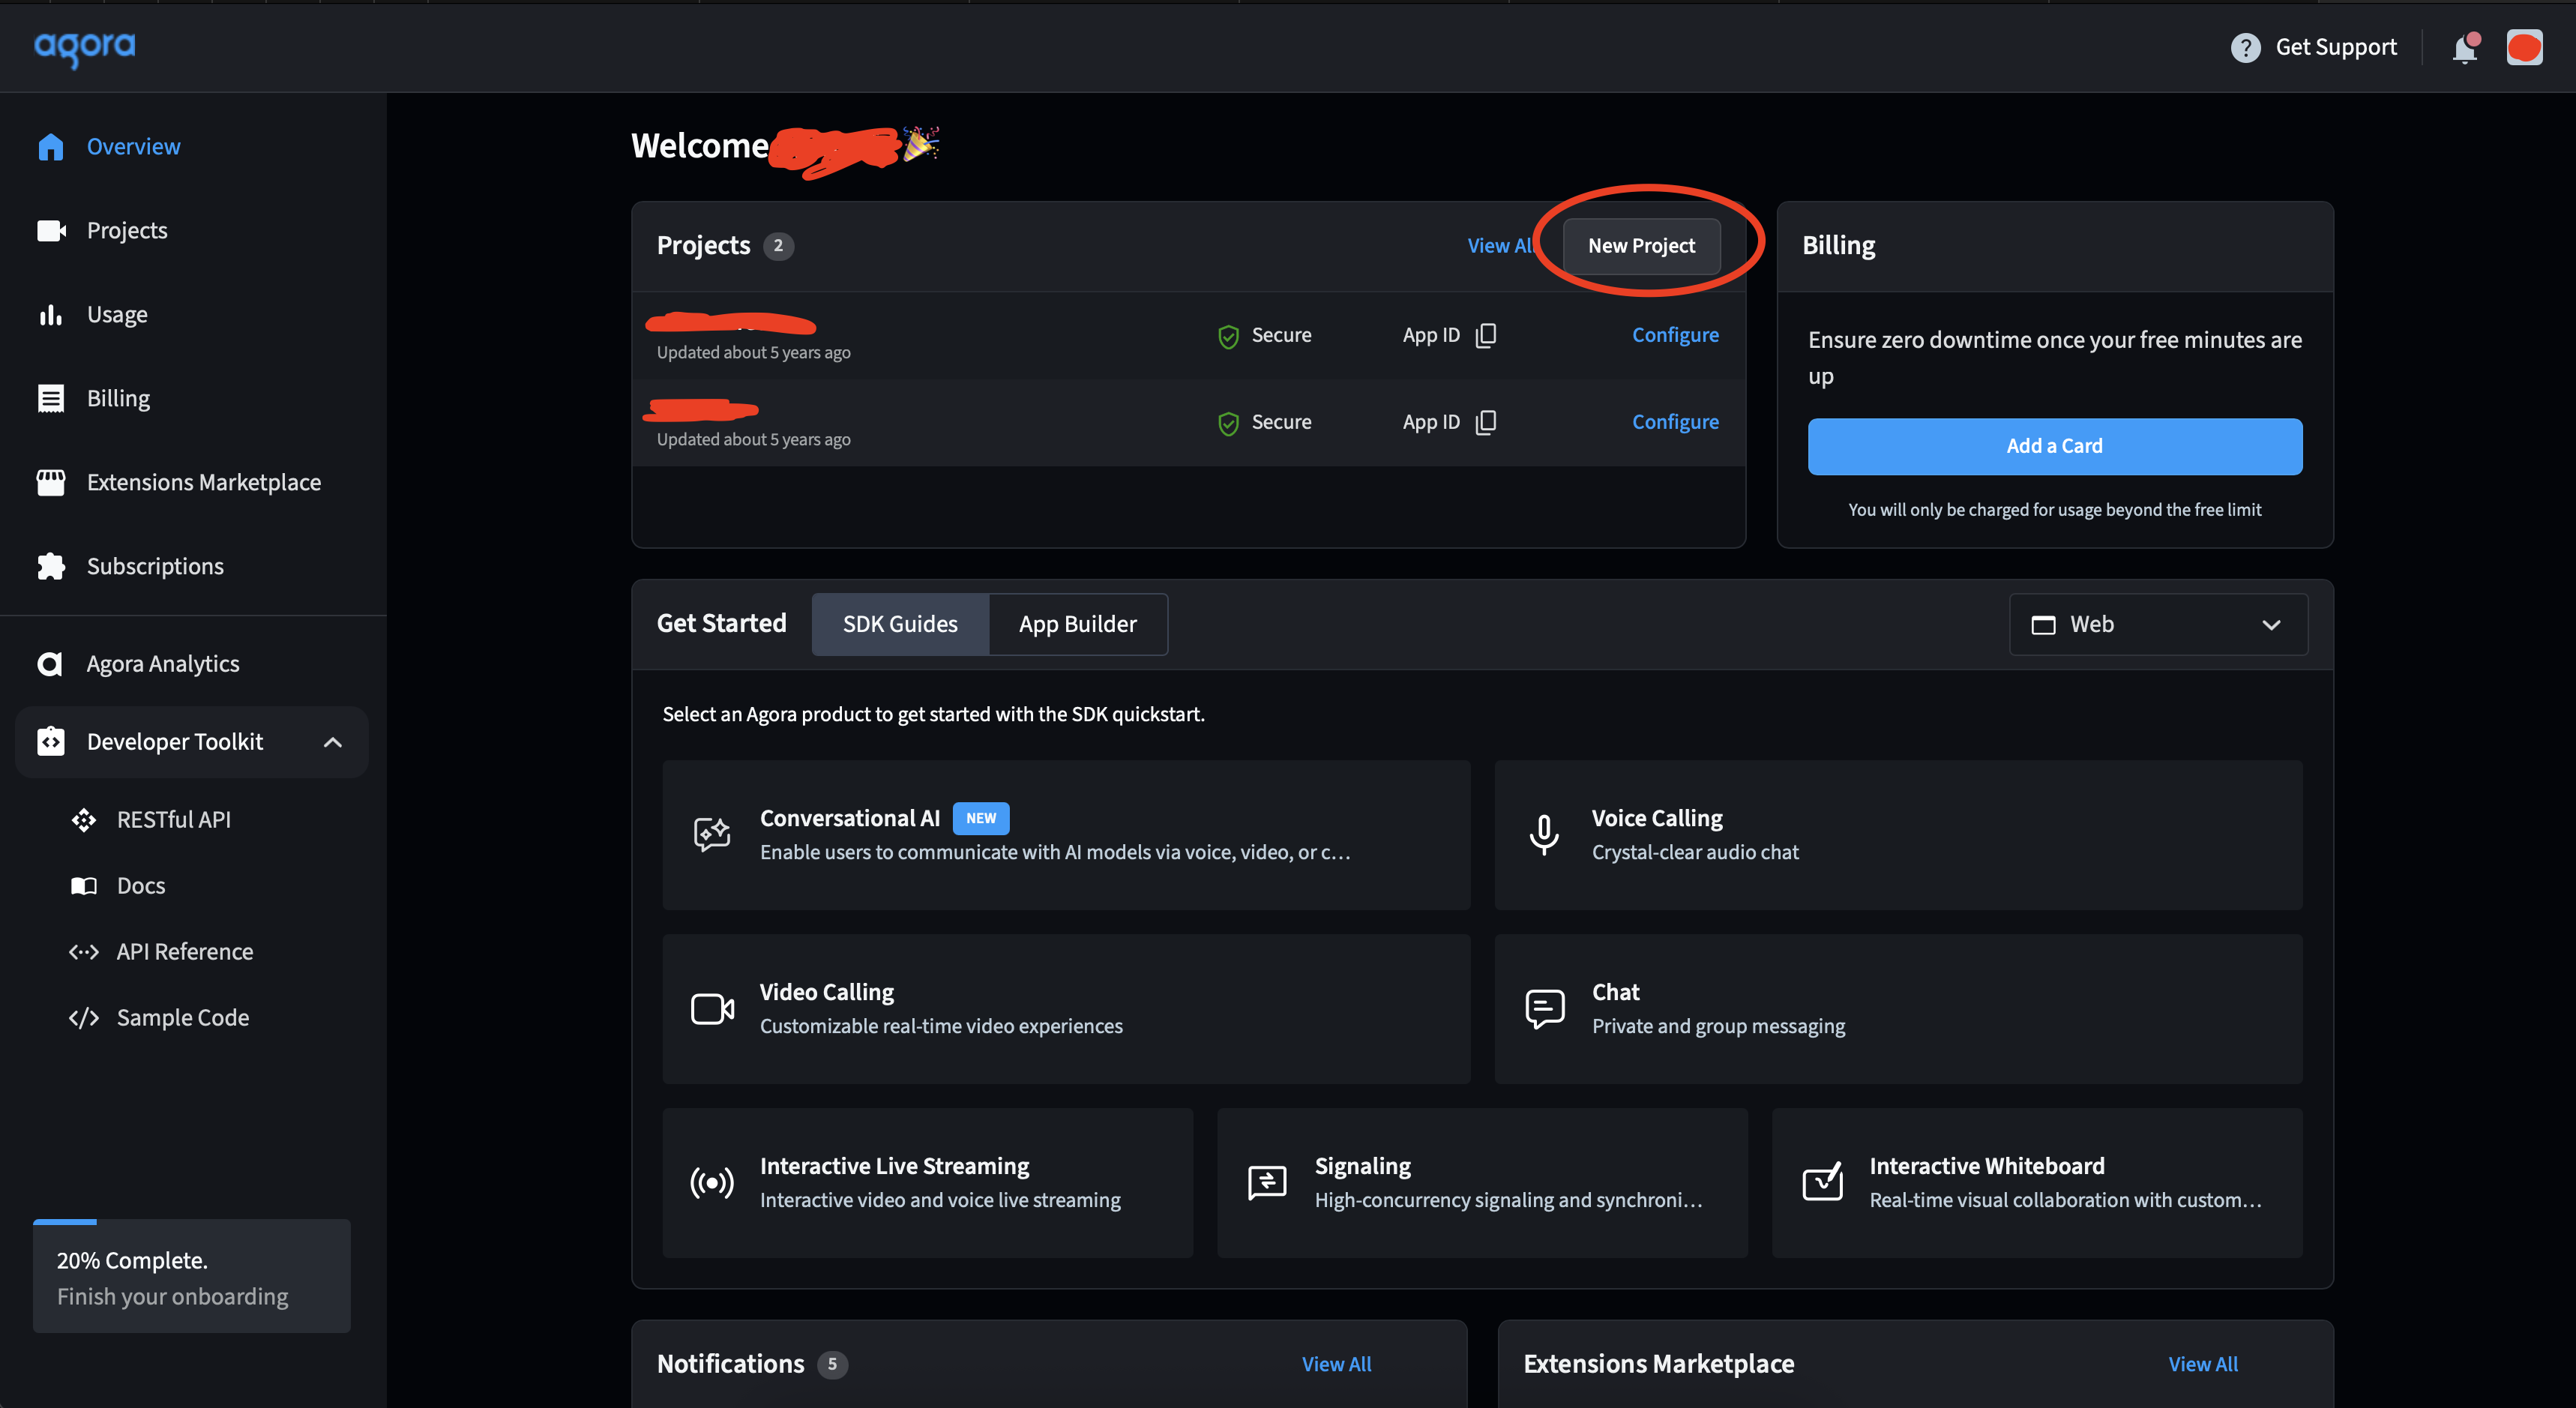
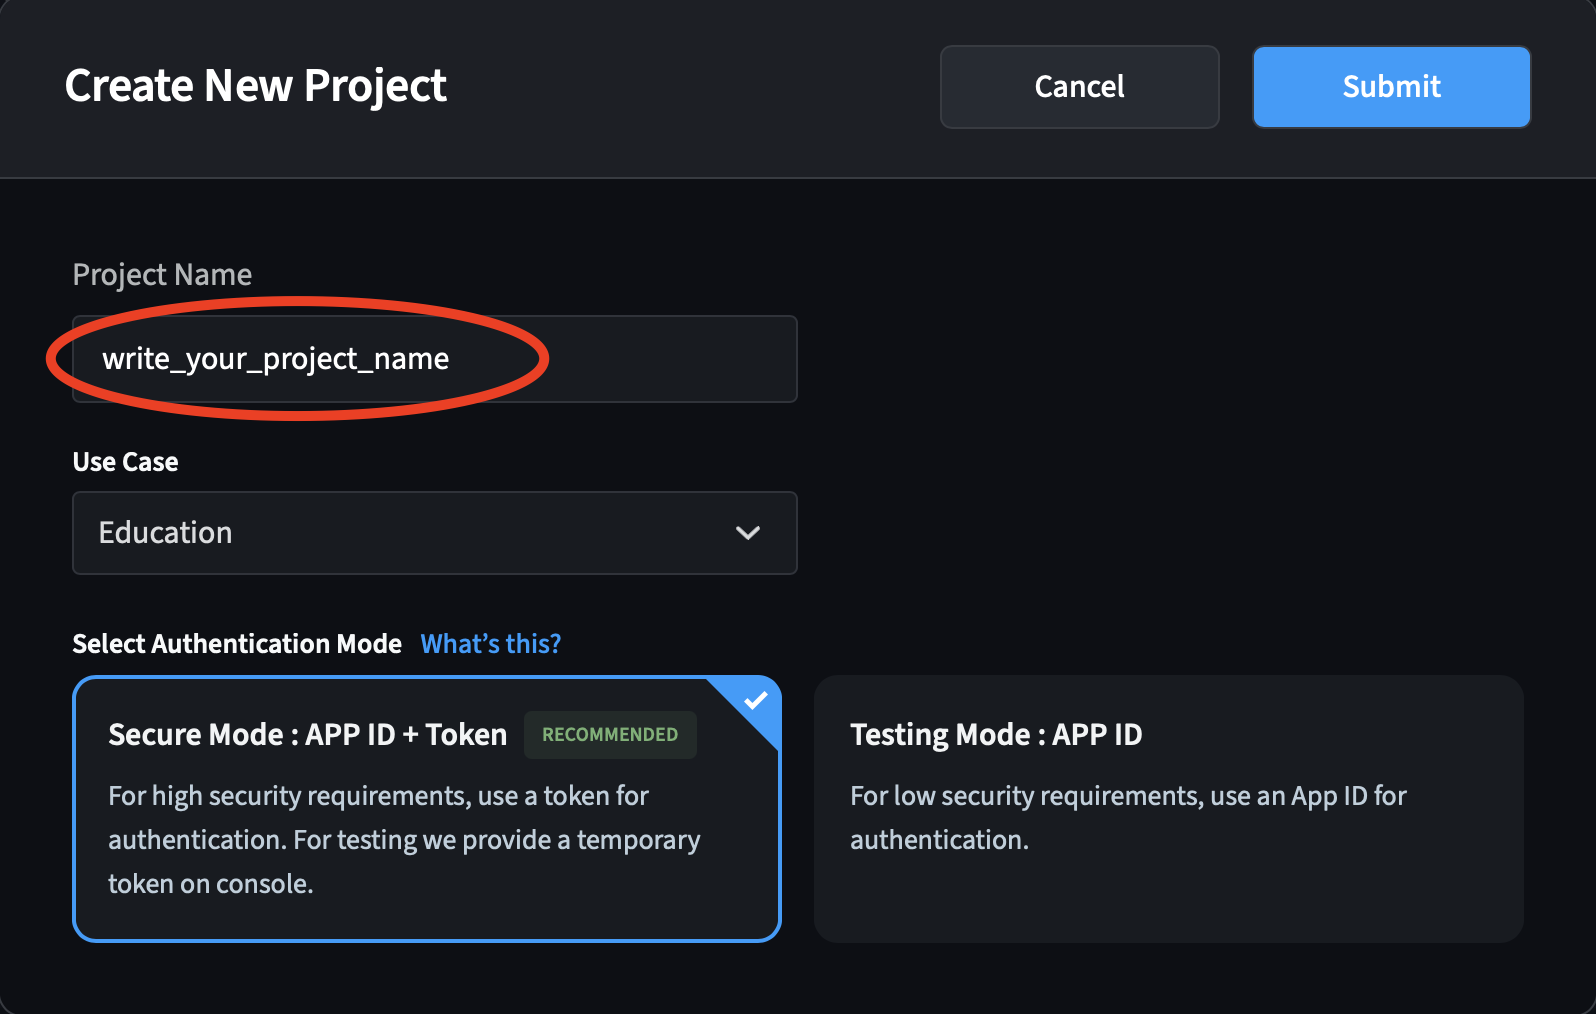
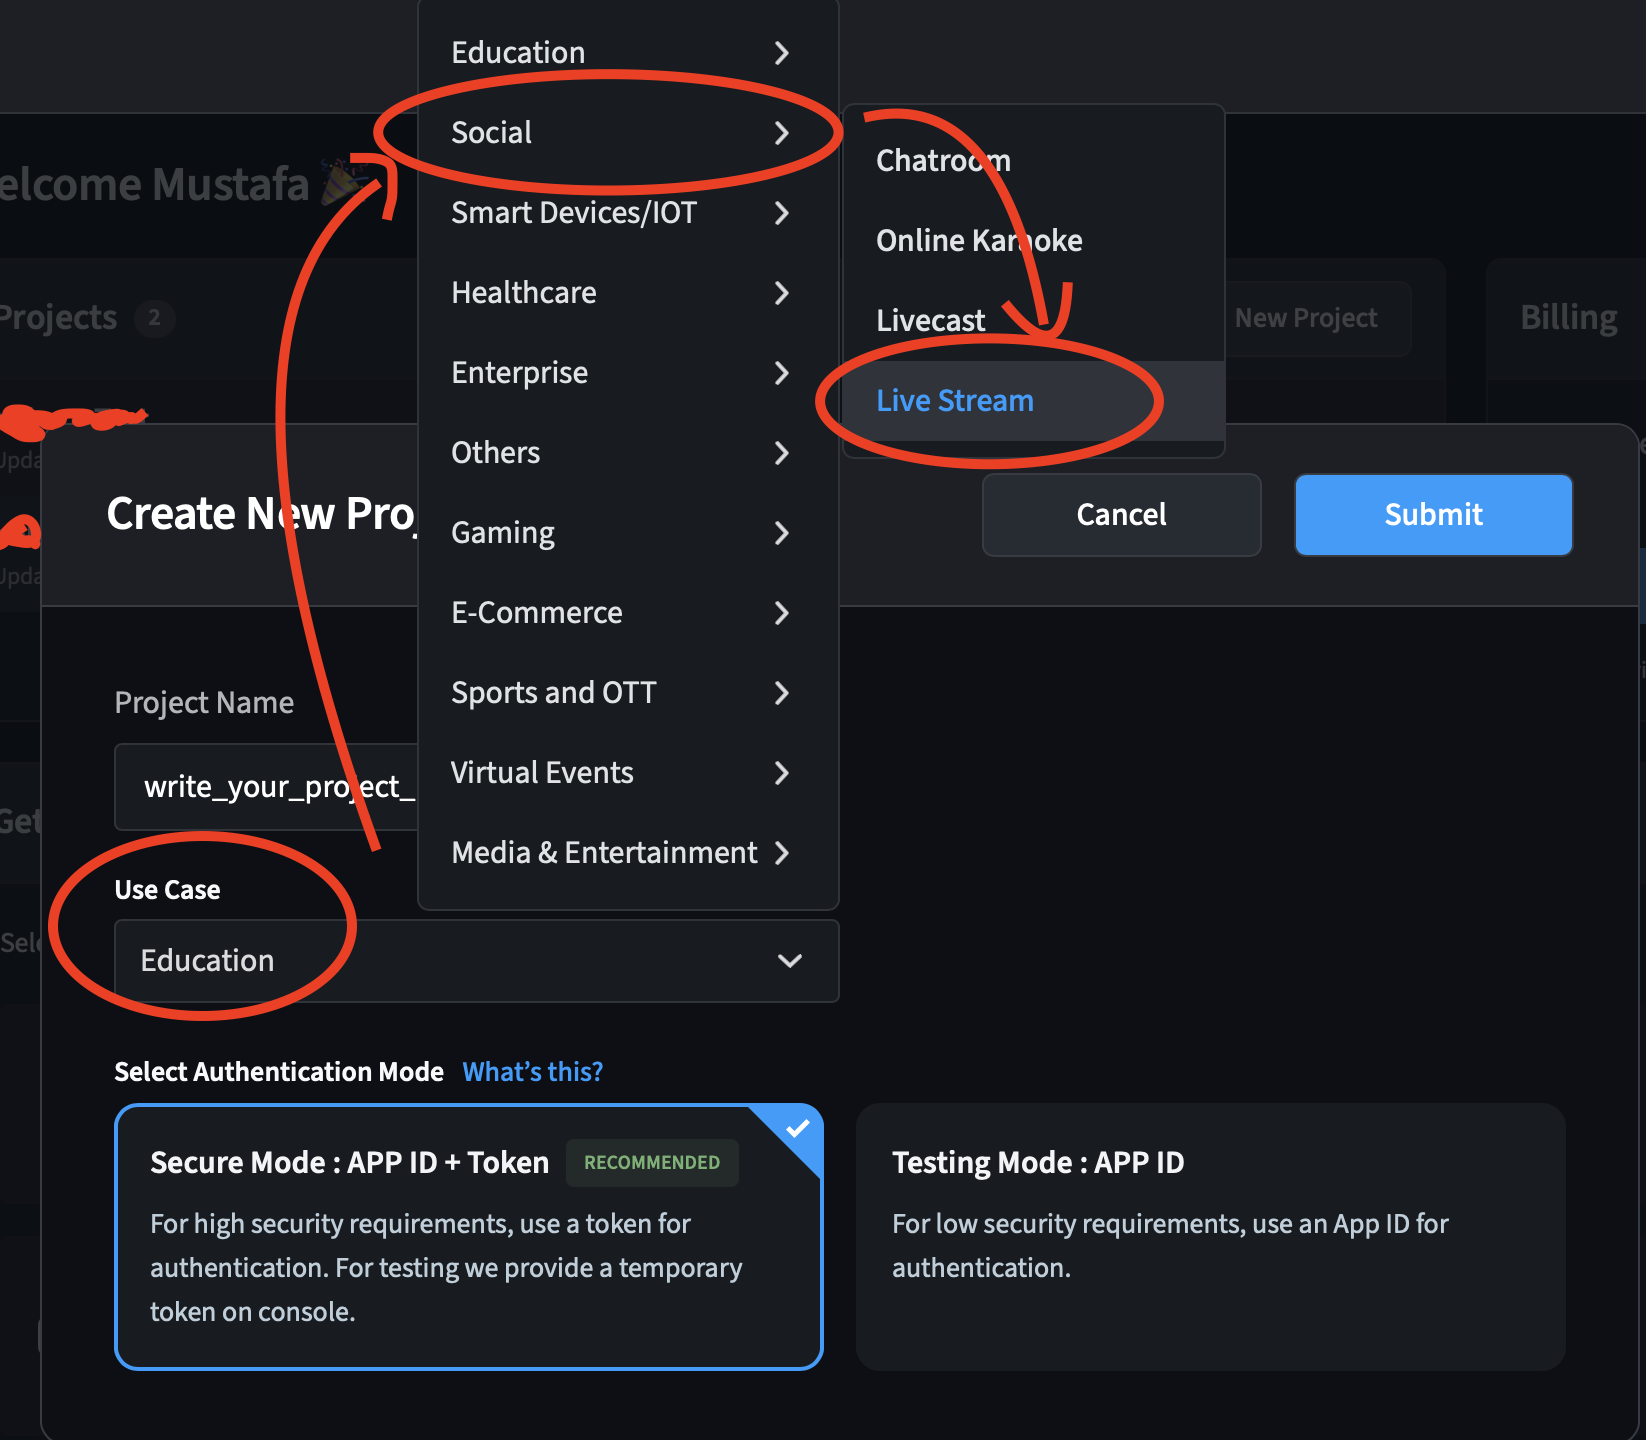
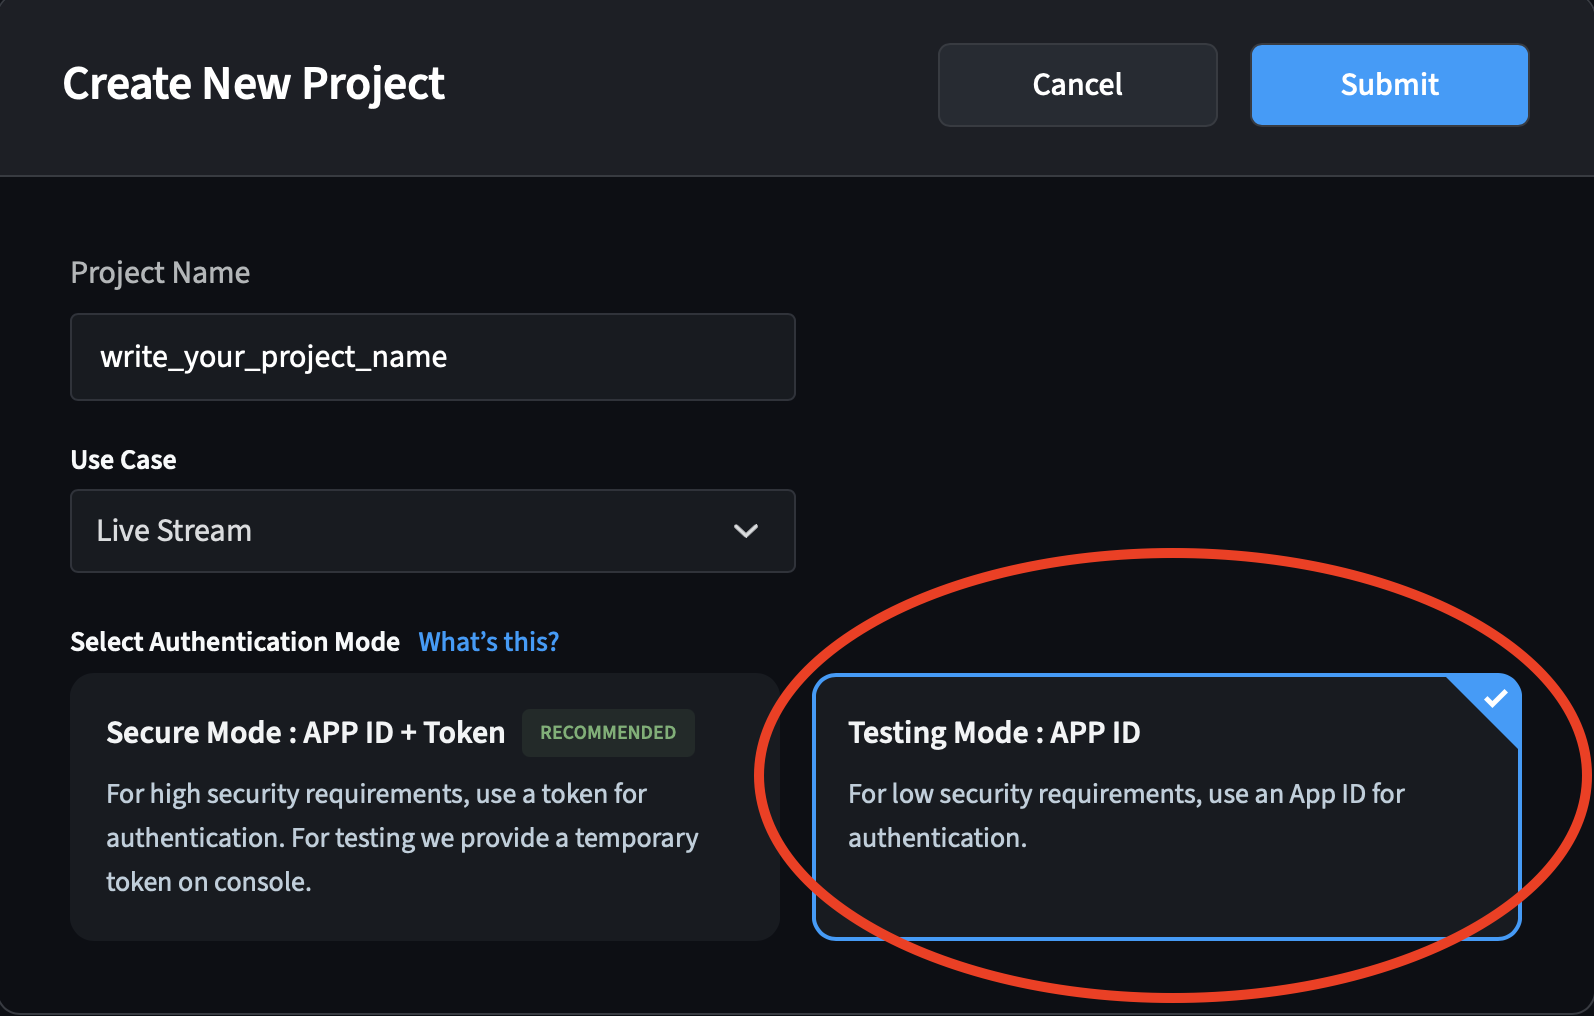
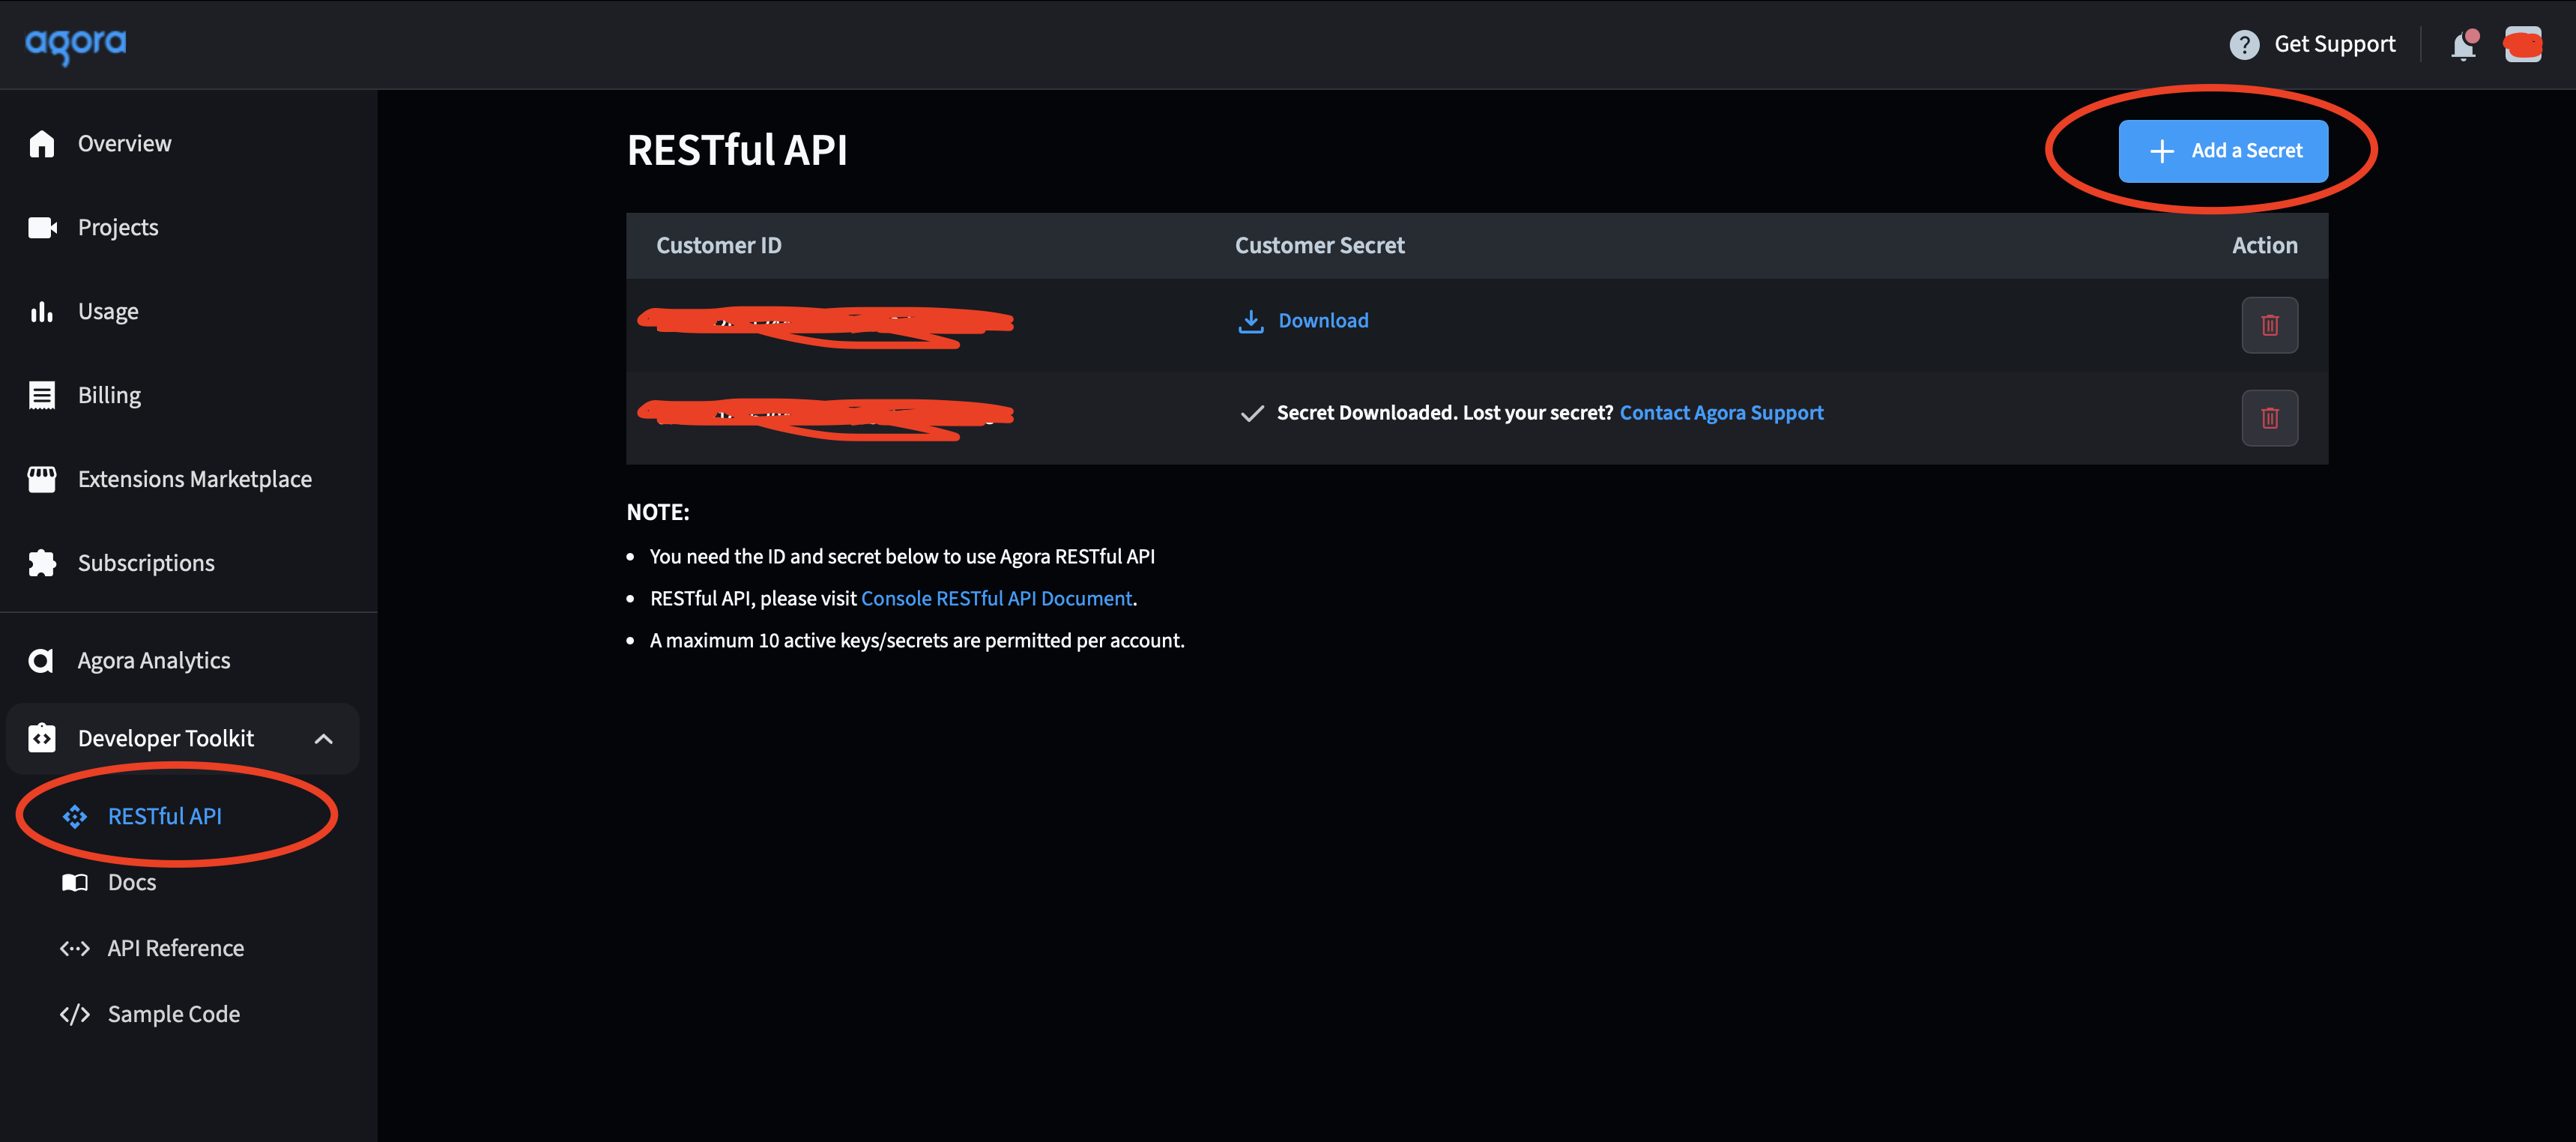
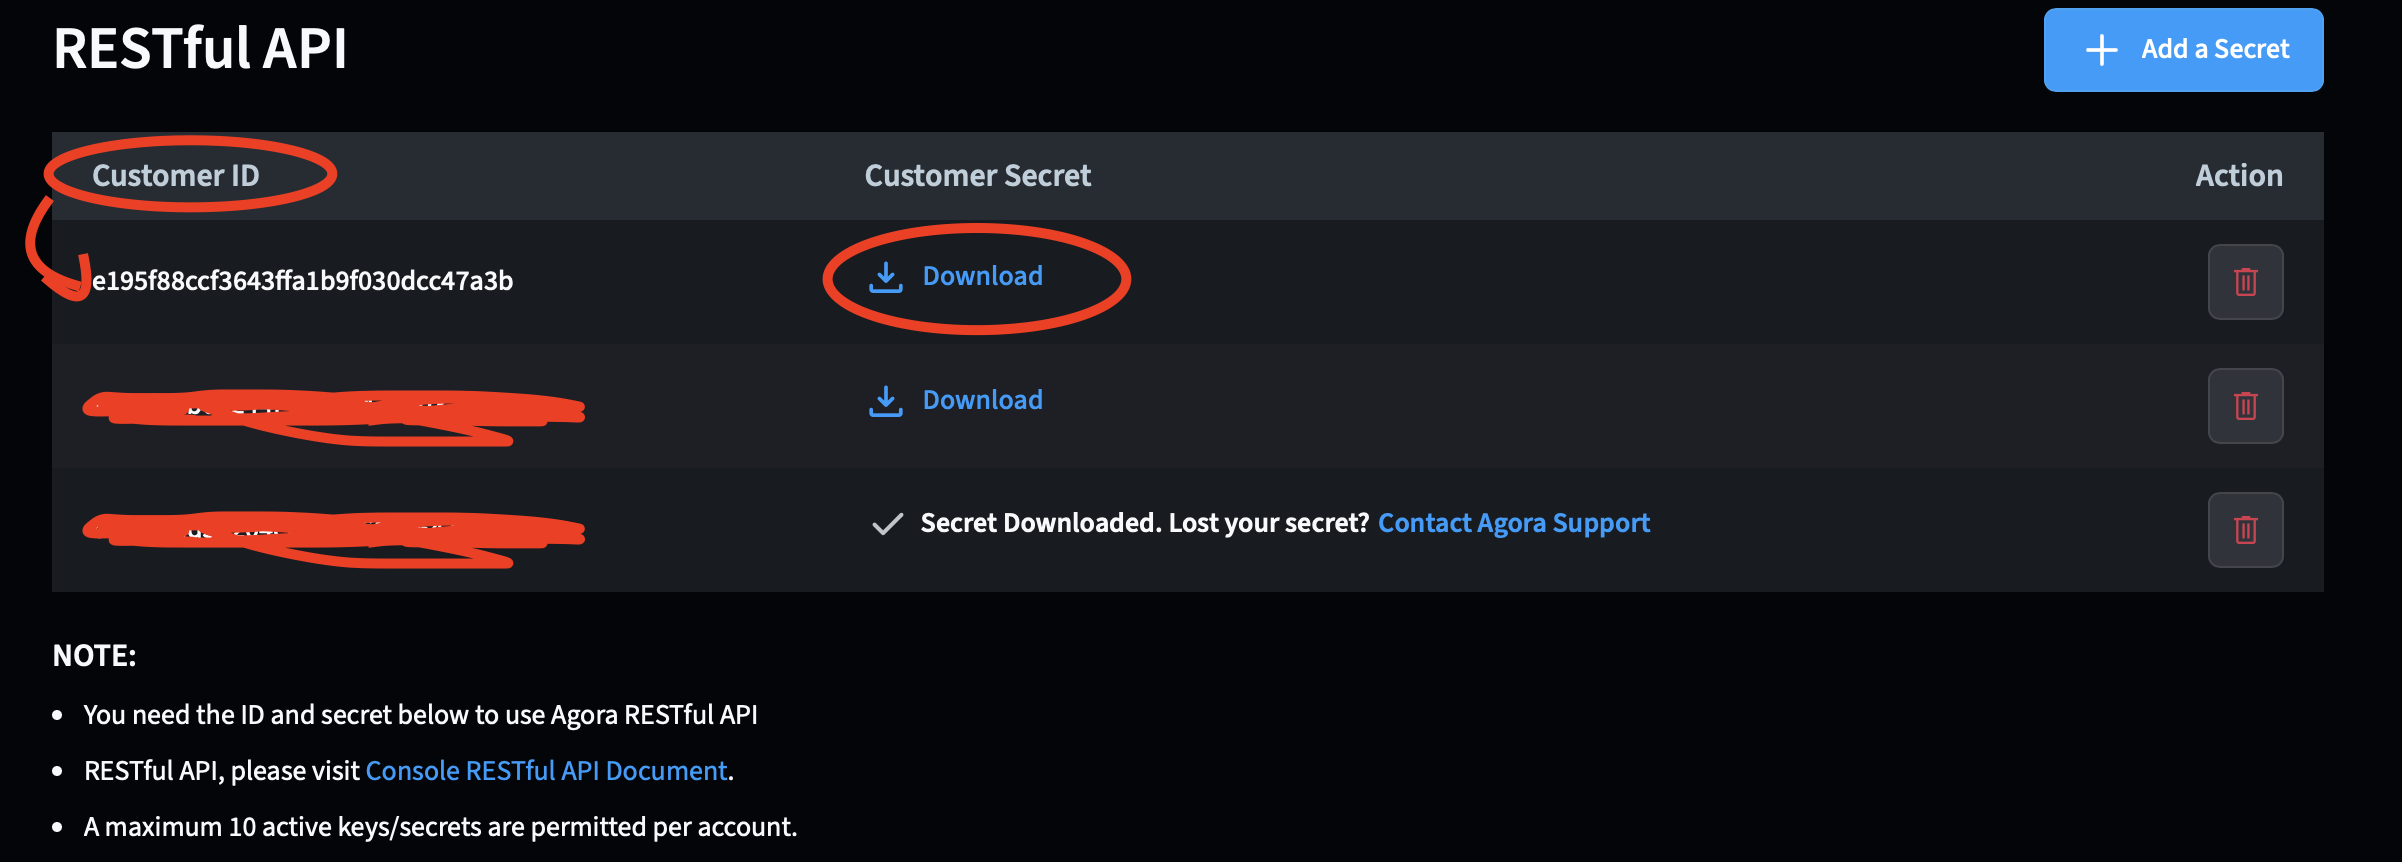
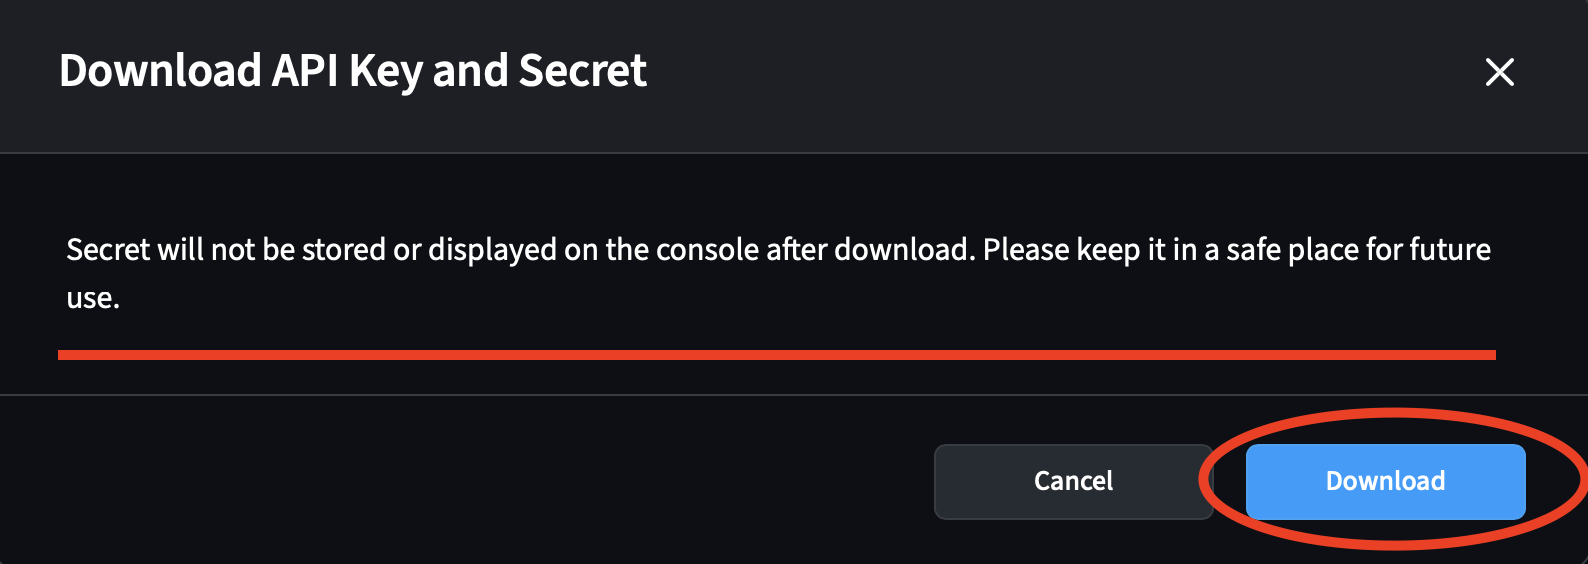

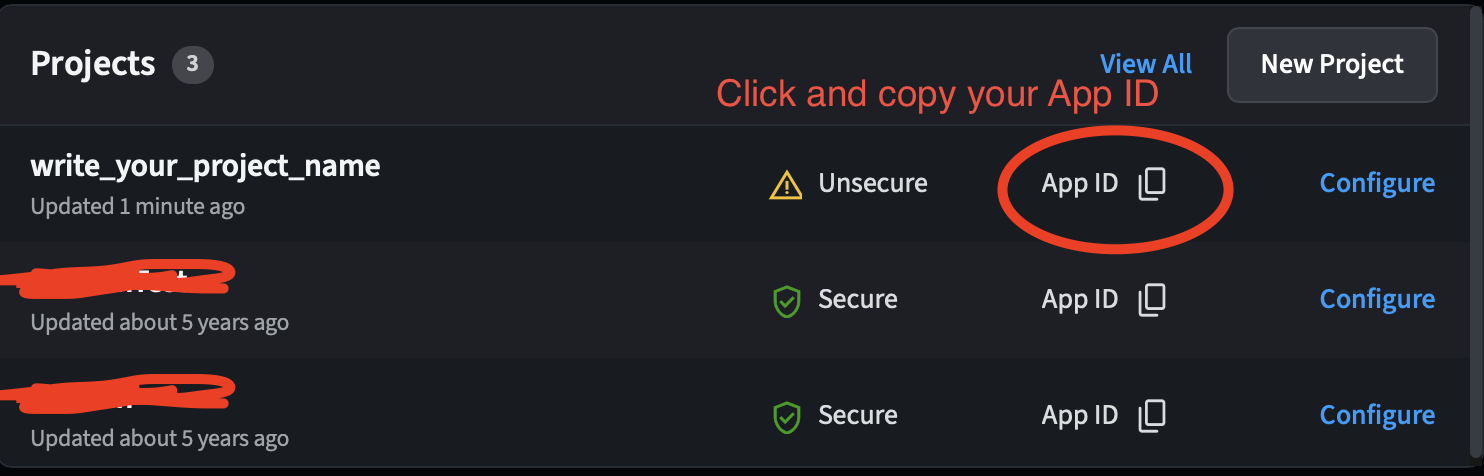
After completing your project setup in the Agora dashboard, copy and paste the following credentials into your admin panel under Live Streaming Settings:
- App ID
- Customer ID
- Customer Secret
If you want me to install Agora for you, please create a ticket on my support site.
AGORA INSTALLATION PROCESS IS PAID.
How To Install PWA
"name": "dizzy - Support Content Creator Script",
"short_name": "dizzy",
"scope": "/",
"start_url": "https://dizzy.dizzyscripts.com/",
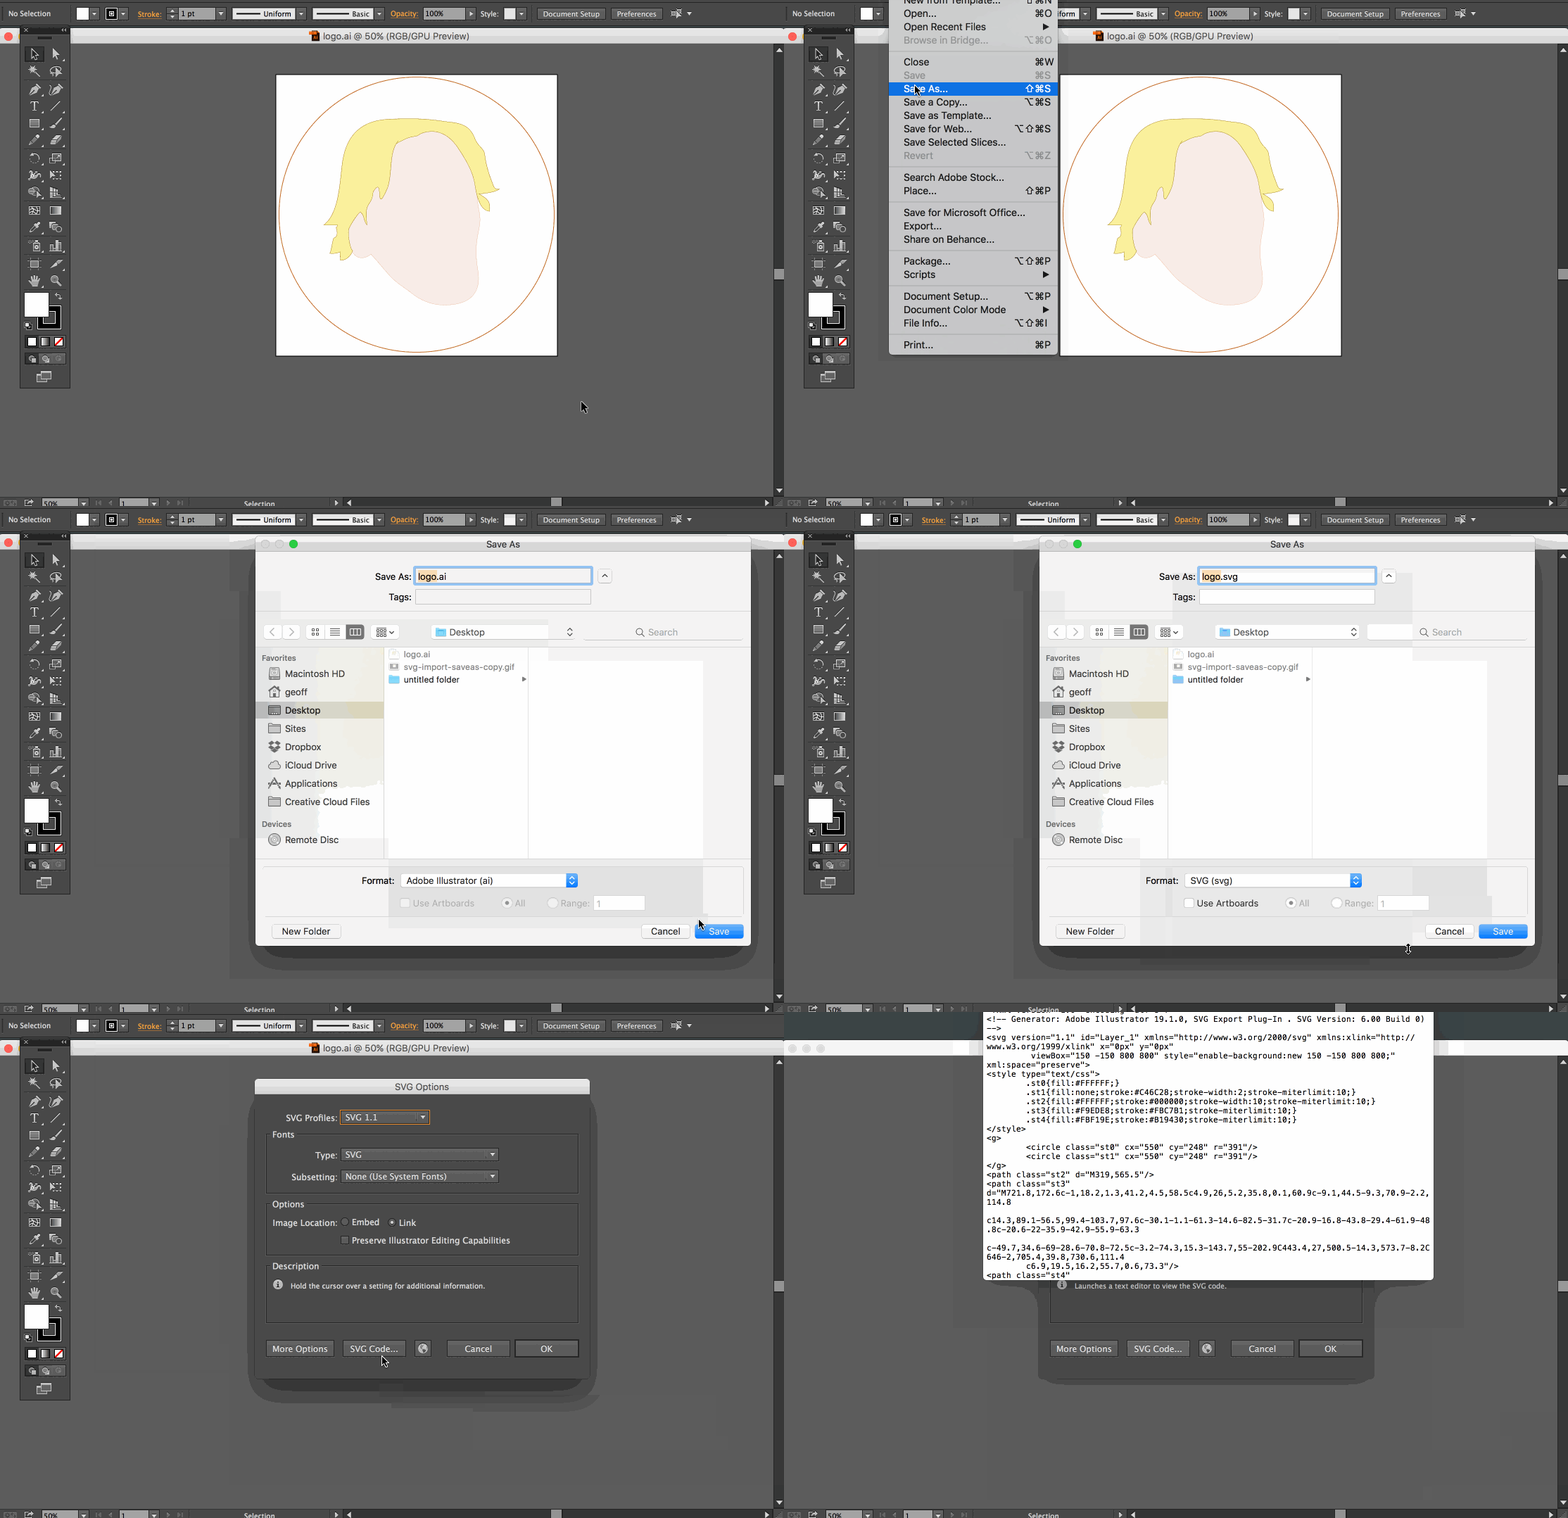
How to add SVG Code
How to Get SVG Code

Customization services are strictly paid. You can share the details of the customization service you want to receive with me by CREATING A TICKET on my support site.
Once again, thank you so much for purchased my dizzy - Support Creator Content Script . As I said at the beginning, I'd be glad to help you if you have any questions relating to dizzy - Support Creator Content Script. Please feel free
to CREATE TICKET